Raspberry Pi ideas

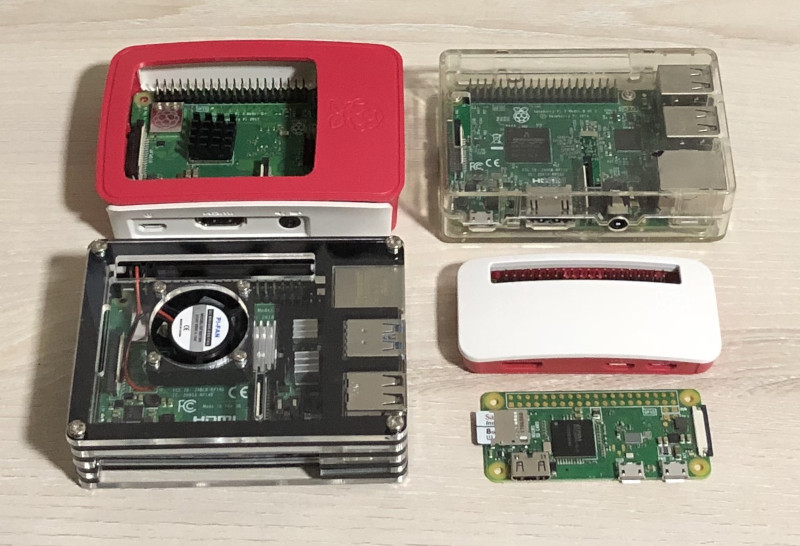
Pi4B Pi3B Pi3b+ and PiZeroWs on table

A Raspberry Pi is one of the things that you should consider getting if you are a computer programmer.

Just bought a Raspberry Pi but not sure what to do with it? If that is the case, you had come to the right place. On this page, you will find plenty of ideas on how to use your Raspberry Pi.

By following the ideas here, you will understand your Raspberry Pi and the Linux operating system better. In addition, you will be able to setup your Raspberry Pi to serve some interesting use cases at home.

For example, you will find instructions on how to setup a CCTV for surveillance, Web IDE to help you code everywhere you go, project management platform for tracking your project statuses and etc.

How to enable secured remote management of D-Link DIR series router with Certbot, nginx, Raspbian Jessie Lite and Raspberry Pi 3

If you have a Internet subscription at home, chances are you will have a router that helps to enable computers, big and small, to access the Internet concurrently. To enable my computers to access the Internet concurrently, my Internet service provider gave me a D-Link DIR-868L router which had been serving me well over 2 years.

One way for me to access the router when I was not at home is to enable remote management by checking the Enable Remote Management in the ADMINISTRATION section of the TOOLS tab.

However, this feature activate remote management through HTTP through a designated port. Since HTTP communication is not encrypted, it is not safe for me to use this remote management feature from an unfamiliar network.

Since I had created a reverse proxy server with nginx, Raspbian Jessie Lite and Raspberry Pi 3 and installed Certbot on it, I reckoned that I can enable remote management of my D-Link DIR series router to be performed in a secured manner.

This post documents how to enable secured remote management of D-Link DIR series router with Certbot, nginx, Raspbian Jessie Lite and Raspberry Pi 3.
Installing Certbot on Raspbian Jessie Lite for deploying Let’s Encrypt certificates

Let’s Encrypt is an awesome open certificate authority that give digital certificates for free. The introduction of Let’s Encrypt had given ordinary folks like me the ability to host their own website that browsers will mark as secured – without paying hefty fees. Matching Let’s Encrypt with Raspberry Pi, we can easily deploy secure applications at home to serve clients anytime, anywhere.

The issuance of digital certificates is automated by software using the ACME protocol. We will need to run such a software on the devices which are going to serve as web hosts which speak HTTPS. Let’s Encrypt recommends that people with shell access use the Certbot ACME client to request for Let’s Encrypt certificates.

Since I had recently setup a reverse proxy server with nginx, Raspbian Jessie Lite and Raspberry Pi 3 with the shell terminal, I continue on to install Certbot on the Raspbian Jessie Lite operating system for deploying Let’s Encrypt certificates for my reverse proxy server to serve HTTPS traffic on behalf of future upstream servers.

How to setup a reverse proxy server with nginx, Raspian Jessie Lite and Raspberry Pi 3

If you plan to deploy multiple devices at home and made them publicly accessible from outside your home network, you may want to consider setting up a reverse proxy server that will route HTTP traffic from the internet to the respective devices residing in your home network.

Tagged with an affordable price tag with good specifications, the Raspberry Pi 3 is an ideal candidate for the hardware of a reverse proxy server at home. And since the nginx server is a powerful reverse proxy server that can run efficiently on commodity hardware, it is an ideal candidate for the software aspect of a reverse proxy server.

This post documents how to setup a reverse proxy server with nginx, Raspian Jessie Lite and Raspberry Pi 3.

How to setup Raspbian Jessie Lite on Raspberry Pi 3 to run Python 3 applications

The Raspbian operating system is the Raspberry Pi Foundation’s official supported operating system. As of this writing, Raspbian comes in two flavours – one with a graphical user interface for us to build a low cost desktop computer and the other without the graphical user interface.

If you intend to use your Raspberry Pi 3 with sensors and build a web interface for you to manage those sensors, Raspbian Jessie Lite is one operating system which you may want to install on your Raspberry Pi 3.

And with the versatility of Python 3, setting up Raspbian Jessie Lite on Raspberry Pi 3 to run Python 3 applications will be one of the first task that you will perform before you embark on your next sensor based project with the Raspberry Pi 3.

This post documents the steps that I took to setup Raspbian Jessie Lite on Raspberry Pi 3 to run Python 3 applications.

How to setup Ubuntu Classic Server 16.04 on Raspberry Pi 3 for running Python 3 applications

Most of the customers who wanted to try out my minimal viable products (MVP) would provide me with an instance of Ubuntu Classic Server 16.0x these days. As such, it makes sense for me to trial my MVPs on the Ubuntu Classic Server 16.0x to ensure that I spend minimal time in deploying my MVPs to validate my customers’ needs. Since I have a few Raspberry Pi 3s lying around in the house, I can install a version of Ubuntu Classic Server 16.0x to serve as the development server for me to trial my MVPs.

Fortunately, the good folks at ubuntu-pi-flavour-maker.org had put up an optimised Ubuntu Classic Server 16.04 image for Raspberry Pi 3.

This post documents the steps that I took to run Ubuntu Classic Server 16.04 on my Raspberry Pi 3 for running Python 3 applications.

How to connect the Raspberry Pi Camera Module to Raspberry Pi 2 or Raspberry Pi 3

Since the Raspberry Pi camera module connects to most of the recent Raspberry Pi boards via the camera serial interface (CSI), the Raspberry Pi camera module is an ideal peripheral for implementing Raspberry Pi based projects that require image capturing.

This post documents how to connect a Raspberry Pi camera module to a Raspberry Pi 3.

Setting up a low cost desktop computer with Raspberry Pi 3

With the advent of single-board computers like Raspberry Pi, we do not have to spend too much money on a computer that can fulfil our basic computing needs. The launch of Raspberry Pi 3 was like icing on the cake; it came with WiFi connectivity. Since WiFi is ubiquitous, the WiFi connectivity of the Raspberry Pi 3 made it a suitable candidate to be used as a low cost desktop computer in the house, office or school.

This post documents how you can setup a low cost desktop computer with Raspberry Pi 3.

How I setup a CCTV camera with Raspberry Pi Zero W and motionEyeOS image for home surveillance

When the Raspberry Pi Zero W was launched, I didn’t think twice before ordering one. Compared to the Raspberry Pi Zero, the Raspberry Pi Zero W comes with WiFi. This meant that I can use my new Raspberry Pi Zero W to replace my Raspberry Pi 3 CCTV camera for home surveillance and use the more powerful Raspberry Pi 3 for other projects.

This post documents how I setup my Raspberry Pi Zero W as a CCTV camera using the MotionEyeOS image.