Raspberry Pi ideas

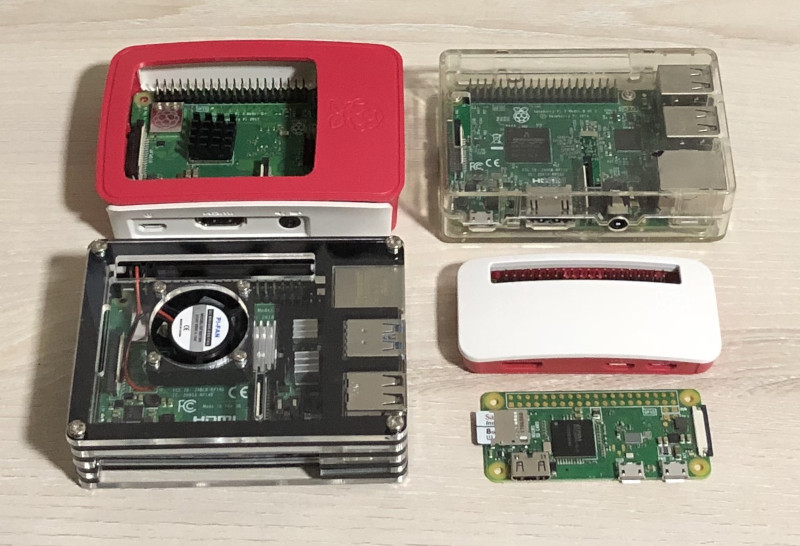
Pi4B Pi3B Pi3b+ and PiZeroWs on table

A Raspberry Pi is one of the things that you should consider getting if you are a computer programmer.

Just bought a Raspberry Pi but not sure what to do with it? If that is the case, you had come to the right place. On this page, you will find plenty of ideas on how to use your Raspberry Pi.

By following the ideas here, you will understand your Raspberry Pi and the Linux operating system better. In addition, you will be able to setup your Raspberry Pi to serve some interesting use cases at home.

For example, you will find instructions on how to setup a CCTV for surveillance, Web IDE to help you code everywhere you go, project management platform for tracking your project statuses and etc.

How to connect Raspberry Pi camera module to Raspberry Pi Zero W and the official case

Equipped with a wireless LAN and priced at only $10, I see the Raspberry Pi Zero W as a good candidate for a low cost CCTV that I can deploy at my house for surveillance purposes. With the arrival of my Raspberry Pi Zero W and the official case, I could free up the Raspberry Pi 3 that I had been using for home surveillance for other projects.

This post documents how I connect my Raspberry Pi camera module to my Raspberry Pi Zero W and the official case.

How I setup Codiad web IDE on my Raspberry Pi 3 with Ubuntu Server 15.10.3, Nginx and PHP

There are times when I get the urge to work on project source codes that reside on my Raspberry Pi 3 LEMP server while I am on the move. Setting up a web based IDE on my Raspberry Pi 3 is one way to enable me to code while I am on the move, so long as I have a device with a web browser that is connected to the internet. Since I had already setup a LEMP server to run WordPress on my Raspberry Pi 3 and that Codiad is written in PHP, Codiad is an ideal web based IDE that I can set up on my Raspberry Pi 3.

This post documents how I setup Codiad web IDE on my Raspberry Pi 3. To make this post complete, I had taken some of the steps mentioned in my other posts on Raspberry Pi and replicated it in this post.

How to prepare the operating system to run your Raspberry Pi, with your Windows machine

Recently, I had been deploying several pieces of Raspberry Pi around my house for different purposes. In order to use Raspberry Pi as a TV Box, a CCTV, a LEMP server or any other appliances, we will need to prepare an operating system in a microSD card to run our Raspberry Pi.

I always use my Windows machine to prepare the operating system for all my Raspberry Pis, since I find that it is easiest to write an operating system for Raspberry Pi on a Windows machine. This post documents how I would prepare the operating system to run my Raspberry Pi with my Windows machine.

How I make my Java programs run faster on my Raspberry Pi 3

When my first attempt to install GitBucket on my Raspberry Pi 3 highlighted to me that it was the JVM that caused GitBucket to have sluggish performance, I did not invest more time to improve the performance of the JVM that I had installed on my Raspberry Pi 3. Instead, I went on to install Go Git Service on my Raspberry Pi 3 to act as the Git server to manage the source codes of my hobby projects.

However, I just couldn’t get over my belief that Java programs would perform badly on my Raspberry Pi 3; after all Java was the first programming language that I learnt and I often use it to build software at work. Furthermore, with an Ubuntu Server 15.10.3 setup on my Raspberry Pi 3, I could use my Raspberry Pi 3 as an integration server for my Java hobby projects and be pretty sure that if my Java hobby projects run on my Raspberry Pi 3, they will most probably run on a Ubuntu Server 15.10.3 DigitalOcean droplet as well.

After spending some time researching the topic, I did manage to make my Java programs run around 10 times faster on my Raspberry Pi 3. This post documents the steps that I went through to speed up my Java programs on my Raspberry Pi 3.
Setting up Go Git Service on a Ubuntu Server 15.10.3 image on my Raspberry Pi 3

My quest in searching for a suitable self hosted Git Service didn’t stop at GitBucket. While GitBucket is easy to setup, running it on a Raspberry Pi 3 had not been ideal for me. If I had set it up on a more powerful computer / VM, I would have stuck with it.

To get a second opinion, I decided to give Go Git Service a try. This post documents my attempt in setting up Go Git Service on a Ubuntu 15.10.3 image on my Raspberry Pi 3. To make this post complete, the first eight steps are taken from previous posts.

Setting up GitBucket on Raspberry Pi 3 with an Ubuntu Server 15.10.3 image

With multiple Raspberry Pis around the house, it was time for me to setup a Git server to synchronise the source codes residing on my development laptop with those that are deployed on my Raspberry Pi servers.

As I am using GitHub at my workplace, I seek to emulate similar development operations at home. GitBucket seems to be an ideal candidate for my home Git server since it comes as a war file having API compatibility with GitHub.

Since I had created a LEMP server on my Raspberry Pi 3 with on Ubuntu Server 15.10.3, it makes sense for me to setup my GitBucket server on it.

This post describes how I setup GitBucket on my Raspberry Pi 3 with an Ubuntu Server 15.10.3 image. To make this post complete, the first seven steps are taken from previous posts.

How I built my Raspberry Pi 3 CCTV using a motionEyeOS image for home surveillance

When I bought my Raspberry Pi 2, I also bought the first version of the Raspberry Camera Module just for the fun of it. After setting up my Raspberry Pi 2 as a TV box for my wife, that camera module became an ornament. Feeling bad about such wastage, I bought another Raspberry Pi 3 to utilise the camera module in performing home surveillance.

This post documents the steps that I took to build my Raspberry Pi 3 CCTV via a MotionEyeOS image for home surveillance.

The steps that I took to build my Raspberry Pi 2 TV box via the OpenELEC Mediacenter image

After I got my new Raspberry Pi 3 to incubate my new WordPress website, I freed up my Raspberry Pi 2 for other things. Since my wife had been yearning for a TV box to watch her favourite videos on our TV, I decided to convert my Raspberry Pi 2 into a TV box.

This post documents the steps that I took to build my Raspberry Pi 2 TV Box with an OpenELEC Mediacenter image.