How to prepare the operating system to run your Raspberry Pi, with your Windows machine
Recently, I had been deploying several pieces of Raspberry Pi around my house for different purposes. In order to use Raspberry Pi as a TV Box, a CCTV, a LEMP server or any other appliances, we will need to prepare an operating system in a microSD card to run our Raspberry Pi.
I always use my Windows machine to prepare the operating system for all my Raspberry Pis, since I find that it is easiest to write an operating system for Raspberry Pi on a Windows machine. This post documents how I would prepare the operating system to run my Raspberry Pi, with my Windows machine.
Installing a copy of Win32DiskImager on your Windows machine
The Win32 Disk Imager is a free tool that help us write images to USB sticks or SD/CF cards with our Windows machine. Since Raspberry Pi loads the operating system from a microSD card, we can use the Win32 Disk Imager to help us prepare the operating system. If you do not have a copy of Win32 Disk Imager, you may want to download a copy and install it on your Windows machine.
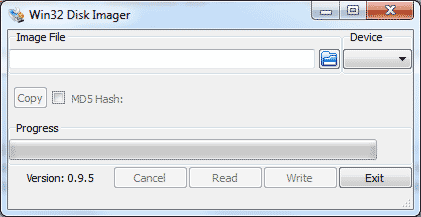
The Win32 Disk Imager user interface looks like the following on my Windows machine:
Downloading a copy of the operating system image that you want to use on your Raspberry Pi
With your Win32 Disk Imager up and running, the next step will be to download the copy of operating system image that you want to use on your Raspberry Pi. Usually, the operating system for Raspberry Pi will come as a file with a .img extension. Most of the time, providers of the operating system for Raspberry Pi compress the .img file to reduce the time to download the operating system image. For example, the Raspberry Pi Foundation provides variants of the Raspbian operating system as .zip files on their download page.
Writing/installing the operating system image into your microSD card
Suppose that I want to install Raspbian Jessie with PIXEL, I will first download the .zip file to my file system and extract the .img file that is contained within the .zip file.
After my .img file is extracted successfully, I will insert my microSD card into my SD card reader on my Windows machine via an adapter.
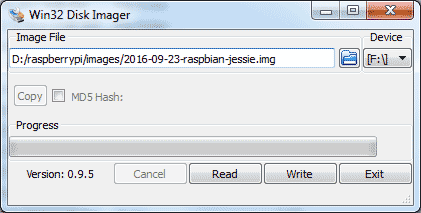
I will then go back to my Win32 Disk Imager user interface. The drop-down box at the "Device" section will be filled with some characters, for example, "[F:\]". This indicates that Win32 Disk Imager had detected an SD card at my F:\ drive. Next, I will click on the folder icon to look for the .img file that I had extracted earlier.
Once I selected the Raspbian Jessie with PIXEL image file that I wish to write to the microSD card, my Win32 Disk Imager will look like this:
To trigger the installation of the Raspbian Jessie with PIXEL in the microSD card, I will then click on the "Write" button. After Win32 Disk Imager completes the image writing process, I will then be able to run Raspbian Jessie with Pixel on my Raspberry Pi.