Articles about Python

Python Logo

Python is one of the most versatile programming languages in the world. With Python, you can control electronics, build web applications and perform machine learning.

In this page, you can find articles on Python references, coding and application setup.

How to read RFID tags from SparkFun RFID USB Reader with Python 3

When you have an RFID starter kit from Sparkfun, you will be able to read RFID tags through serial.

Previously, we saw how to use an ESP32 board to read RFID tags from a SparkFun RFID USB Reader.

Given that, I was able to build a ESP32 prototype to scan tag ids from RFID cards.

In order for that ESP32 prototype to recognise what each of my tag card represents, I need to label the ids. Whenever my ESP32 prototype gets a tag id, it will query a tag catalogue to see what that tag id represent.

Since it is easier to label the tag cards from a computer, I built a Python 3 application to read the RFID tags from the SparkFun RFID reader.

So how we can read RFID tags from SparkFun RFID USB Reader with Python 3?

If you are looking for a way to read RFID tags from SparkFun RFID USB Reader with Python 3, then this post is for you.

How to use Python 3 to convert your images to Base64 encoding

When you encode your images in Base64, your images can be transferred and saved as text.

Although there will be a 37% bloat in space requirements, it can be useful to encode images in Base64.

For example with SAP HANA XS Advanced, you can quickly build an OData service to receive images via JSON.

Given that, let’s see how we can encode an image in Base64 encoding with Python 3.

How to read soil moisture level with Raspberry Pi and a YL-69/FC-28 moisture sensor

When I did a Raspberry Pi 4 Model B review, I got myself a Raspberry Pi 4 Model B. Therefore, the current Raspberry Pi 3 Model B+ that I have been using for validating Raspberry Pi ideas became available for another IoT project in the house.

So what should I do with my Raspberry Pi?

Since I have always wanted to build my own indoor herb garden, I plan to use it to help my plants grow well.

When I bought the LED Grow Lights, I am able to give my plants consistent lighting. Given that consistent lighting is solved, I can use my Raspberry Pi 3 to monitor soil moisture so that I can provide water my plants better.

Given these points, this is a proof of concept that I did to read soil moisture level with my Raspberry Pi and a YL-69/FC-28 moisture sensor.

How to use the MCP3008-I/P chip to help your Raspberry Pi read digital data from analog sensors

Although your Raspberry Pi is unable to read analog input out of the box, you can get a MCP3008 I/P ADC chip to help your Raspberry Pi do so.

MCP3008 IP ADC chip up close

When you connect a MCP3008 I/P chip to your Raspberry Pi, you can read up to 8 analog inputs with SPI.

Given these points, this post will show you how you can use the MCP3008 I/P chip to help your Raspberry Pi read digital data from analog sensors.

How to use Python 3 virtual environments to run Python 3 applications on your Raspberry Pi

Whenever I am working on a Python 3 project, I will always use a Python 3 virtual environment for running that project. Therefore, I tend to do the same when it comes to .

If you are looking to build Python 3 applications to run on your Pi, then you may find this article useful for you.

How to send a HTTP request with client certificate + private key + password/secret in Python 3

When we need to create a HTTP client that communicates with a HTTP server through certificate-based authentication, we will typically have to download a certificate, in .pem format, from the server.

After we had downloaded the .pem file, the HTTP client will use the private key and certificate to authenticate itself with the HTTP server. Sometimes, the HTTP client will need to decrypt the private key with a password/secret first.

So with a .pem file and a password/secret, how can you create a HTTP client in Python 3 to send a HTTP request to the HTTP server?

In case you need it, this post shows how to send a HTTP request with client certificate + private key + password/secret in Python 3.

How to solve “No API definition provided” error for Flask-RESTPlus app on Cloud Foundry

When you create an API endpoint that generates a QRCode with Flask-RESTPlus, you may want to deploy it onto Cloud Foundry.

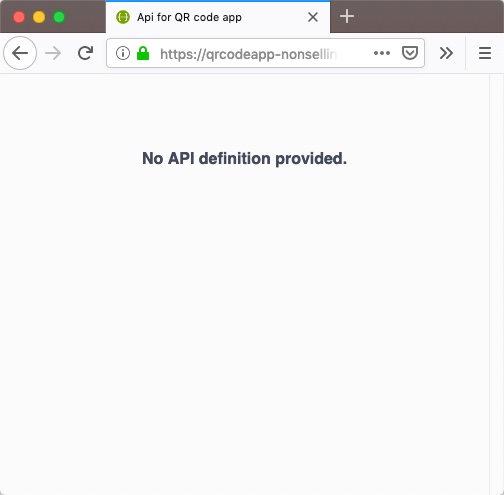
However, when I first tried to do so, I was greeted with a No API definition provided when I accessed the Swagger Api portal page.

qrcodeapp showing No API definition provided

So why is there a “No API definition provided” error for Flask-RESTPlus app on Cloud Foundry?

In case you are facing such a problem, this post discuss how I had managed to solve the “No API definition provided” error for my Flask-RESTPlus app on Cloud Foundry.

How to use NSSM to setup Jupyter Notebook as a Windows Service running its own Python 3 virtual environment

When you take Andrew Ng’s Deep Learning Coursera course, you can get a better understanding of deep learning. In addition, you will get many Jupyter Notebook documents that you can reference while building models that can solve interesting problems.

When you want to readily access those documents, you can setup Jupyter Notebook as a Windows Service on your Windows machine.

As I had mentioned in how to use NSSM to run a Python 3 application as a Windows Service in its own Python 3 virtual environment, NSSM is a very helpful tool for us to create Windows Services.

Since we can install Jupyter Notebook via pip, we can run Jupyter Notebook from its own virtual environment. In addition to that, since we can create a Python 3 virtual environment in Windows 10, we can setup Jupyter Notebook as a Windows Service running its own Python 3 virtual environment.

Given these points, let us look at how we can use NSSM to setup Jupyter Notebook as a Windows Service running its own Python 3 virtual environment.

How to use NSSM to run a Python 3 application as a Windows Service in its own Python 3 virtual environment

If you want to run a Python 3 application as a Windows Service, then you are going to love NSSM. Since NSSM handles the life cycle of a Windows Service for our Python 3 application, we can keep it platform agnostic.

Previously, we saw how we can use a Python 3 virtual environment in Windows 10. Given that, let’s see how we can use NSSM to run a Python 3 application as a Windows Service in its own Python 3 virtual environment.