Posts published by Clivant

Clivant a.k.a Chai Heng enjoys composing software and building systems to serve people. He owns techcoil.com and hopes that whatever he had written and built so far had benefited people. All views expressed belongs to him and are not representative of the company that he works/worked for.

How to read soil moisture level with Raspberry Pi and a YL-69/FC-28 moisture sensor

When I did a Raspberry Pi 4 Model B review, I got myself a Raspberry Pi 4 Model B. Therefore, the current Raspberry Pi 3 Model B+ that I have been using for validating Raspberry Pi ideas became available for another IoT project in the house.

So what should I do with my Raspberry Pi?

Since I have always wanted to build my own indoor herb garden, I plan to use it to help my plants grow well.

When I bought the LED Grow Lights, I am able to give my plants consistent lighting. Given that consistent lighting is solved, I can use my Raspberry Pi 3 to monitor soil moisture so that I can provide water my plants better.

Given these points, this is a proof of concept that I did to read soil moisture level with my Raspberry Pi and a YL-69/FC-28 moisture sensor.
How to use the MCP3008-I/P chip to help your Raspberry Pi read digital data from analog sensors

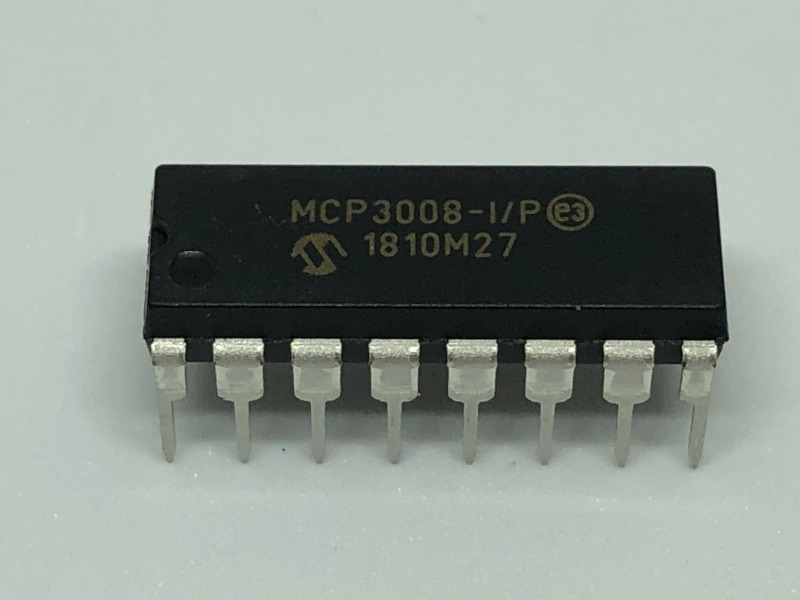
Although your Raspberry Pi is unable to read analog input out of the box, you can get a MCP3008 I/P ADC chip to help your Raspberry Pi do so.

MCP3008 IP ADC chip up close

When you connect a MCP3008 I/P chip to your Raspberry Pi, you can read up to 8 analog inputs with SPI.

Given these points, this post will show you how you can use the MCP3008 I/P chip to help your Raspberry Pi read digital data from analog sensors.

How to enable SPI master driver in Raspbian using raspi-config

Your Raspberry Pi has the ability to communicate with hardware using the Serial Peripheral Interface specification. However, this master driver is disabled by default.

If you want to use the SPI master driver to communicate with devices, then you will need to enable it.

Let’s look at how we can enable the SPI master driver using the Raspberry Pi Software Configuration Tool (raspi-config).

How to use Wise to receive your Amazon Affiliate earnings through direct deposit

As I had mentioned in easy and effective ways for programmers’ websites to earn money, I use Amazon Affiliate program to earn some commission fees for keeping this website running.

Given that, I am able to earn some cash to pay for some online courses and latest gadgets to enrich myself.

However, receiving your Amazon Affiliate earnings can be costly if your bank account is not eligible for direct deposit.

If you are looking for a fast and affordable way to receive your Amazon Affiliate earnings through direct deposit, this post will show you how to use Wise to receive your Amazon Affiliate earnings.

How to capture images in the dark with the Raspberry Pi Infrared Camera Module from Seeed Studio

When I wanted to keep tabs on my corridor, I built a Raspberry Pi Zero W surveillance camera with MotionEye and Raspbian Lite.

After a while, I make my Raspberry Pi Zero W see an ultra-wide view by using one of the Fish Eye lens from a Camera Lens kits that I received as a gift.

Since then, I am able to have a wide angle view of my corridor as long as I have a browser with an Internet connection.

However, the same setup will not work for checking on my plants in the kitchen. If I am to snap some pictures after my LED growth lights are switched off, I will definitely get pitch black images.

So what kind of camera should my plant surveillance setup use? In order to capture images in the dark, I should look for a camera without the Infrared Filter – a NoIR Camera.

With this in mind, I head over to Seeed Studio and got myself the Raspberry Pi Infrared Camera Module.

Since Seeed Studio had provided me with a voucher for this purchase, I am able to minimize the cost of producing this article.

Thank you Seeed Studio!

Given that, let’s see how we can capture images in the dark with the Raspberry Pi Infrared Camera Module.

How to use Python 3 virtual environments to run Python 3 applications on your Raspberry Pi

Whenever I am working on a Python 3 project, I will always use a Python 3 virtual environment for running that project. Therefore, I tend to do the same when it comes to .

If you are looking to build Python 3 applications to run on your Pi, then you may find this article useful for you.

How to host a static website on your Raspberry Pi with Nginx running on Raspbian Buster Lite

After you had understood HTML, CSS and JavaScript from The Web Developer Bootcamp, you can start to host a static website on an actual web server.

If you had been the kind of fan who buy newly-launched Raspberry Pis, then you may find some lying around the house collecting dust.

In this situation, why not use one of your Raspberry Pi to host something that you had just learnt?

Given that, let’s look at how you can host a static website on your Raspberry Pi with Nginx running on Raspbian Buster Lite.

Understanding the default Nginx virtual host (or server) configuration

After you had installed Nginx, one of the first thing to do is to check whether it is running ok.

One way to do so is to use your browser to send a HTTP request to test it.

If you had installed Nginx on your local machine, then you may enter http://localhost or http://127.0.0.1 into the location bar of your browser.

When you had setup Nginx on a separate machine on your home network, you may also enter http://<ip_address_of_the_machine> in the location bar of your browser. For example, in how to host a WordPress website on a Raspberry Pi with Raspbian Buster Lite and Nginx, I had entered http://192.168.1.114 as the location to test out the Nginx server running on my Raspberry Pi.

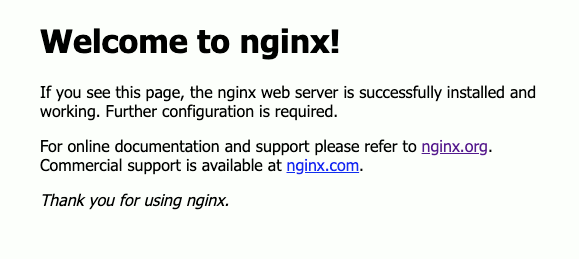
So be it http://localhost, http://127.0.0.1, http://<ip_address_of_the_machine>, you will always see this page on your browser screen:

default welcome page of Nginx 1.14.2

In case you are wondering why your Nginx behaves this way, this post will explain what the default Nginx Virtual Host configuration does to Nginx.

Why buy the Raspberry Pi Zero W?

When you have seen the Raspberry Pi 4 with 4GB ram, you may wonder why should we even be bothered with the earlier versions.

If you have been following Seeed Studio, you may have heard that they had included Raspberry Pi Zero W in their product catalogue.

I welcome this move from Seeed Studio with open arms.

Since I live in Singapore, I will be able to shave hefty shipping costs getting the Pi Zero W from Seeed Studio instead of vendors from the west. If you are staying in countries that are nearer to Guangzhou, then the real cost of your Pi Zero W will be much closer to the 10 USD price tag.

But why buy the Raspberry Pi Zero W?

In case you are thinking of whether to trade 10-ish bucks for one, here are some reasons why you should have a look at the Raspberry Pi Zero W for your next Raspberry Pi project.