How to setup Raspbian Stretch on Raspberry Pi 3 for developing Python 3 applications
Previously, I had shared:
- How to setup Raspbian Stretch Lite on Raspberry Pi 3 for running Python 3 applications
- How to setup Raspbian Stretch Lite on Raspberry Pi Zero W for running Python 3 applications
Although Raspbian Stretch Lite is ideal for running Python 3 applications on Raspberry Pis, it is not so handy for developing Python 3 applications.
For example, if you are building a Python application that interfaces with the GPIO ports and CSI camera of your Raspberry Pi 3, it is hard to test it out on Raspbian Stretch Lite.
Since Raspbian Stretch includes a desktop environment, it is more convenient for developing Python 3 applications for Raspberry Pi. With this purpose in mind, this is how to setup Raspbian Stretch on Raspberry Pi 3 for developing Python 3 applications.
Suggested bill of materials
In case you are looking for what to buy for your Raspberry Pi 3 project, here are some recommendations to build your Raspberry Pi 3 development rig:
- CanaKit Raspberry Pi 3 with 2.5A Micro USB Power Supply or CanaKit Raspberry Pi 3 B+ (B Plus) with 2.5A Power Supply (UL Listed)
- Raspberry Pi 2/3 official case Black/Grey or Raspberry Pi 2/3 official case Red/White
- Sandisk Ultra 32GB Micro SDHC UHS-I Card with Adapter
- AmazonBasics RJ45 Cat-6 Ethernet Patch Cable - 3 Feet (0.9 Meters)
- Logitech MK120 Keyboard & Mouse
- Monitor with HDMI port
Prerequisite hardware to install operating system onto microSD
A Raspberry Pi 3 board will load an operating system from a microSD card. Therefore, we will need to have a computer with a SD card reader. If your computer does not come with a SD card reader, you have to get one.
Downloading a copy of Raspbian Stretch for your Raspberry Pi 3
After you had gotten your hardware, proceed to download a version of Raspbian Stretch for your Raspberry Pi 3. Currently, there are three versions of Raspbian Stretch that are released on 13 November 2018:
- Raspbian Stretch with desktop and recommended software
- Raspbian Stretch with desktop
- Raspbian Stretch Lite
Since the first option contains a lot of software that we will not need for Python 3 development, choose the second option:
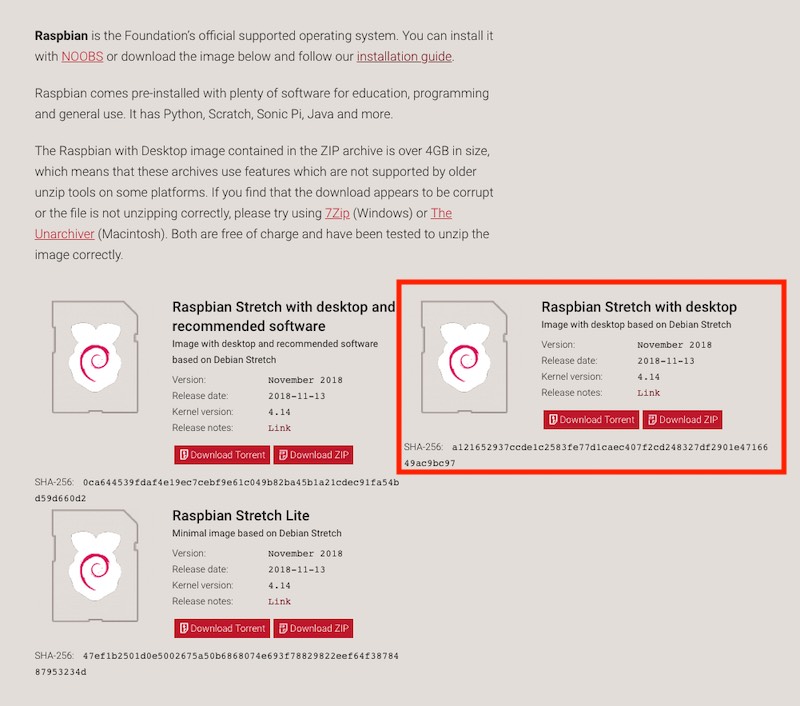
Download the zip file and save it onto your computer. It will take quite a while to download as the file is pretty big.
Installing Raspbian Stretch onto your microSD card
After your browser had downloaded the .zip file successfully, extract the .img file from the .zip file. The .img file is the operating system image that you will use for installing Raspbian Stretch onto your microSD card.
Typically, I use Etcher on my MacBook Pro to install operating system images onto microSD cards.
If you are using a windows machine, you can use Win32DiskImager to install the operating system for your Raspberry Pi 3.
If you are using a Linux desktop, you should be able to use Etcher to install the operating system for your Raspberry Pi 3.
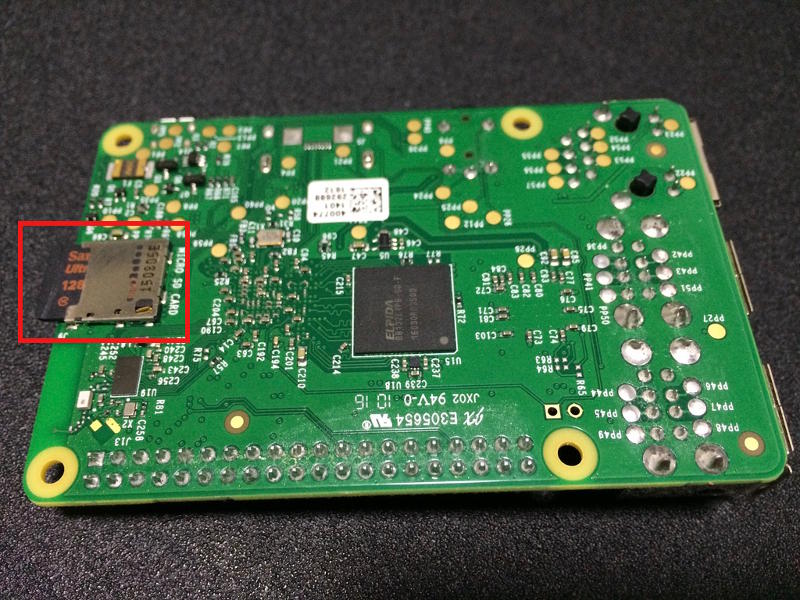
Slotting in the microSD card into the microSD card slot of the Raspberry Pi 3 board
After installing the Raspbian operating system onto the microSD card, you need to put it into the microSD card slot of the Raspberry Pi 3 board:
Assembling the Raspberry Pi 3 board with the Official Raspberry Pi 3 Case
Once you had slotted the microSD card into the microSD card slot of the Raspberry Pi 3 board, proceed to assemble the Raspberry Pi 3 board with the Raspberry Pi Official Case. After you had assembed the Raspberry Pi 3 board with the Raspberry Pi Official Case, insert in your microSD card.
Connecting the computer monitor to your Raspberry Pi 3 board
Once you had pieced together the Official Raspberry Pi 3 Official case with the Raspberry Pi 3 board, you can connect the HDMI port on the Raspberry Pi 3 board to the Samsung monitor with the HDMI cable. Doing so will enable you to get visual feedback from the Raspbian operating system while you perform the rest of the configuration steps.
Connecting the mouse and keyboard to the USB ports
The Raspberry Pi 3 has 4 USB ports for external peripherals. To be able to surf the web through the web browser in Raspbian or perform other computing tasks, you will need to connect the mouse and the keyboard to 2 of the USB ports.
Booting into Raspbian Stretch for the first time
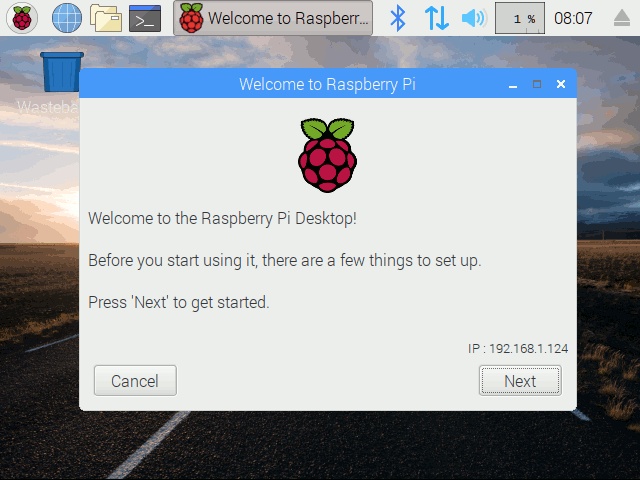
Once you had connected the monitor screen, the keyboard and the mouse to your Raspberry Pi 3 board, you can boot into your Raspbian operating system to perform further configurations. To power up your Raspberry Pi 3, you will need to plug in the micro USB power adapter to your wall socket. When you switch on your wall socket, your Raspberry Pi 3 will load the Raspbian operating system.
Once the Raspbian operating system had successfully booted up, a program will bring you through several configurations. Follow through the instructions to indicate your timezone, your keyboard type, change your new password and etc.
At this point in time, if your Raspbian desktop does not fill up the entire monitor screen, you may want to disable overscan in Raspbian Stretch.
Installing python3-venv on Raspbian Stretch to create Python 3 virtual environments
Virtual environments allow us to run Python 3 applications with varying dependencies. Typically, we create a virtual environment for running each Python 3 application. In order to create virtual environments on Raspbian Stretch, we will need to install python3-venv.
To install python3-venv on Raspbian Stretch, first open a Terminal window by clicking on the highlighted icon at the top:
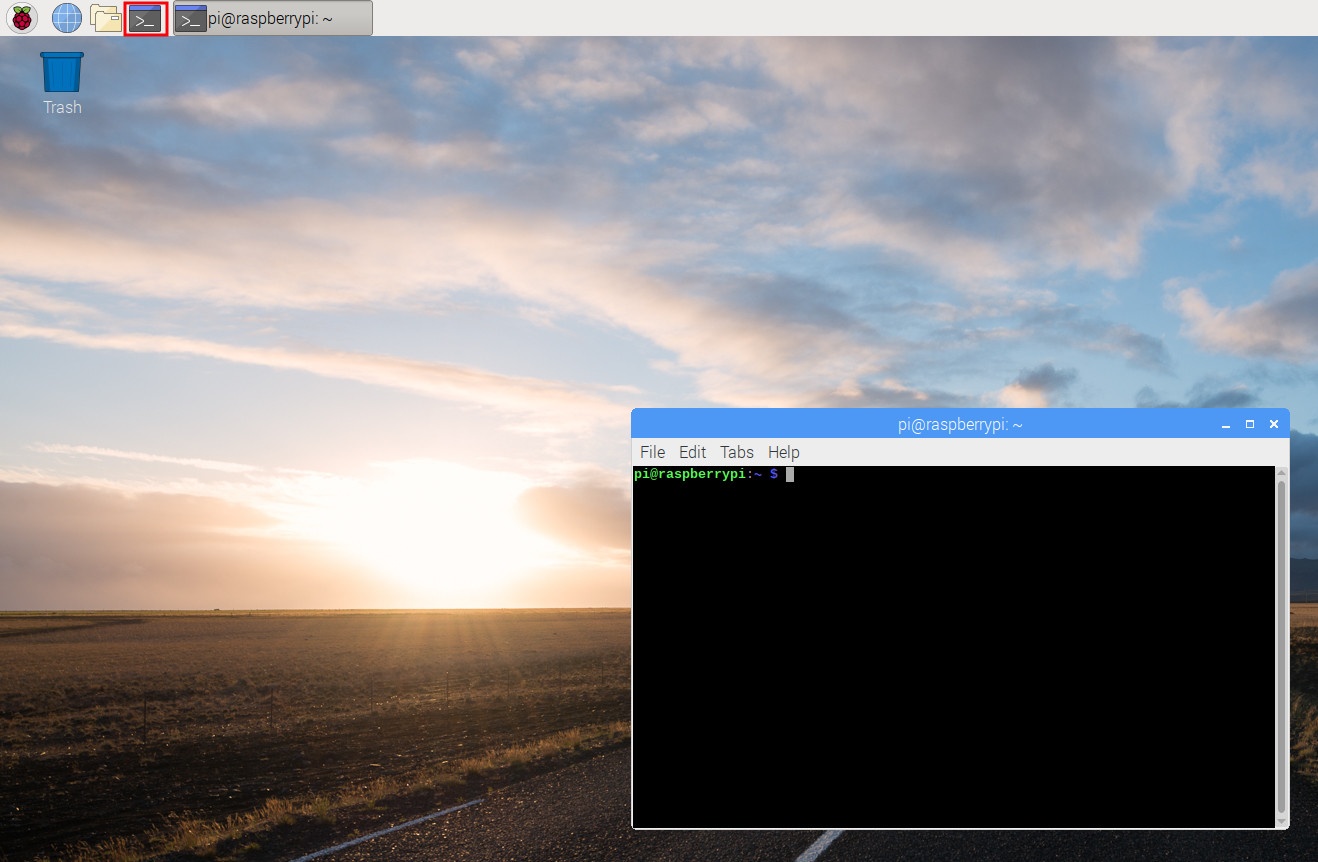
When the Terminal window starts, enter the following command into the Terminal window:
sudo apt-get install python3-venv -y
After the command completes, you will then be able to create a virtual environment to run your Python 3 application on Raspbian Stretch.
Installing Thonny for Python 3 development on Raspbian Stretch
Since we did not install Raspbian Stretch with desktop and recommended software, we need to install Thonny separately. Installing Thonny on Raspbian Stretch is not too difficult.
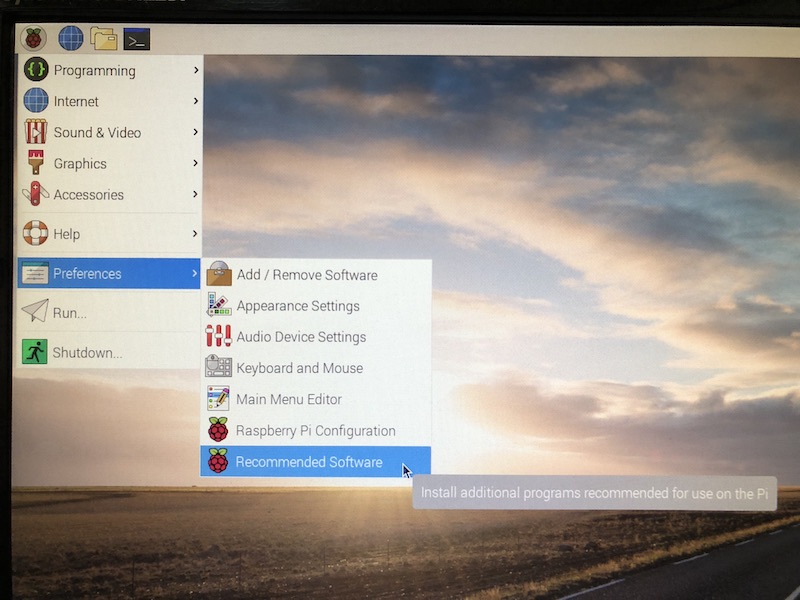
Firstly, click on the Raspberry Pi logo at the top, and then go to Preferences -> Recommended Software:
After the Recommended Software window appears, look for Thonny and check the checkbox under the Install column:
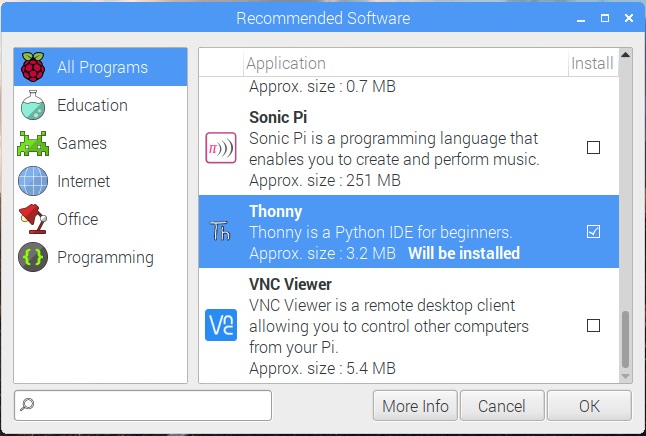
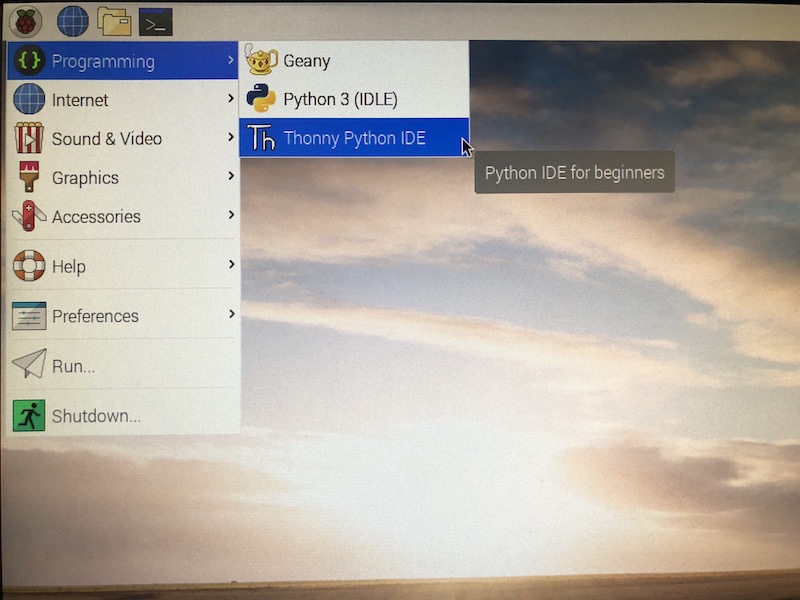
Click Ok to install Thonny. After the installation process completes, you can then launch Thonny from the menu:
Additional resources
At this point in time, you will be able to develop Python 3 applications with your Raspberry Pi 3 running Raspbian Stretch. This section lists a few more articles that you may find useful.
Associating a Python 3 virtual environment with Thonny
Since you may use your Raspberry Pi 3 development machine to work on several projects, Thonny allows you to associate different Python 3 virtual environment for different projects. In case you need it, this is how to associate a Python 3 virtual environment with Thonny.
Changing Raspbian screen resolution
When you bring your Raspberry Pi 3 to a different location with a different monitor screen, your screen resolution may change. In case that happens, this is how to change screen resolution in Raspbian Stretch with raspi-config.
Helpful GPIO Pinout resources that you can reference while connecting sensors to your Raspberry Pi 3
It can be tough to remember what the functionality of the 40 GPIO pins on your Raspberry Pi 3. When you are lost, here are some helpful GPIO Pinout resources that you can reference while connecting sensors to your Raspberry Pi 3.