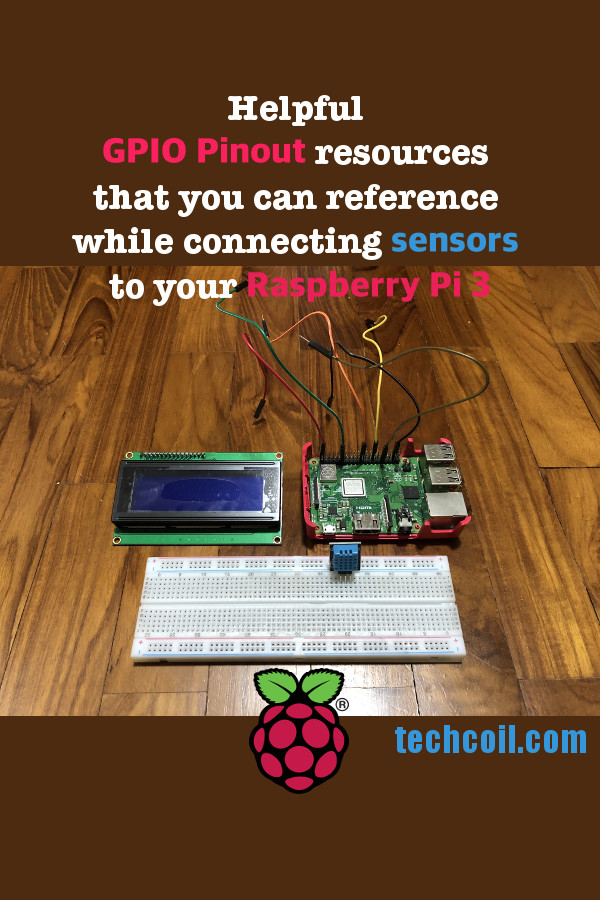
Helpful GPIO Pinout resources that you can reference while connecting sensors to your Raspberry Pi 3
Undeniably, the GPIO (general-purpose input/output) pins along the top edge of your Raspberry Pi 3 board is what makes it so useful for IOT projects. In case you are curious, this is how the GPIO pins looks like on a Raspberry Pi 3 B+:
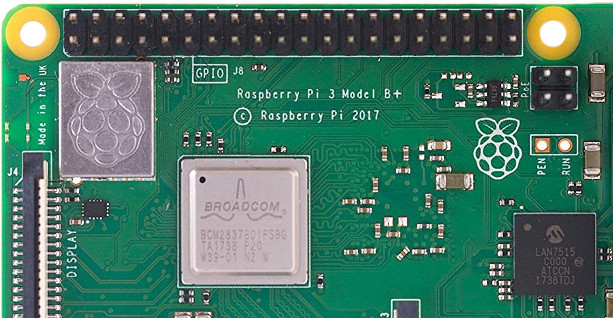
Although there is the word GPIO on the circuit board that indicates what those pins are, there is no indication on what each individual pin does.
So how do you know which pins to connect your sensors to? Thankfully, there are several good resources that you can reference while connecting sensors to your Raspberry Pi 3 board.
In case you need it, here are some helpful GPIO resources that you can reference when you are connecting sensors to your Raspberry Pi 3 board.
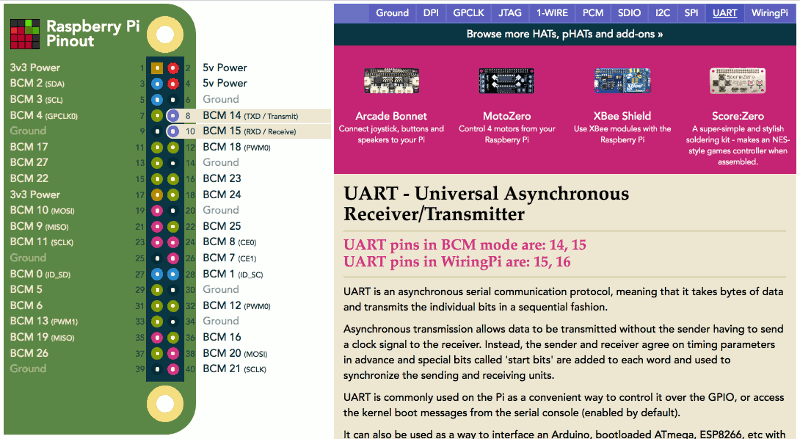
Website at https://pinout.xyz
In addition to labelling the individual GPIO pins, GPIO Pinout is an interactive website that help you figure out which pin combinations to use for interacting with different hardware devices.
For example, the page on UART - Universal Asynchronous Receiver/Transmitter provides a coding reference and the pins to use for communicating with a UART device:
Fritzing
Fritzing is an open-source hardware initiative that makes electronics accessible as a creative material for anyone. In order to use Fritzing, you need to install the software on your computer. You can download the installer for your operating system at the download page.
To get a GPIO reference of Raspberry Pi 3 with Fritzing, go to the Breadboard tab and drag a RPi3 part to the grid canvas.
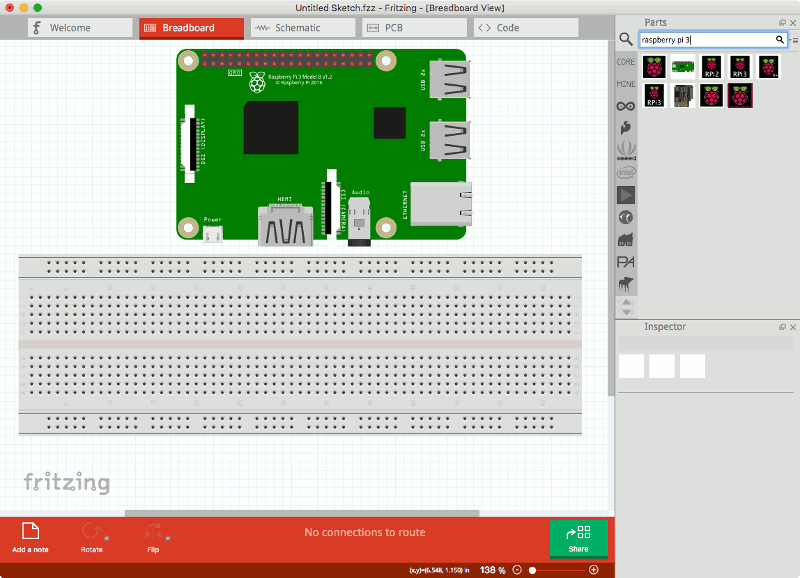
After that, you can hover your mouse over those red dots on the RPi3 part to get a text description of the individual pins that you are trying to wire. Moreover, you can connect sensors to the RPi3 part in Fritzing before proceeding to replicate the connections for your actual Raspberry Pi 3 project.
CanaKit Raspberry Pi GPIO Breakout Board (40-Pin T-Shaped - Assembled)
If you are going to connect your sensors to your Raspberry Pi 3 via a breadboard, you can get a CanaKit Raspberry Pi GPIO Breakout Board (40-Pin T-Shaped - Assembled) to help you connect the 40 GPIO pins to a standard breadboard.
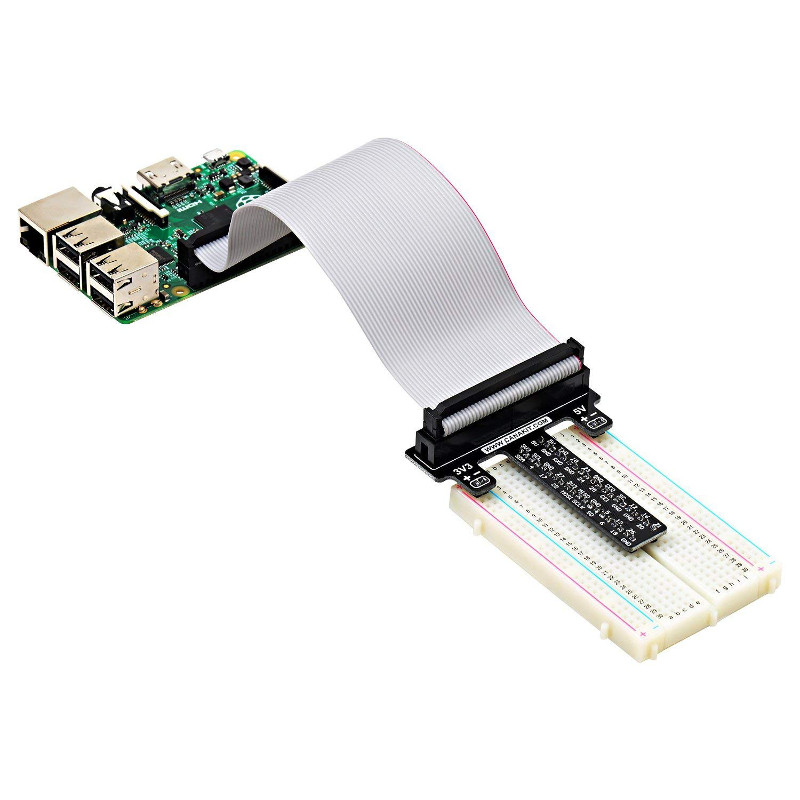
After you had connected your Raspberry Pi 3 GPIO pins to your breadboard via the GPIO Breakout Board, you can then follow the labels on the board to connect the sensors on the breadboard.
Geekworm Raspberry Pi GPIO Module Reference Board for Raspberry Pi 3
The Geekworm Raspberry Pi GPIO Module Reference Board is a cardboard that you can insert directly onto the GPIO pins of your Raspberry Pi 3. By doing so, you will have labelled all the GPIO pins in one shot.
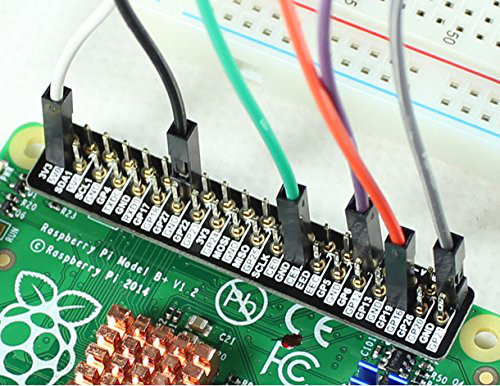
You can then follow the labels to connect sensors to your Raspberry Pi 3.
That's all, have fun with your Raspberry Pi 3 project!