How to host a WordPress website on a Raspberry Pi with Raspbian Buster Lite and Nginx
If you are thinking of starting a blog about computer technology, then you can consider hosting a WordPress website on your Raspberry Pi.
Since Raspberry Pi is a capable machine that does not take up too much space and power, it is a good as a web server.
In addition, if you have an Internet subscription that does not block port 80 and 443, hosting a WordPress at home can be cost effective.
Given these points, let's look at how we can host a WordPress website on a Raspberry Pi with Raspbian Buster and Nginx.
Why host your WordPress website on a Raspberry Pi?
In case you are looking for a reason to host you WordPress site on a Raspberry Pi, here are some reasons for you:
- You are not sure whether you will enjoy blogging. Since you can use Raspberry Pi for various server projects, you can easily scrape your WordPress website if you do not enjoy blogging anymore.
- You are make a living from the WordPress ecosystem. In such a situation, your Raspberry Pi can serve as a good development server for you to test the plugins and themes that you had created.
- You are trying to learn about WordPress. In addition to the coding aspects of WordPress, hosting a WordPress website on a Raspberry Pi will also provide you with insights to administer WordPress on a Linux server.
Which Raspberry Pi to use for hosting your WordPress website?
Although WordPress can be hosted on most of Raspberry Pi versions, a Raspberry Pi 2 or later models will be better suited for a Raspberry Pi. In addition, you may want to look for a version with an Ethernet port.
If you do not have a Raspberry Pi that you can use for your WordPress site, then you may want to consider getting the following items:
- CanaKit Raspberry Pi 4 Basic Kit 4GB
- SanDisk 128GB Extreme microSDXC UHS-I Memory Card with Adapter
- ZkeeShop Magnetic Installation Acrylic Case for Raspberry Pi 4 Model B
- Gigabit Ethernet Cable
In addition to the list of recommended hardware, you will need a computer with an SD card writer.
In order to keep things simple, let's assume that your Raspberry Pi will connect to a router via an Ethernet cable. Given that, your Raspberry Pi can access the Internet through your router. In addition to that, your router provides the Raspberry Pi with a private IP address and you are configuring it from a computer in the same network.
Technology stack for hosting the WordPress website on Raspberry Pi
Since Nginx is a good reverse proxy server for hosting websites, we will cover hosting the WordPress website on a Raspberry Pi LEMP stack:
Setting up Raspbian Buster Lite on your Raspberry Pi
First, setup Raspbian Buster Lite for Raspberry Pi server projects. After you had completed that tutorial, you will have a Raspberry Pi that you can administer from your computer via SSH.
For the rest of this tutorial, let's assume that your Raspberry Pi is accessible via 192.168.1.114. In addition to that, you are connected to your Pi via SSH. If not, then you will need to open up a terminal program and run the following command:
ssh pi@192.168.1.114
Installing Nginx on Raspbian Buster Lite
After you had logged into your Raspberry Pi with SSH, run the following commands to install Nginx on Raspbian Buster Lite:
sudo apt-get update
sudo apt install nginx -y
Once the commands complete, run the following command to verify that Nginx is installed successfully on your Raspberry Pi:
systemctl status nginx.service
When Nginx is installed successfully, you should see output similar to the following:
● nginx.service - A high performance web server and a reverse proxy server
   Loaded: loaded (/lib/systemd/system/nginx.service; enabled; vendor preset: enabled)
   Active: active (running) since Sun 2019-09-15 13:04:28 +08; 3min 23s ago
     Docs: man:nginx(8)
 Main PID: 2962 (nginx)
    Tasks: 5 (limit: 4915)
   Memory: 7.6M
   CGroup: /system.slice/nginx.service
           ├─2962 nginx: master process /usr/sbin/nginx -g daemon on; master_process on;
           ├─2963 nginx: worker process
           ├─2964 nginx: worker process
           ├─2965 nginx: worker process
           └─2966 nginx: worker process

Sep 15 13:04:28 raspberrypi systemd[1]: Starting A high performance web server and a reverse proxy server...
Sep 15 13:04:28 raspberrypi systemd[1]: Started A high performance web server and a reverse proxy server.
In addition to that, you can access http://<your_raspberry_pi_ip_address>/ with your browser to test out your Nginx default configuration. You should see the following screen if everything is fine:
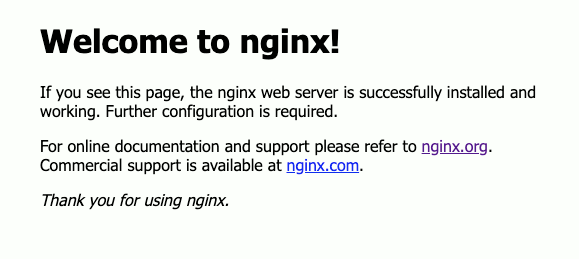
In case you are wondering, this page was returned based on the Nginx configurations from /etc/nginx/sites-available/default. In addition to that, the Nginx server had found that file through the symbolic link at /etc/nginx/sites-enabled/default.
Installing MariaDB server and command line client on Raspbian Buster Lite
Next, install the database components that is needed for hosting your WordPress website:
sudo apt install mariadb-server mariadb-client -y
When the command complete, you will have the database server for your WordPress website to persist data. In addition to that, you will also have the command line client for configuring the MariaDB database server.
At this point in time, you can verify your MariaDB installation by running the following command:
sudo mariadb
When the components are installed properly, you should get a command line interface that looks like the following:
Welcome to the MariaDB monitor.  Commands end with ; or \g.
Your MariaDB connection id is 47
Server version: 10.3.17-MariaDB-0+deb10u1 Raspbian 10

Copyright (c) 2000, 2018, Oracle, MariaDB Corporation Ab and others.

Type 'help;' or '\h' for help. Type '\c' to clear the current input statement.

MariaDB [(none)]>
Type exit and then Enter to quit the command line client.
Installing PHP 7 on Raspbian Buster Lite
After you had gotten MariaDB up and running, install PHP 7 and the necessary libraries to host your WordPress website with the following command:
sudo apt install php php-fpm php-mysql -y
Once the command completes, you can check your PHP FPM installation with the following command:
systemctl status php7*
When PHP FPM is installed properly, you should see output similar to the following:
● php7.3-fpm.service - The PHP 7.3 FastCGI Process Manager
   Loaded: loaded (/lib/systemd/system/php7.3-fpm.service; enabled; vendor preset: enabled)
   Active: active (running) since Sun 2019-09-15 13:33:12 +08; 3min 32s ago
     Docs: man:php-fpm7.3(8)
 Main PID: 16080 (php-fpm7.3)
   Status: "Processes active: 0, idle: 2, Requests: 0, slow: 0, Traffic: 0req/sec"
    Tasks: 3 (limit: 4915)
   Memory: 5.0M
   CGroup: /system.slice/php7.3-fpm.service
           ├─16080 php-fpm: master process (/etc/php/7.3/fpm/php-fpm.conf)
           ├─16081 php-fpm: pool www
           └─16082 php-fpm: pool www

Sep 15 13:33:12 raspberrypi systemd[1]: Starting The PHP 7.3 FastCGI Process Manager...
Sep 15 13:33:12 raspberrypi systemd[1]: Started The PHP 7.3 FastCGI Process Manager.
Deciding the domain name for your WordPress website
Once you had installed the technology stack for your WordPress website, it is time to decide a domain name for your WordPress website.
Although it is possible to configure your WordPress website to be reachable via an IP address, a domain name makes it easier for people to remember your website.
Furthermore, you can host multiple websites at home with different domain names mapped to a single IP address.
Mapping a domain name to your Pi's IP address
If you are keeping your WordPress site to computers in your home network, you can edit the hosts file on your computer to map a name to the private IP address of your Pi.
For example, if you use a mac, you can edit /etc/hosts and add an entry that looks like the following:
192.168.1.114 yourwpdomainname.com
After saving the file, your browser will know that it should use 192.168.1.114 to access yourwpdomainname.com.
Buying a domain name for your Raspberry Pi WordPress website
Another approach will be to buy a domain name from a registrar like Namecheap.
Since it provides Dynamic DNS service, Namecheap is the best domain name registrar for hosting your web server at home.
If your public IP address changes often, you can get your Raspberry Pi to update your domain with Namecheap dynamic DNS.
For the sake of this tutorial, we will use yourwpdomainname.com as the domain name to configure our WordPress website.
To adapt the configurations for your own domain name, simply replace occurrences of yourwpdomainname.com with your own domain name.
Forwarding port 80 and 443 of your router's public IP address to your Pi's private IP address
If you take the approach of buying a domain name from a registrar, you will need to forward port 80 and 443 of your router's public IP address to your Pi's private IP address.
Most routers should have such a feature. For example if you use a Linksys router, you should be able to forward network traffic made to port 80 and 443 to the web server running on your Raspberry Pi.
Downloading a copy of WordPress onto your Raspberry Pi
Once you have the domain name for your WordPress site, download a copy of WordPress onto your Raspberry Pi:
cd /var/www
sudo wget https://wordpress.org/latest.tar.gz
sudo tar xvfz latest.tar.gz
sudo rm latest.tar.gz
sudo mv wordpress yourwpdomainname.com
After the above commands complete, you will find the WordPress codes inside /var/www/yourwpdomainname.com.
When HTTP requests are sent to your WordPress site, Nginx and PHP FPM will look into this directory to serve content for your WordPress website.
Giving ownership of yourwpdomainname.com directory to the www-data user
Since Nginx and PHP FPM are ran with the www-data user, you will need to give that user ownership of the /var/www/yourwpdomainname.com directory. This will allow media uploads to your WordPress site.
Given these points, change the ownership of /var/www/yourwpdomainname.com directory with the following command:
sudo chown -R www-data:www-data /var/www/yourwpdomainname.com
Creating a MariaDB user and a database instance for your WordPress site
Next, setup the MariaDB database instance for your WordPress site to interact with. Since it is a good practice to create a separate database user for the WordPress site to interact with the database, let's create a Maria DB user with the privileges to interact with a particular database instance.
In order to do so, get into the MariaDB prompt to interact with the MariaDB server:
sudo mariadb
Once the MariaDB prompt appears, run the following command to create a new database instance:
CREATE DATABASE newWordPressDb;
When the database instance is created successfully, create the MariaDB user with the relevant privileges for accessing that database instance:
CREATE USER 'anewuser'@'localhost' IDENTIFIED BY 'password';
GRANT ALL ON newWordPressDb.* TO 'anewuser'@'localhost';
Configuring Nginx to serve content for your WordPress website
First define an upstream server that points to your PHP FPM. To do so, use nano to open up /etc/nginx/nginx.conf:
sudo nano /etc/nginx/nginx.conf
Once nano loads up /etc/nginx/nginx.conf, copy the following content into the http block before the line include /etc/nginx/conf.d/*.conf;:
upstream local_php {
    server unix:/run/php/php7.3-fpm.sock;
}
In addition to that, if your domain name is as long as this example, change:
# server_names_hash_bucket_size 64;
to:
server_names_hash_bucket_size 64;
Once you had done so, press Ctrl-X, Y and Enter to save the changes. This set of configuration will allow us to refer to the PHP FPM instance from future Nginx virtual host configurations.
Next, configure Nginx to serve content for your WordPress site.
First use nano to create a Nginx configuration file:
sudo nano /etc/nginx/sites-enabled/yourwpdomainname.com.conf
Once nano starts, fill in the following content:
server {
        listen   80;
        ## Your website name goes here.
        server_name yourwpdomainname.com  www.yourwpdomainname.com;
        root /var/www/yourwpdomainname.com;
        ## This should be in your http block and if it is, it's not needed here.
        index index.php;

        location = /favicon.ico {
                log_not_found off;
                access_log off;
        }

        location = /robots.txt {
                allow all;
                log_not_found off;
                access_log off;
        }

        location / {
                try_files $uri $uri/ /index.php?$args;
        }

        location ~ \.php$ {
                include fastcgi.conf;
                fastcgi_intercept_errors on;
                fastcgi_pass local_php;
                fastcgi_buffers 16 16k;
                fastcgi_buffer_size 32k;
        }

        location ~* \.(js|css|png|jpg|jpeg|gif|ico)$ {
                expires max;
                log_not_found off;
        }
}
Once you had done so, press Ctrl-X, Y and Enter to save the changes.
In addition to that, restart your Nginx server to take the new configurations:
sudo systemctl restart nginx.service
Creating the WordPress configurations to use the database instance
Next, create the WordPress configurations for your website.
To do so, rename /var/www/yourwpdomainname.com/wp-config-sample.php to /var/www/yourwpdomainname.com/wp-config.php:
sudo mv /var/www/yourwpdomainname.com/wp-config-sample.php /var/www/yourwpdomainname.com/wp-config.php
Next, use your browser to access https://api.wordpress.org/secret-key/1.1/salt/ to generate some key and salt values for your WordPress configurations.
Once you have done so, open /var/www/yourwpdomainname.com/wp-config.php with nano:
sudo nano /var/www/yourwpdomainname.com/wp-config.php
and update some sections of the file to look like the following:
// ** MySQL settings - You can get this info from your web host ** //
/** The name of the database for WordPress */
define('DB_NAME', 'newWordPressDb');

/** MySQL database username */
define('DB_USER', 'anewuser');

/** MySQL database password */
define('DB_PASSWORD', 'password');

/** MySQL hostname */
define('DB_HOST', 'localhost');

/** Database Charset to use in creating database tables. */
define('DB_CHARSET', 'utf8');

/** The Database Collate type. Don't change this if in doubt. */
define('DB_COLLATE', '');

/**#@+
 * Authentication Unique Keys and Salts.
 *
 * Change these to different unique phrases!
 * You can generate these using the {@link https://api.wordpress.org/secret-key/1.1/salt/ WordPress.org secret-key service}
 * You can change these at any point in time to invalidate all existing cookies. This will force all users to have to log in again.
 *
 * @since 2.6.0
 */
define('AUTH_KEY',         '+cSfNRx/GGIC.w*S!Bm-tHSZ;XG{&KL$Ciah!&U!XpM1_) c{q1+Z5nZ&:n$3|EA');
define('SECURE_AUTH_KEY',  'b&YwiG*4|u-GPq ],XfvrK.m>@G]77S_50J3TF@XpsrG.!b}sPjYQliq; EYaHO+');
define('LOGGED_IN_KEY',    '!:Z`K-+mxdD{]KuXOxEV _KoPY[e r2|0|p|kT-S;Fp4aKat>(k6;{tNM8+<93HU');
define('NONCE_KEY',        'Ws9-:a=77-CYQiu-4&5S:[&sDo++d(TCm=us|D,Y!ZsG*Q+F/Q|6QP(dx{{Kz{|3');
define('AUTH_SALT',        'AG+J* 6n2%$`,Lsw<2`G[;aK->K_=@C<#gn|@z9t+?|{y-`7F~otjp`0{$[d.&C6');
define('SECURE_AUTH_SALT', 'S{^tpy:o#sN)+vq#93jv<WD_FX6[T 6g*=tAvP+KBj!Wm})v<0)g(?BkUB#vH1YD');
define('LOGGED_IN_SALT',   'J~~FNzfG>1B(Xo=B1j4H<eN9bjEg9sZkKCSSB.+~;|,J!MYKDXw4`aHKwI_Uw-N<');
define('NONCE_SALT',       '[Qj-Qz:5G-RIX*vm[?B0Wuej^w|qy !)AOkrC3gHI_tR1B%]$o8/SsG-;r:CfE@)');
/**#@-*/
You should also consider changing $table_prefix to another value:
$table_prefix = 'abc123_';
When you are done with the changes, press Ctrl-X, Y and Enter to save the file.
Running the WordPress installation script
At this point in time, your Raspberry Pi should be able to serve content for your WordPress site.
Therefore, you can proceed with running the WordPress installation script.
In order to trigger the installation script, access yourwpdomainname.com (or your domain name) with your browser:
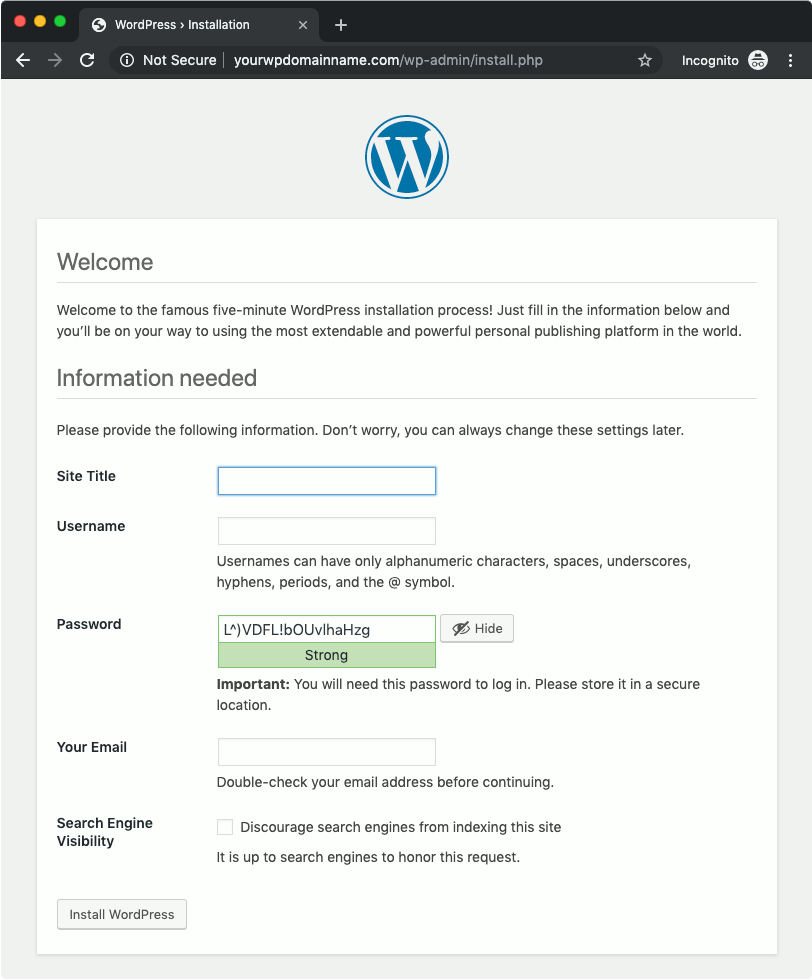
Fill in the necessary details:
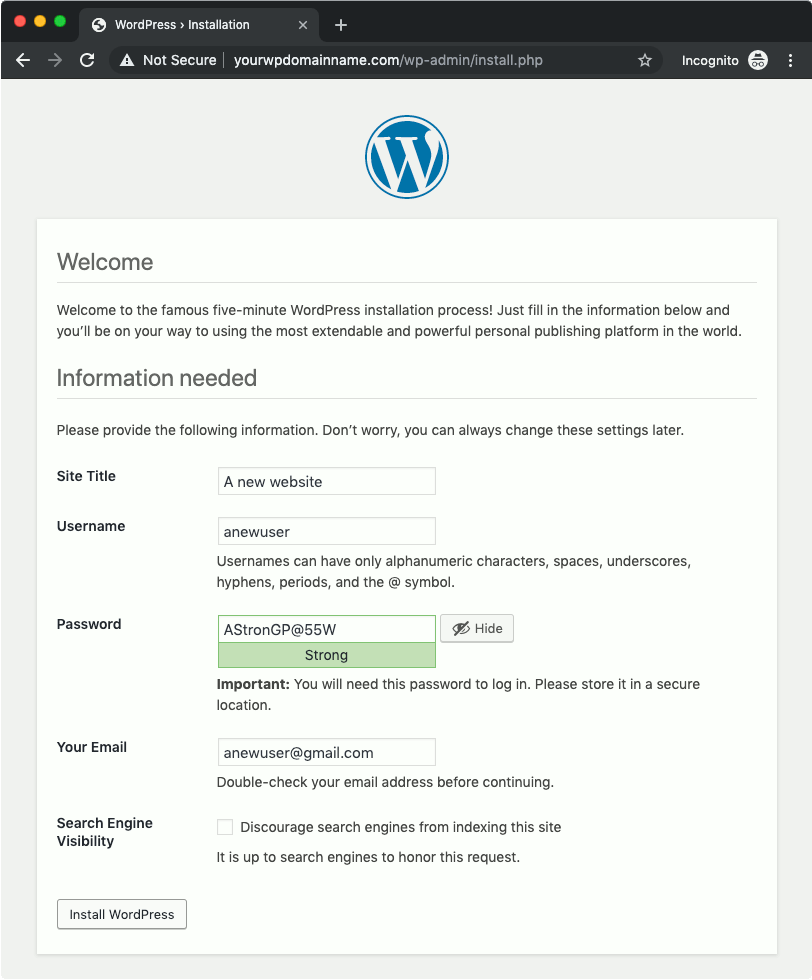
and click on Install WordPress:
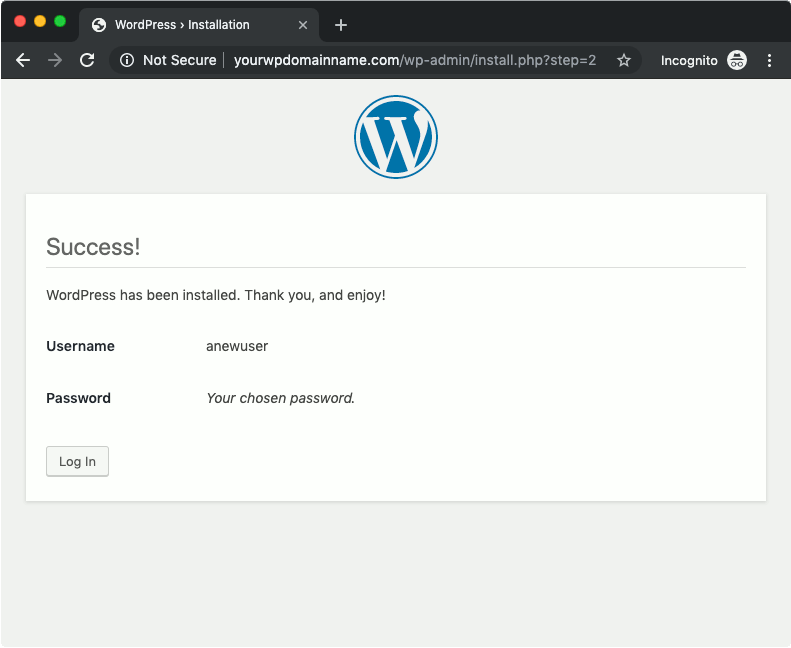
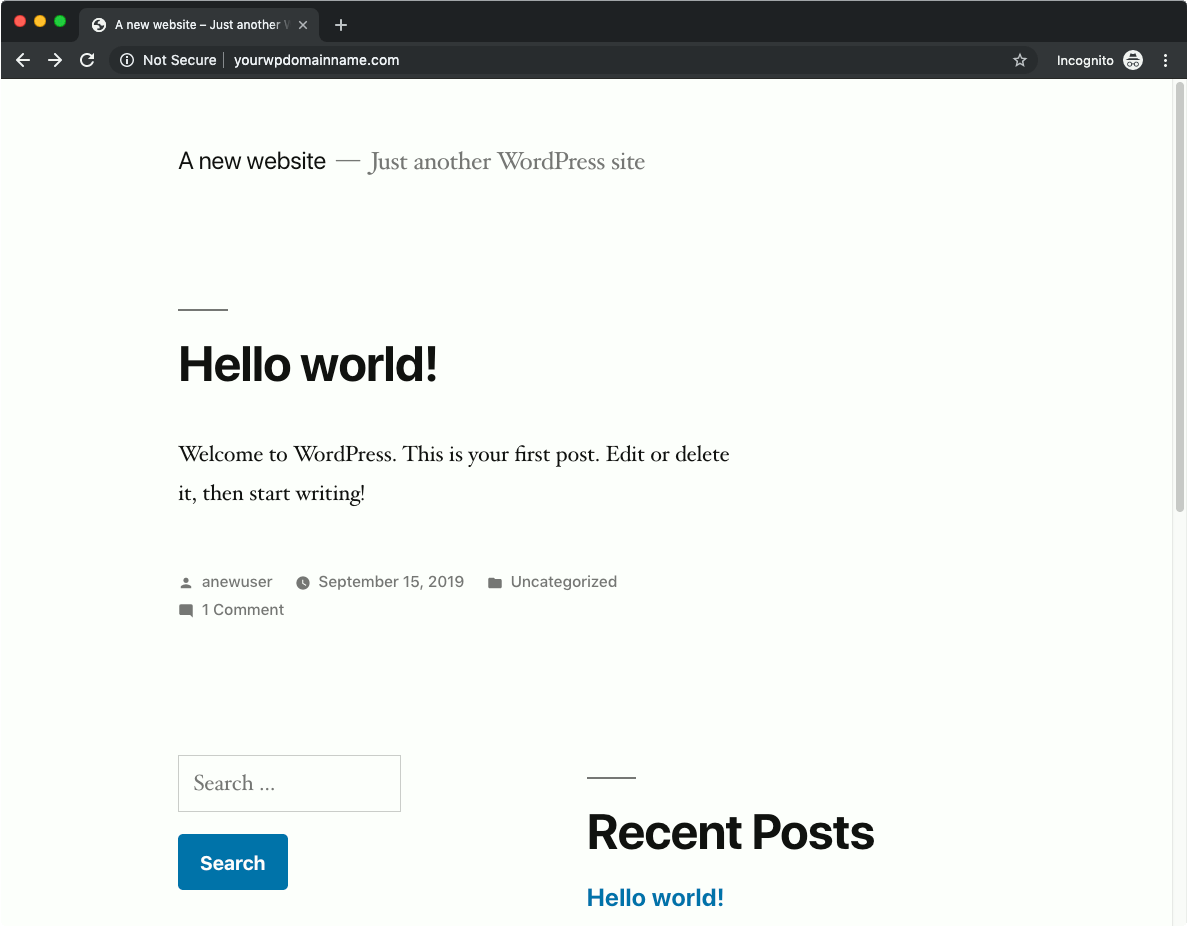
At this point in time, you should be able to see a default post with a default comment when you access the home page of your WordPress site:
If you are keeping your WordPress website within your own home network, you are done with setting up your WordPress website on your Raspberry Pi.
However, if you are serving your WordPress website on the Internet, you will want to configure Nginx to serve your site with HTTPS.
Let's Encrypt your Raspberry Pi WordPress site with a browser-trusted SSL/TLS certificate
With Let's Encrypt, you can serve your Raspberry Pi WordPress site over HTTPS with a free browser-trusted SSL/TLS certificate.
Since Google encourages securing website with HTTPS for better user experience and Let's Encrypt gives us free browser-trusted SSL/TLS certificates, let's proceed with securing your Raspberry Pi WordPress website.
Installing Certbot on Raspbian Buster Lite for obtaining Let’s Encrypt’s browser-trusted certificates
In order to use Let's Encrypt facilities, we will need a ACME client to help us get the SSL artefacts from Let's Encrypt. Therefore, install Certbot on Raspbian Buster Lite for obtaining Let’s Encrypt’s browser-trusted certificates.
Configuring Nginx to facilitate Certbot in acquiring the SSL certificate for your domain
Once you have installed Certbot on Raspbian Buster Lite, configure Nginx to facilitate Certbot in acquiring the SSL certificate for your domain.
Given that, open up yourwpdomainname.com.conf again:
sudo nano /etc/nginx/sites-enabled/yourwpdomainname.com.conf
Once nano loads up your configuration file, add in the following location block:
location ~ /.well-known {
        allow all;
}
inside the server block. After you do so, your configuration file should look like this:
server {
        listen   80;
        ## Your website name goes here.
        server_name yourwpdomainname.com  www.yourwpdomainname.com;
        root /var/www/yourwpdomainname.com;
        ## This should be in your http block and if it is, it's not needed here.
        index index.php;

        location = /favicon.ico {
                log_not_found off;
                access_log off;
        }

        location = /robots.txt {
                allow all;
                log_not_found off;
                access_log off;
        }

        location ~ /.well-known {
                allow all;
        }

        location / {
                try_files $uri $uri/ /index.php?$args;
        }

        location ~ \.php$ {
                include fastcgi.conf;
                fastcgi_intercept_errors on;
                fastcgi_pass local_php;
                fastcgi_buffers 16 16k;
                fastcgi_buffer_size 32k;
        }

        location ~* \.(js|css|png|jpg|jpeg|gif|ico)$ {
                expires max;
                log_not_found off;
        }
}
Once you are done with the changes, press Ctrl-X, Y and Enter to save the changes. This set of changes allow Nginx to respond to HTTP requests made by Let's Encrypt servers to confirm that your Certbot is running on the server that serves content for your domain.
Restart your Nginx server so that it takes the new configuration changes:
sudo systemctl restart nginx.service
Using Certbot to get Let's Encrypt to issue browser-trusted SSL certificate for your domain
After Nginx is ready to facilitate Certbot in acquiring the SSL certificate artefacts, run the following command to acquire them:
sudo certbot certonly -a webroot --webroot-path=/var/www/yourwpdomainname.com -d yourwpdomainname.com -d www.yourwpdomainname.com
Generating a strong Diffie-Hellman group for your website
Once Certbot had fetched the SSL certificate artefacts for your domain, generate a Diffie-Hellman group for Nginx to use for exchanging cryptographic keys with its clients:
sudo openssl dhparam -out /etc/ssl/certs/dhparam.pem 2048
Updating the Nginx configurations for serving HTTPS for your Raspberry Pi WordPress site
At this point in time, you will have the necessary artefacts for Nginx to serve your site over HTTPS. Therefore, update the Nginx configurations to use those artefacts for serving your WordPress site over HTTPS.
Given that, open up yourwpdomainname.com.conf again:
server {
    listen 80;
    server_name  yourwpdomainname.com www.yourwpdomainname.com;
    return 301 https://$host$request_uri;
}

server {
        ssl on;
        ssl_certificate /etc/letsencrypt/live/yourwpdomainname.com/fullchain.pem;
        ssl_certificate_key /etc/letsencrypt/live/yourwpdomainname.com/privkey.pem;
        ssl_protocols TLSv1 TLSv1.1 TLSv1.2;
        ssl_prefer_server_ciphers on;
        ssl_dhparam /etc/ssl/certs/dhparam.pem;
        ssl_ciphers 'ECDHE-RSA-AES128-GCM-SHA256:ECDHE-ECDSA-AES128-GCM-SHA256:ECDHE-RSA-AES256-GCM-SHA384:ECDHE-ECDSA-AES256-GCM-SHA384:DHE-RSA-AES128-GCM-SHA256:DHE-DSS-AES128-GCM-SHA256:kEDH+AESGCM:ECDHE-RSA-AES128-SHA256:ECDHE-ECDSA-AES128-SHA256:ECDHE-RSA-AES128-SHA:ECDHE-ECDSA-AES128-SHA:ECDHE-RSA-AES256-SHA384:ECDHE-ECDSA-AES256-SHA384:ECDHE-RSA-AES256-SHA:ECDHE-ECDSA-AES256-SHA:DHE-RSA-AES128-SHA256:DHE-RSA-AES128-SHA:DHE-DSS-AES128-SHA256:DHE-RSA-AES256-SHA256:DHE-DSS-AES256-SHA:DHE-RSA-AES256-SHA:AES128-GCM-SHA256:AES256-GCM-SHA384:AES128-SHA256:AES256-SHA256:AES128-SHA:AES256-SHA:AES:CAMELLIA:DES-CBC3-SHA:!aNULL:!eNULL:!EXPORT:!DES:!RC4:!MD5:!PSK:!aECDH:!EDH-DSS-DES-CBC3-SHA:!EDH-RSA-DES-CBC3-SHA:!KRB5-DES-CBC3-SHA';
        ssl_session_timeout 1d;
        ssl_session_cache shared:SSL:50m;
        ssl_stapling on;
        ssl_stapling_verify on;
        add_header Strict-Transport-Security max-age=15768000;

        listen   443;

        server_name yourwpdomainname.com  www.yourwpdomainname.com;
        root /var/www/yourwpdomainname.com;
        ## This should be in your http block and if it is, it's not needed here.
        index index.php;

        location ~ /.well-known {
                allow all;
        }

        location = /favicon.ico {
                log_not_found off;
                access_log off;
        }

        location = /robots.txt {
                allow all;
                log_not_found off;
                access_log off;
        }

        location / {
                try_files $uri $uri/ /index.php?$args;
        }

        location ~ \.php$ {
                include fastcgi.conf;
                fastcgi_intercept_errors on;
                fastcgi_pass local_php;
                fastcgi_buffers 16 16k;
                fastcgi_buffer_size 32k;
        }

        location ~* \.(js|css|png|jpg|jpeg|gif|ico)$ {
                expires max;
                log_not_found off;
        }
}
Once you had done so, press Ctrl-X, Y and Enter to save the changes.
Restart your Nginx server to take the new configurations:
sudo systemctl restart nginx.service
When you visit your WordPress website again, you will notice the lock icon in the address bar:
![]()
This meant that your WordPress website is served over HTTPS with a browser-trusted certificate.
Increasing file upload limit
Since the default file upload size limit is slightly less than 1 Megabyte for Nginx and 2 Megabytes for PHP FPM 7, you can only upload slightly less than 1 Megabyte of content to my Raspberry Pi WordPress site.
When you wish to tweak the file upload limit, look at how to configure Nginx and PHP 7 stack in Linux to increase or decrease file upload size limit.
You are now able to host a WordPress website on your Raspberry Pi with HTTPS
Congratulations for reaching till the end of the post. It have been quite a ride for you.
At this point in time, as long as you do not switch off your Internet and your Pi, your WordPress website will be accessible from the Internet.
If you find this guide useful, feel free to share it with others.
Wishing you all the best with your WordPress website!