How to setup Raspbian Stretch Lite with SSH server enabled on your microSD card
The first step of starting a Raspberry Pi project is to setup a operating system of your choice on the microSD card for managing your Raspberry Pi hardware and software resources, as well as, providing the common services for the computer programs that you are going to run.
The Raspbian Stretch Lite operating system is a light-weight and well supported operating system for Raspberry Pi. Therefore, it is one operating system that you might want to consider as the operating system for your next Raspberry Pi project.
This post serves as a guide to setting up Raspbian Stretch Lite on your microSD card with SSH server enabled.
Prerequisite hardware to install operating system onto the microSD
An operating system is required to be installed onto a microSD card in order to run Raspberry Pi 3. Hence, we will need to have a computer with a SD card reader. If your computer does not come with a SD card reader, you have to get one.
Downloading a copy of Raspbian Stretch Lite for your Raspberry Pi 3
Once you had gathered all the necessary hardware, proceed to download a version of the Raspbian Stretch Lite operating system for your Raspberry Pi 3. As of this writing, the one that was available was dated 13th March 2018:
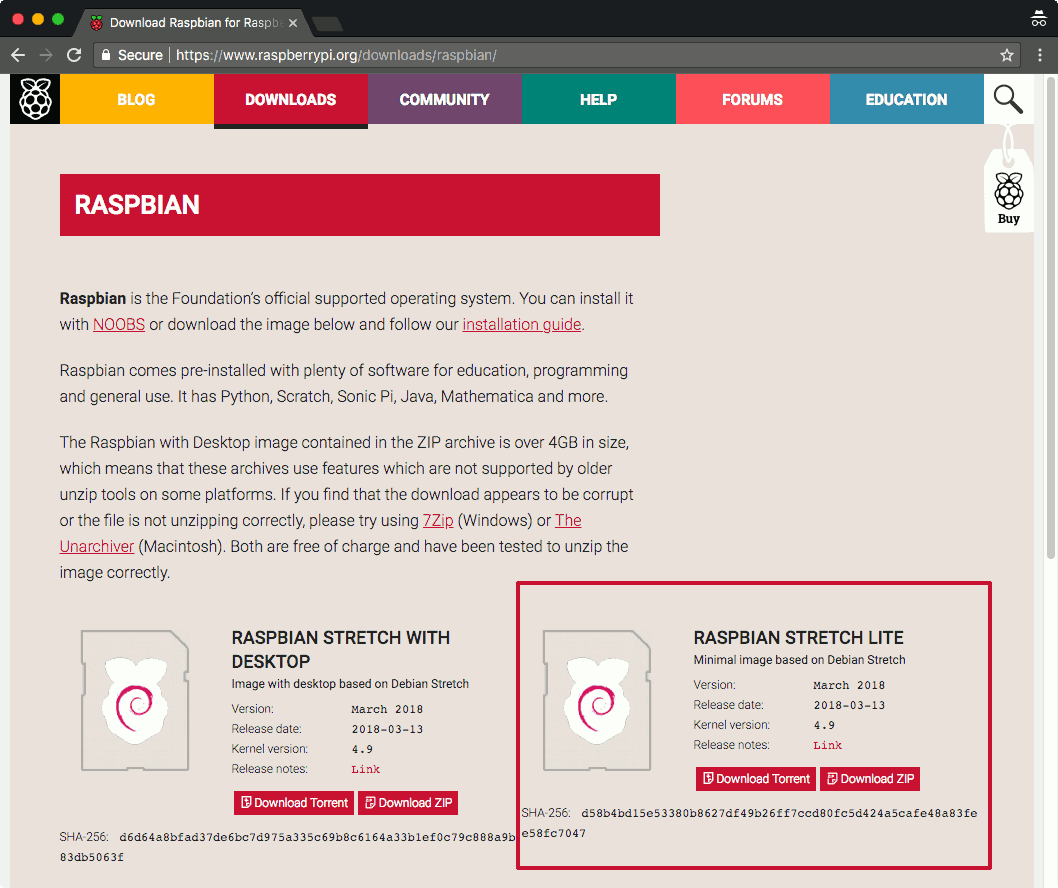
Click on the Download Zip button for Raspbian Stretch Lite and save the zip file onto your file system.
Installing Raspbian Stretch Lite on the microSD card
After your browser had downloaded the .zip file successfully, extract the .img file from the .zip file. The .img file is the operating system image that you will use for installing Raspbian Stretch Lite onto your microSD card.
Typically, I use Etcher on my MacBook Pro to install operating system images onto microSD cards.
If you are using a windows machine, you can use Win32DiskImager to install the operating system for your Raspberry Pi 3.
If you are using a Linux desktop, you should be able to use Etcher to install the operating system for your Raspberry Pi 3.
Enabling SSH server on Raspbian Stretch Lite first boot
Although there are different ways to enable SSH server on Raspbian Stretch Lite, the best way is to enable on first boot. Given that, we do not have to find a spare keyboard and monitor in order to configure Raspbian Stretch Lite after it had booted up for the first time.
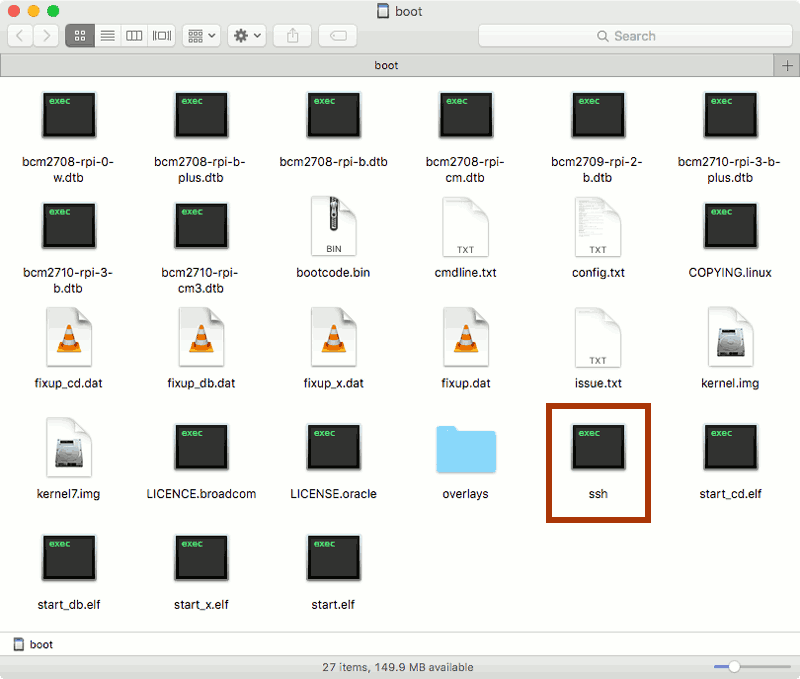
In order to enable SSH server on first boot, create a file named "ssh" in the boot partition of the microSD card to ensure that the SSH server runs after the first boot:
Next steps
Once you had completed the steps mentioned in this post, you will be able to use the microSD for powering your Raspberry Pi. You will also be able to SSH into your Raspberry Pi from your computer when it is connected to the same network as your computer. It is recommended that you perform these set of configurations on the first run of your Raspbian Stretch Lite.
If you had arrived to this page without an idea on what to do with your Raspberry Pi, you may want to look at some of the projects that you can build on top of a Raspbian Stretch Lite operating system.