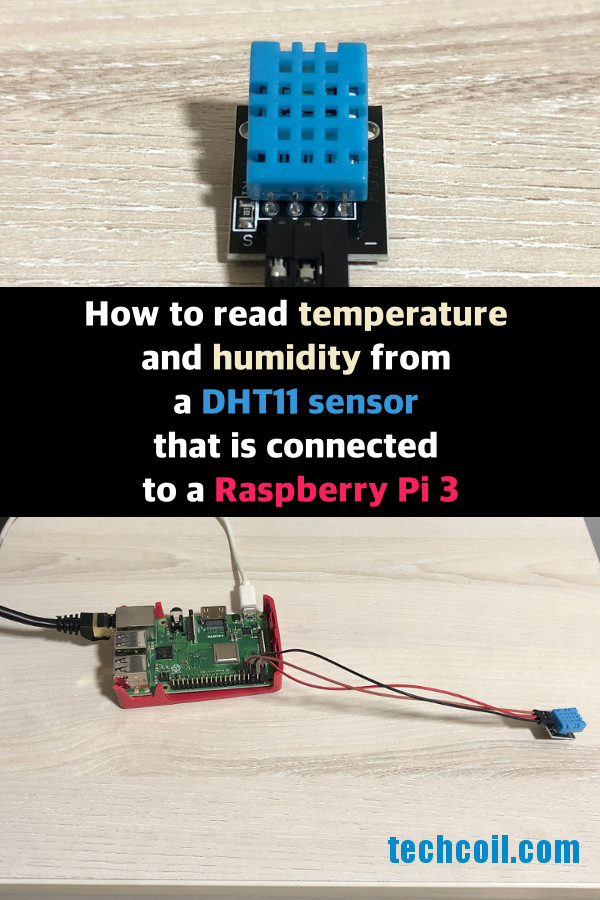
How to read temperature and humidity from a DHT11 sensor that is connected to a Raspberry Pi 3
I had always wanted to measure the temperature and humidity of the environment where my herbs are grown at.
Since I had a few pieces of Raspberry Pi 3 lying around the house, I decided to use one of them to measure the temperature and humidity of the area of the house where my herbs are.
An additional sensor is required to measure the temperature and humidity of the environment. Therefore, I went to AliExpress and got a DHT11 sensor. By connecting a DHT11 sensor to my Raspberry Pi 3, I can give it the ability to read the temperature and humidity of its environment.
Given these points, I created this post to show how to read temperature and humidity from a DHT11 sensor that is connected to a Raspberry Pi 3.
In order for us to check the temperature and humidity from the DHT11 sensor, we will build a simple Flask application that returns the temperature and humidity values as HTTP responses to HTTP clients.
Recommended bill of materials
In case you need it, here are the things that you can buy for a Raspberry Pi 3 project like this one:
From Amazon
- CanaKit Raspberry Pi 3 B+ (B Plus) with 2.5A Power Supply (UL Listed)
- Sandisk Ultra 32GB Micro SDHC UHS-I Card with Adapter
- Official Raspberry Pi 3 Case - Red/White (Optional)
- DHT11 Temperature and Relative Humidity Sensor Module for Arduino / Raspberry Pi
- 40PCS 20cm 1P-1P Female To Female Jumper Wire Dupont Cable
Identifying the pins of your DHT11 sensor
Let's have a closer look at the DHT11 sensor that I had gotten from Aliexpress:
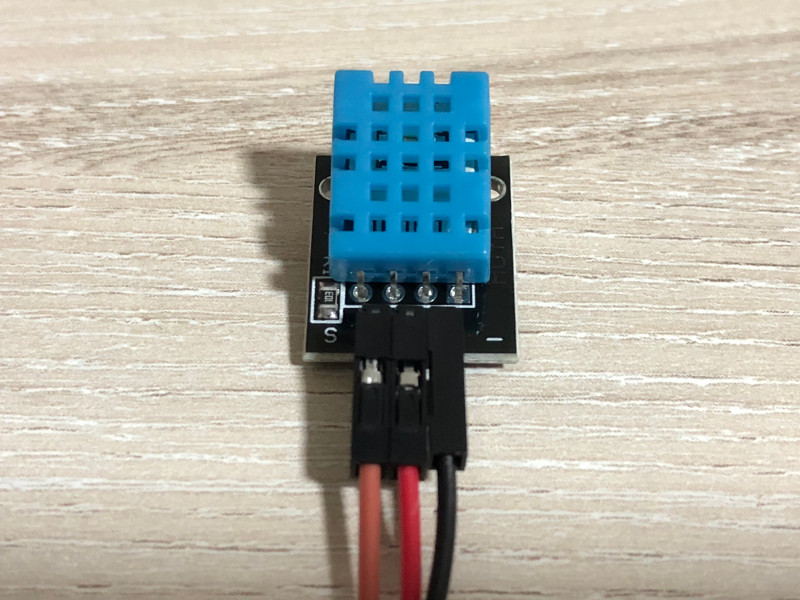
Notice that the leftmost pin is marked with a s and the rightmost is marked with a -. In this case, the s stands for Signal and the - stands for ground. Therefore, the leftmost pin should be connected to a GPIO pin, the middle pin should be connected to a 5v pin and the rightmost pin should be connected to a ground pin.
Let's look at another type of pin arrangement that is evident on the Refaxi DHT11 Digital Module Humidity Temperature Sensor:
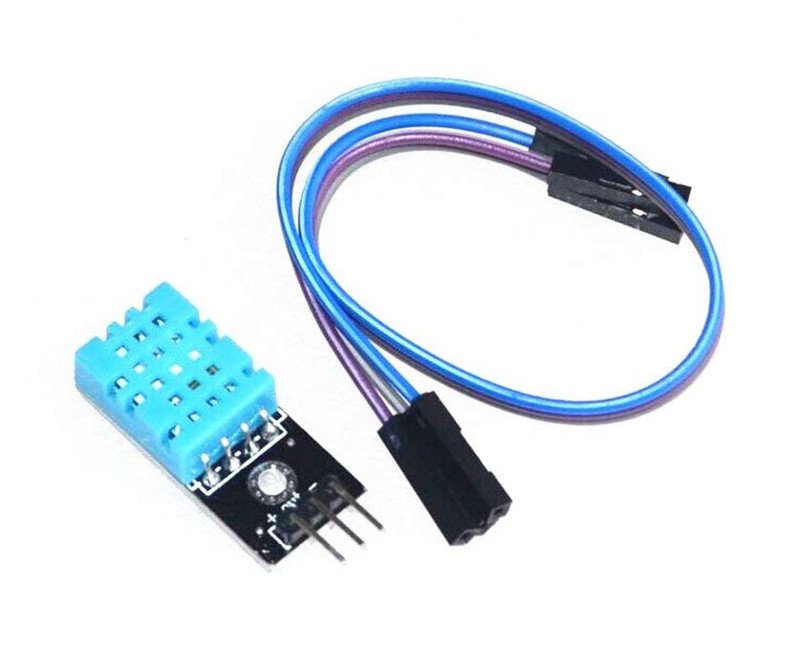

In this case, the leftmost pin is marked with a + and the rightmost is marked with a -. Therefore, the leftmost pin should be connected to a 5v pin, the middle pin should be connected to a GPIO pin and the rightmost pin should be connected to a ground pin.
This tutorial will be based on the DHT11 sensor that I had gotten from Aliexpress.
Connect your Raspberry Pi 3 to your DHT11 sensor
Let's have a look at the DHT11 sensor that I gotten from Aliexpress again:


Notice that I had connected three female to female jumper wires to the pins. The brown one is for the Raspberry Pi 3 to read from, the red one is to supply 5v to the DHT11 sensor and the black one is for grounding.
Once I had connected the female to female jumper wires to the DHT11 sensor, I proceeded to connect the other ends of the wires to the GPIO pins on a Raspberry Pi 3:
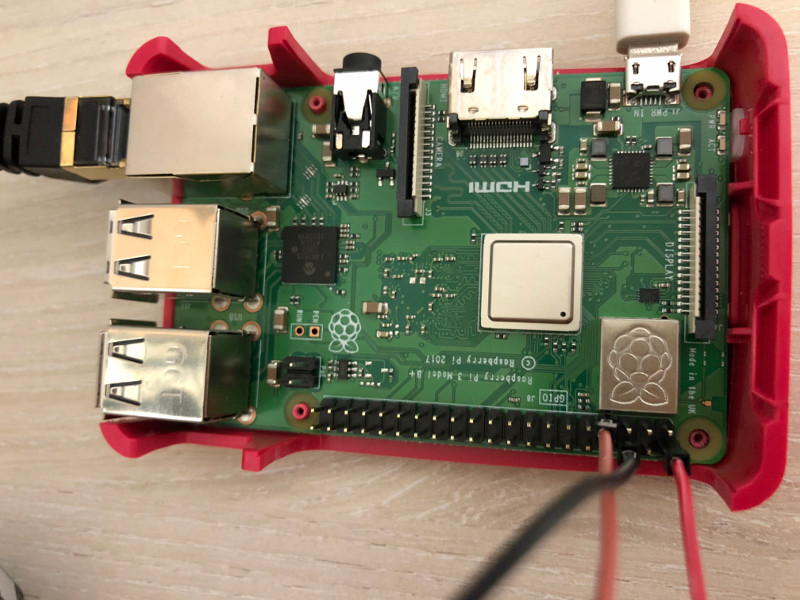

The signal pin of the DHT11 is connected to GPIO 4, the middle pin is connected to a 5v pin and the rightmost pin is connected to a ground pin on the Raspberry Pi 3.
Putting everything in an image, the entire setup for this tutorial looks like this:
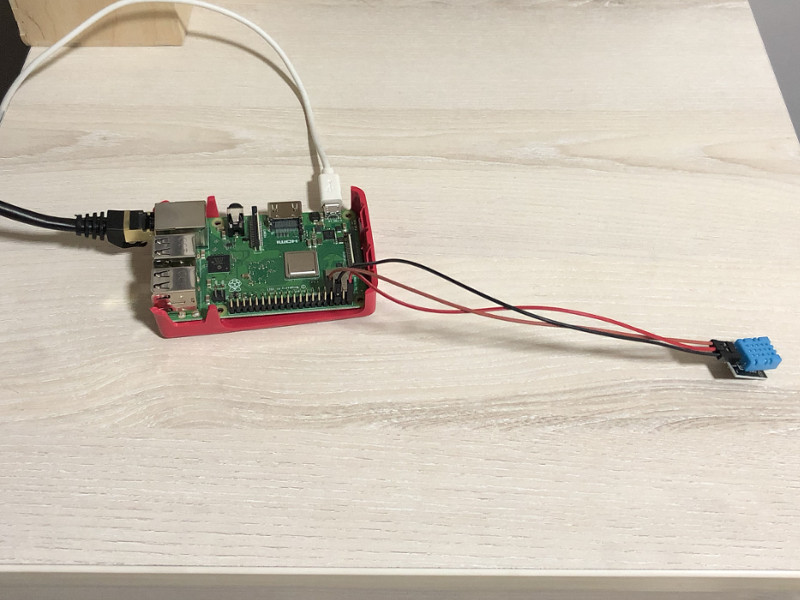

Your setup should look similar to mine. If you want to try to connect your DHT11 sensor to other GPIO pins, you can checkout these GPIO Pinout resources to help you do so.
Setting up Raspbian Stretch Lite with SSH server enabled on your microSD card
Once you had connected your DHT11 sensor to your Raspberry Pi 3, proceed to setup Raspbian Stretch Lite with SSH server enabled on your microSD card. Doing so will allow you to SSH into your Raspbian Stretch Lite to perform further configurations in this post.
Starting the Raspbian Stretch Lite operating system
Next, connect one end of the RJ45 cable to the RJ45 port on the Raspberry Pi 3 board and the other end of the cable to one of the switch port of your home router. After that, connect the micro USB power supply to the Raspberry Pi 3 board and a wall socket. Turn on the power socket to supply power to the Raspberry Pi 3 board.
Getting into Raspbian Stretch Lite and updating it
After you had started your Raspbian Stretch Lite, SSH into your Raspberry Pi 3 with a computer that is connected to the same network as your Raspberry Pi 3.
Suppose your router had given your Raspberry Pi 3 192.168.1.123 as the IP address, you will run the following command from your terminal program to get into Raspbian Stretch Lite:
ssh pi@192.168.1.123
When Raspbian Stretch Lite prompts for a password, enter raspberry.
Once you had gotten into Raspbian Stretch Lite, run the following command to update it:
sudo apt-get update
Installing Virtualenv on Raspbian Stretch Lite
Virtualenv is a tool that allows us to create isolated environments in the same machine. This is useful when you have to run multiple applications with conflicting python dependencies on your Raspberry Pi 3.
Therefore to be able to use the same Raspberry Pi 3 to try out other projects, we will be using Virtualenv to create an environment to run our Python 3 Flask application.
To install Virtualenv, run the following command:
sudo apt-get install virtualenv -y
Installing Supervisor
When we want our Python 3 Flask application to start at boot time and constantly listen for HTTP requests to serve, we can use Supervisor to help us monitor and control the process that will run our Python 3 Flask application.
In order to install Supervisor, we need to run the following command:
sudo apt-get install supervisor -y
Coding a Python 3 Flask application that read from the DHT11 sensor on a Raspberry Pi 3
Once we had installed all the needed components on our Raspbian Stretch Lite, we can proceed to create a simple Python 3 Flask application.
To keep things simple, let's create a Python 3 Flask application with a route for the root endpoint.
Whenever a HTTP request is received at that endpoint, the application will read the humidity and temperature from the DHT11 sensor and create a HTTP response containing those values back to the client.
Given these points, let's use nano to create a Python 3 script at /home/pi/run.py:
nano /home/pi/run.py
Once the editor starts, copy the following Python 3 codes into the editor:
from flask import Flask, jsonify
import Adafruit_DHT

app = Flask(__name__)

@app.route('/')
def get_humidity_and_temperature_from_DHT11():
    humidity, temperature = Adafruit_DHT.read_retry(Adafruit_DHT.DHT11, 4)
    return jsonify({'humidity': humidity, 'temperature': temperature})

app.run(host='0.0.0.0', port='12345')
After that, type Ctrl-X and then Y to save the file.
In the Python 3 script, we first import the libraries that we are going to use. After that, we create an instance of Flask for building the web server.
Indicating the function to call for HTTP GET requests made to the root endpoint
After that, we decorate a function, get_humidity_and_temperature_from_DHT11, with @app.route('/') to indicate to Flask that get_humidity_and_temperature_from_DHT11 should be called for HTTP GET requests made to the root endpoint.
Getting the humidity and temperature values from the DHT11 sensor
Inside get_humidity_and_temperature_from_DHT11, we use the Adafruit_DHT library to read the humidity and temperature from a DHT11 sensor at GPIO 4.
Lastly, we return the humidity and temperature values as a JSON response.
Starting the Flask web server to listen at port 12345
The last line of the Python 3 script starts the Flask web server and makes it listen for HTTP requests at port 12345.
Creating a virtual environment to run your Python 3 Flask application
Next, let's create a virtual environment to run the Python 3 Flask application. In order to do so, we will run the following command:
virtualenv -p python3 /home/pi/rpi-dht11-flask-env
After that, we get into the virtual environment by running the following command:
source /home/pi/rpi-dht11-flask-env/bin/activate
Once you gotten into the virtual environment, run the following commands to install the Python dependencies for the Python 3 Flask application:
pip install Flask==1.0.2 Adafruit-DHT==1.3.4
After pip finishes the installations, you will be able to run your Python 3 Flask application within the virtual environment.
Testing your Python 3 Flask application
Once you had installed the Python dependencies for your Python 3 Flask application, you can run it with the following commands:
cd /home/pi
python run.py
You will notice that after you ran the commands, the terminal pauses. This meant that your Flask application is ready to serve HTTP GET requests to the root endpoint.
Next, use a web browser from your work computer to access the IP address of your Raspberry Pi 3. For example, if the IP address of your Raspberry Pi 3 is 192.168.1.123, you will type in http://192.168.1.123:12345 into the location bar of your web browser.
After you had done so, your browser will receive a JSON object that tells you the humidity and temperature of the environment that your Raspberry Pi 3 is located at.
Running the Python 3 Flask application as a background process when your Raspberry Pi 3 powers on
When you want your Python 3 Flask application to run whenever your Raspberry Pi 3 is turned on, you can depend on Supervisor. This section will show how to get Supervisor to run your Python 3 Flask application whenever your Raspberry Pi 3 is turned on.
Firstly, let's create a shell script that will activate the virtual environment that we had created earlier and run our Python 3 Flask application within that virtual environment.
To do so, we use nano to create a shell script at /home/pi/run.sh
nano /home/pi/run.sh
Once the editor loads, write the following content into the editor:
!#/bin/bash
source ./rpi-dht11-flask-env/bin/activate
python run.py
deactivate
After you had included the content, type Ctrl-X and then Y to save the file.
Afterwards, make the shell script executable by running the following command:
sudo chmod 744 /home/pi/run.sh
To get Supervisor to start our Python 3 Flask application so that we can check the humidity and temperature with our Raspberry Pi 3, we first create a configuration file at /etc/supervisor/conf.d/rpi-dht11-flask-app.conf:
sudo nano /etc/supervisor/conf.d/rpi-dht11-flask-app.conf
After nano loads, copy the following configuration codes into the editor:
[program:rpi-dht11-flask-app]
directory=/home/pi
command=/bin/bash -E -c ./run.sh
autostart=true
autorestart=true
stopsignal=INT
stopasgroup=true
killasgroup=true
user=pi
Once you had written the configurations into the editor, run the following command to restart Supervisor:
sudo systemctl restart supervisor.service
When Supervisor runs again, it will take the configurations that you had created earlier and run your Python 3 Flask application.
With that, whenever you power on your Raspberry Pi 3, you will be able check the humidity and temperature with your Raspberry Pi 3.
