Quick References

As a constant learner, I get to touch upon many ideas in different areas. This category is for me to capture those ideas which I felt people may reference to get ahead of their tasks. Most of the time, I do come back to this section of my blog to remember what I had learnt in the past.

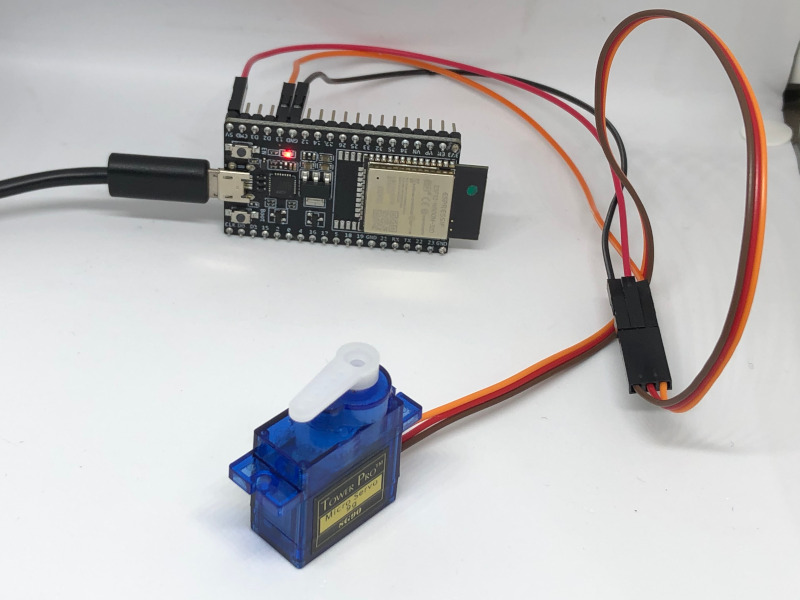
How to setup MicroPython on your ESP32 development board to run Python applications

When my friend Youssef shared a link to MicroPython, I kept it at the back of my mind. Since I had found some time to sharpen my saw, I decided to take a look at it.

If I get familiar MicroPython, then I can perform machine learning magic with an AIOT board like Sipeed Maixduino Kit with greater ease.

Given that in mind, here are the steps that I took to setup MicroPython on my ESP32 development board to kickstart my learning.

In case you wish to setup MicroPython on your ESP32 development board to run Python applications, read on to find out more.

How to terminate screen terminal sessions cleanly on macOS

So how do you communicate with a serial device that is connected to your Mac?

In this situation, you can use the screen command on your Mac to do so.

After you terminate the serial session with Ctrl+A+D, you may find that the serial device is still being hogged by the screen command.

When you try to access the device again, you may encounter a Resource busy error message.

For example, after I detached my screen terminal from /dev/cu.SLAB_USBtoUART, I will get the following message if I try to connect to the same device again:

Cannot open line ‘/dev/cu.SLAB_USBtoUART’ for R/W: Resource busy

Given these points, this post shows how we can terminate screen terminal sessions cleanly on macOS.

How to send a HTTP Basic Authentication request from your ESP32 development board

When you connect your ESP32 board to the internet, you may need to send HTTP Basic Authentication requests.

In this situation, we can rely on the HttpClient library from the Arduino core for ESP32.

Given that, this post shows how you can send a HTTP Basic Authentication request from your ESP32 development board.

How to read RFID tags from SparkFun RFID USB Reader with Python 3

When you have an RFID starter kit from Sparkfun, you will be able to read RFID tags through serial.

Previously, we saw how to use an ESP32 board to read RFID tags from a SparkFun RFID USB Reader.

Given that, I was able to build a ESP32 prototype to scan tag ids from RFID cards.

In order for that ESP32 prototype to recognise what each of my tag card represents, I need to label the ids. Whenever my ESP32 prototype gets a tag id, it will query a tag catalogue to see what that tag id represent.

Since it is easier to label the tag cards from a computer, I built a Python 3 application to read the RFID tags from the SparkFun RFID reader.

So how we can read RFID tags from SparkFun RFID USB Reader with Python 3?

If you are looking for a way to read RFID tags from SparkFun RFID USB Reader with Python 3, then this post is for you.

How to control a servo motor with an ESP32 development board

When I try to reuse the Ardunio Sketch to control a servo motor with a ESP8266, I encountered the following error during compile time:

WARNING: library Servo claims to run on (avr, sam, samd, nrf52, stm32f4) architecture(s) and may be incompatible with your current board which runs on (esp32) architecture(s).
In file included from /Users/i309663/Documents/learning/Arduino-sketches/sketch_arduino_servo/sketch_arduino_servo.ino:1:0:
/Users/i309663/Arduino.1.8.7/Arduino.app/Contents/Java/libraries/Servo/src/Servo.h:73:2: error: #error “This library only supports boards with an AVR, SAM, SAMD, NRF52 or STM32F4 processor.”
#error “This library only supports boards with an AVR, SAM, SAMD, NRF52 or STM32F4 processor.”
^
exit status 1
Error compiling for board ESP32 Dev Module.

Therefore, I had to find another way to control my SG90 servo motor with an ESP32 development board.

Given that, this post shows how to control a servo motor with an ESP32 development board.

ESP32 devkit-c v4 connected to sg90 servo motor

How to use an ESP32 development board to read from a VCNL4010 Proximity/Light sensor

If you have a Proximity/Light sensor, you will be able to detect how close an object is. When your range of detection is within 200mm, you can use the VCNL4010 Proximity/Light sensor.

Given that characteristic, you can use the VCNL4010 Proximity/Light sensor as a contactless switch to trigger some action.

For example, you can use it in a soap dispenser that will dispense some soap when a palm is near the nozzle.

In case you need it, this is how to use an ESP32 development board to read from a VCNL4010 Proximity/Light sensor.

VCNL4010 Proximity/Light sensor

How to use an ESP32 development board to read RFID tags from a SparkFun RFID USB Reader

When you have an RFID starter kit from Sparkfun, you will be able to read RFID tags through a serial connection.

Although the SparkFun RFID USB Reader comes with a USB port, you can also read RFID tags with an ESP32 development board.

In case you need it, this is how to use an ESP32 development board to read RFID tags from a SparkFun RFID USB Reader.

SparkFun RFID USB Reader

How to use Python 3 to convert your images to Base64 encoding

When you encode your images in Base64, your images can be transferred and saved as text.

Although there will be a 37% bloat in space requirements, it can be useful to encode images in Base64.

For example with SAP HANA XS Advanced, you can quickly build an OData service to receive images via JSON.

Given that, let’s see how we can encode an image in Base64 encoding with Python 3.

How to setup the Raspberry Pi Official 7 Inch Touch Screen with your Raspberry Pi 4 Model B

As I have noted in my review on the Raspberry Pi 4 Model B, the Pi 4B came with substantial upgrades.

Since it has faster (and more) RAM along with better graphics processing capabilities, the Pi 4B is well suited for multimedia deployments.

Given that, you may want to add the Raspberry Pi Official 7 Inch Touch Screen to your Pi 4B so that you can use it to build a kiosk.

If that’s the case, read on to see how to setup the Raspberry Pi Official 7 Inch Touch Screen with your Raspberry Pi 4B.