How to setup MicroPython on your ESP32 development board to run Python applications
When my friend Youssef shared a link to MicroPython, I kept it at the back of my mind. Since I had found some time to sharpen my saw, I decided to take a look at it.
If I get familiar MicroPython, then I can perform machine learning magic with an AIOT board like Sipeed Maixduino Kit with greater ease.
Given that in mind, here are the steps that I took to setup MicroPython on my ESP32 development board to kickstart my learning.
In case you wish to setup MicroPython on your ESP32 development board to run Python applications, read on to find out more.
Downloading a copy of MicroPython for your ESP32 development board
First and foremost, we will need to download a copy of the MicroPython binary for our ESP32 development board. Therefore, head over to MicroPython's download section for ESP32 boards. For example, I had chosen to download esp32-idf4-20200115-v1.12-68-g3032ae115.bin into the ~/micropython/images folder on my computer.
Installing a USB to UART bridge driver on your computer
In order to get the binary file onto our ESP32 development board, we will need a USB to UART driver. For example, if your development board has a CP210x chip to handle serial communication, you can install one of the CP210x USB to UART Bridge VCP Drivers from Silicon Labs. If you enable ESP32 development on your Arduino IDE, then you will have already installed the driver.
Preparing a Python environment with esptool installed
After your computer is able to communicate with your ESP32 development board, get a copy of esptool. Since a Python virtual environment helps us isolate Python dependencies for different applications, you may want to install your esptool into one of them.
Given these points, let's install our esptool into a Python 3 virtual environment. If you are using a linux or unix environment, this is how you can create a virtual environment for your Python 3 application with python3-venv in Linux or Unix. However, if you are using Windows, this is how to create a Python 3 virtual environment in Windows 10.
Since I am using a Mac to create this tutorial, I first create a Python 3 virtual environment with the following command:
python3 -m venv ~/micropython/tools-env
After the virtual environment is created, I then activate the environment within my terminal session with the following command:
source ~/micropython/tools-env/bin/activate
When the virtual environment is activated, I then install esptool with the following command:
pip install esptool
After the pip installation completes, we will be able to use the esptool by running the following command:
esptool.py
When you do so, you will see the help menu in the output.
Getting the MicroPython binary onto your ESP32 development board
At this point in time, you will have the necessary tools to get MicroPython onto your ESP32 development board.
First, erase everything from your ESP32 board's flash with the following command:
esptool.py --chip esp32 --port /dev/tty.SLAB_USBtoUART erase_flash
After the flash is erased, run the following command to put the MicroPython binary that you have downloaded onto your board:
esptool.py --chip esp32 --port /dev/tty.SLAB_USBtoUART --baud 460800 write_flash -z 0x1000 ~/micropython/images/esp32-idf4-20200115-v1.12-68-g3032ae115.bin
When the command completes, you will be able to run Python codes on your ESP32 board via MicroPython.
Verifying your MicroPython setup on your ESP32 development board
So how can we know if MicroPython is correctly installed on our ESP32 development board?
When MicroPython is correctly installed, we will be able to access the REPL over serial with a terminal emulator program.
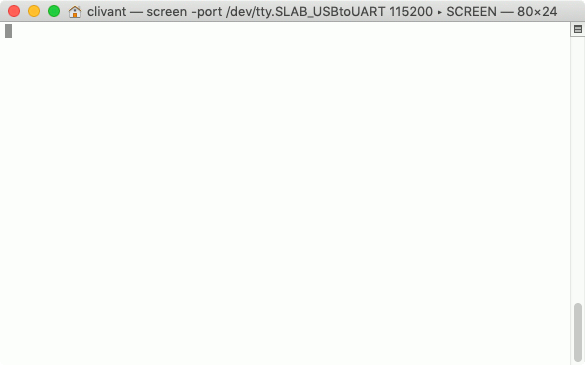
For example, you can use the screen command if you are running macOS:
screen -port /dev/tty.SLAB_USBtoUART 115200
After you ran this command, you may find a blank screen. When you see the blank screen, hit Enter and you should be able to get the REPL prompt. If you want to see the MicroPython trace, then you can press Ctrl-D to initiate a soft reboot. At this point in time, you can try running some Python codes on the REPL:
Finding out the installed modules on your MicroPython installation
If you wish to find out the modules that are available with your MicroPython installation, you can enter the following command:
help('modules')
When I do so in my MicroPython REPL, I got the following output trace:
__main__          gc                uctypes           urequests
_boot             inisetup          uerrno            uselect
_onewire          machine           uhashlib          usocket
_thread           math              uhashlib          ussl
_webrepl          micropython       uheapq            ustruct
apa106            neopixel          uio               utime
btree             network           ujson             utimeq
builtins          ntptime           umqtt/robust      uwebsocket
cmath             onewire           umqtt/simple      uzlib
dht               sys               uos               webrepl
ds18x20           uarray            upip              webrepl_setup
esp               ubinascii         upip_utarfile     websocket_helper
esp32             ubluetooth        upysh
flashbdev         ucollections      urandom
framebuf          ucryptolib        ure
Plus any modules on the filesystem
Given that, you can then check out MicroPython's libraries documentation on how to use them.
Before continuing with this post, quit your terminal emulator program and make sure that it does not lock the serial driver to your board.
If you are using screen, you can press Ctrl-A+K to kill the session terminal. If you press Ctrl-A+D instead, then you will need to terminate your screen session cleanly.
Getting Python scripts onto your ESP32 board
At this point in time, you can find boot.py when you run the following Python codes in your MicroPython REPL:
import os
os.listdir()
When you setup MicroPython on your ESP32 board, it will run boot.py on every boot, including wake-boot from deep sleep, and main.py after that.
Therefore, in order to run your own Python scripts on your ESP32 board, you need to get these two files into your ESP32 board.
Installing Remote MicroPython shell on your Python virtual environment
The Remote MicroPython shell is a useful tool to help us get our own Python scripts onto our ESP32 board. Therefore, you may want to install it into your Python environment with the following command:
pip install rshell
Using rshell to connect to your ESP32 development board
After you have installed rshell into your Python virtual environment, run the following command to connect it to your board:
rshell -p /dev/tty.SLAB_USBtoUART -b 115200
When rshell is able to connect to your MicroPython instance on your ESP32 board, you should see output similar to the following:
Using buffer-size of 32
Connecting to /dev/tty.SLAB_USBtoUART (buffer-size 32)...
Trying to connect to REPL  connected
Testing if ubinascii.unhexlify exists ... Y
Retrieving root directories ... /boot.py/
Setting time ... Jan 15, 2020 15:19:09
Evaluating board_name ... pyboard
Retrieving time epoch ... Jan 01, 2000
Welcome to rshell. Use Control-D (or the exit command) to exit rshell.
At this point in time, you will be able to use rshell to access the filesystems of your computer and your ESP32 board. Since the root folder of your ESP32 board is mapped to /pyboard, you can list its contents via the following command call:
ls /pyboard
When you do so, you will find boot.py in the output.
Copying files into your ESP32 development board via rshell
Given that the root folder of our ESP32 board is mappe to /pyboard, we can use the cp command within rshell to get files into the board.
For example, if we have ~/micropython/codes/boot.py on our host computer, we can run the following command to get it into the ESP32 board:
cp ~/micropython/codes/boot.py /pyboard/boot.py
We can also copy everything in a folder onto the ESP32:
cp ~/micropython/codes/* /pyboard/