Enabling ESP32 Development on Arduino IDE
When you want to implement a low cost IOT solution with bluetooth interface, you can consider using a ESP32 development board. In addition to the bluetooth interface, the ESP32 development board also includes a WiFi interface.
In order to run a program on the ESP32 Development Board, we will need to write our program into the flash memory of the development board. Since it is easy to write code and flash programs with Arduino IDE, it is a good tool to use with the ESP32 Development Board.
In case you need it, this post shows how to enable ESP32 development on Arduino IDE.
Getting a copy of Arduino IDE that supports addons with the Arduino Boards Manager
Firstly, ensure that your copy of Arduino IDE supports addons with the Arduino Boards Manager. When you have an Arduino IDE 1.6.4 and later, you will be ready to add the ESP32 core to your Arduino IDE. If you do not have one, download the latest Arduino IDE and install it on your computer.
Installing ESP32 core with Arduino Boards Manager
In order to enable ESP32 development on Arduino IDE, we will need to add the ESP32 core.
When your Arduino IDE had started, go to Arduino -> Preferences to open up the Preferences windows.
Next, enter https://dl.espressif.com/dl/package_esp32_index.json into the Additional Board Manager URLs textfield.
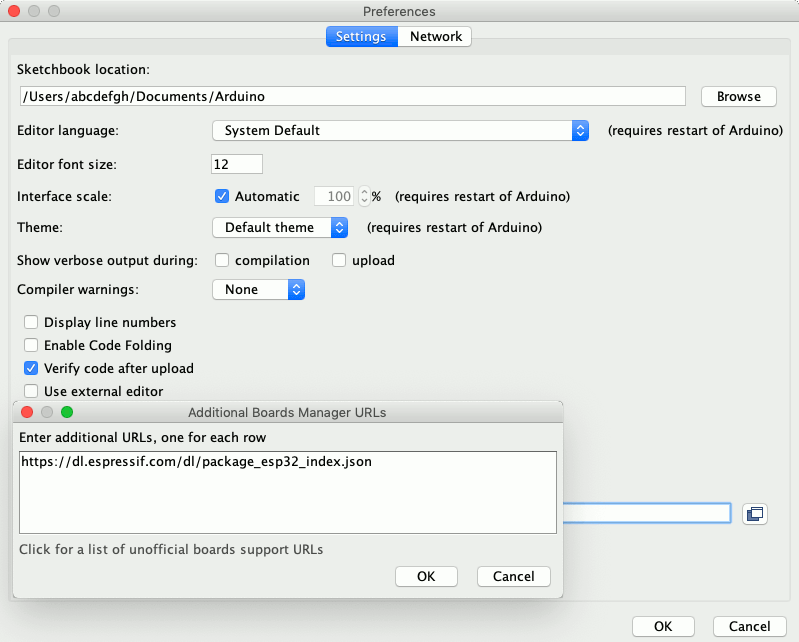
After that, press OK on the Additional Boards Manager URLs windows and OK on the Preferences windows to exit Preferences.
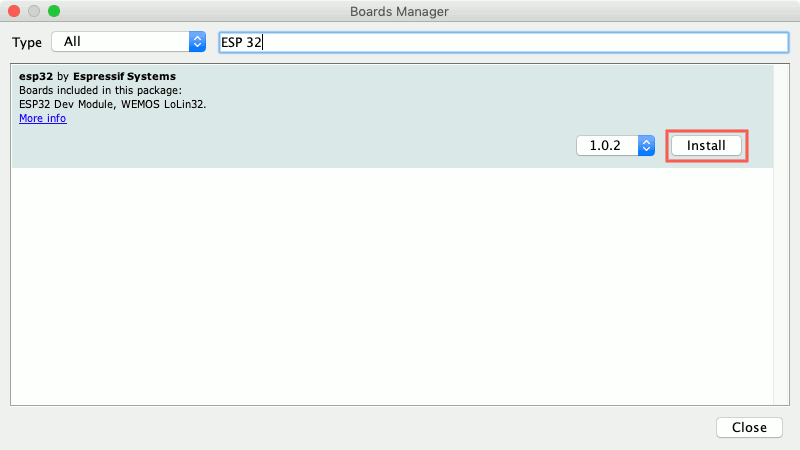
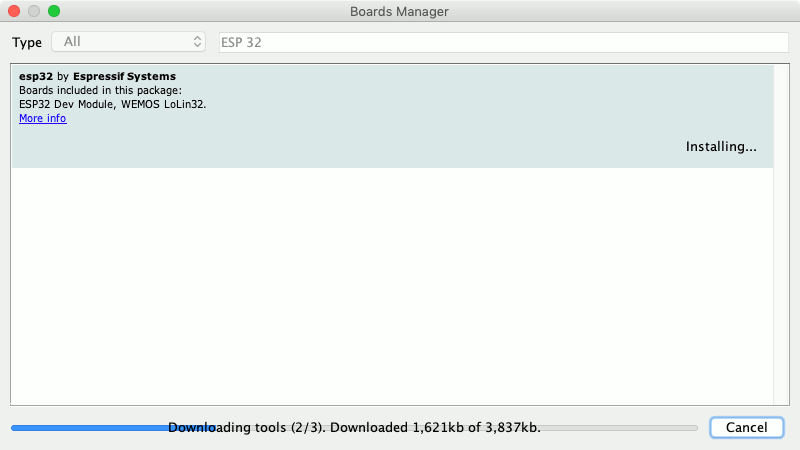
Once you had included the ESP32 core URL, go to Tools -> Boards -> Boards Manager... to open up the Boards Manager window. When the Boards Manager window appears, find ESP 32 and click Install:
After you clicked install, a progress bar appears to show the installation process:
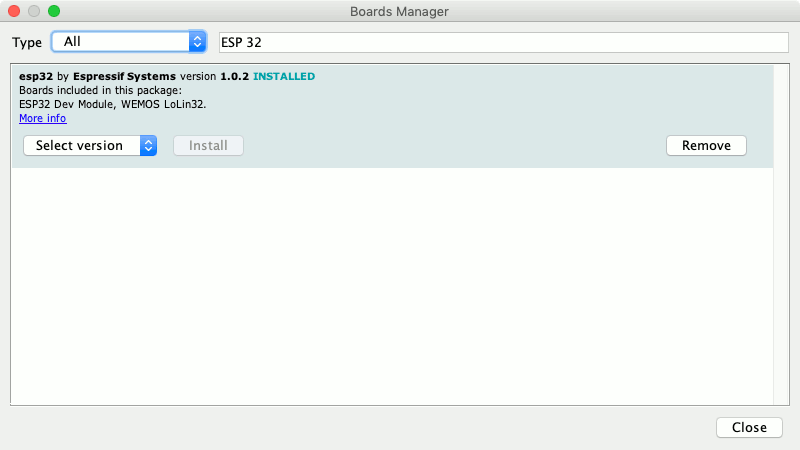
When the installation is completed, the Boards Manager will show the version of ESP 32 that had been installed on your Arduino IDE:
Installing a CP210x USB to UART Bridge VCP Driver
In order to flash your program to your ESP32 Development Board, you will also need to have CP210x USB to UART Bridge VCP Driver installed on your computer. Therefore, go to Silicon's download page for CP210x USB to UART Bridge VCP Drivers to get a copy for your computer. Follow the instructions to install the respective driver for your computer.
Verifying that you can flash a program to your ESP32 board with Arduino IDE
Once you had installed the CP210x USB to UART Bridge VCP Driver on your computer, you can proceed to verify that you can flash a program to your ESP32 board with your Arduino IDE.
Connecting your ESP32 Development Board to your computer
First, connect your ESP32 Development Board to your computer via a good microUSB cable.
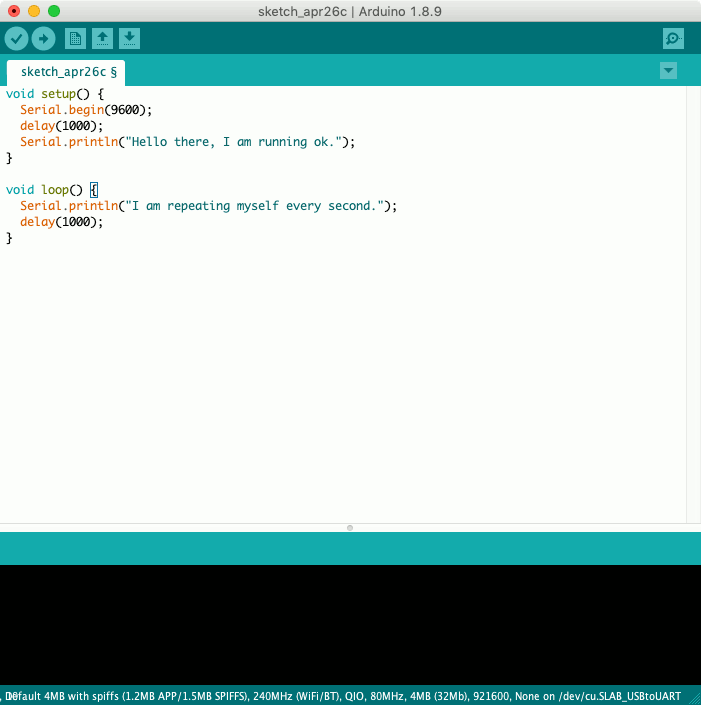
Once you had done so, copy and paste the following codes into the editor of your Arduino IDE:
void setup() {
  Serial.begin(9600);
  delay(1000);
  Serial.println("Hello there, I am running ok.");
}

void loop() {
  Serial.println("I am repeating myself every second.");
  delay(1000);
}
After you had done so, click the serial monitor button on the top right of your Arduino IDE:

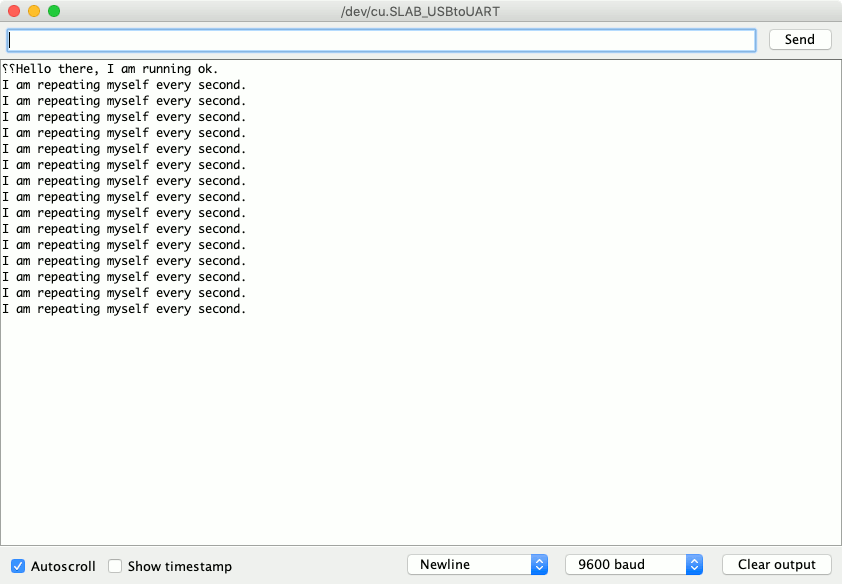
Once you had done so, you should see a window like this:
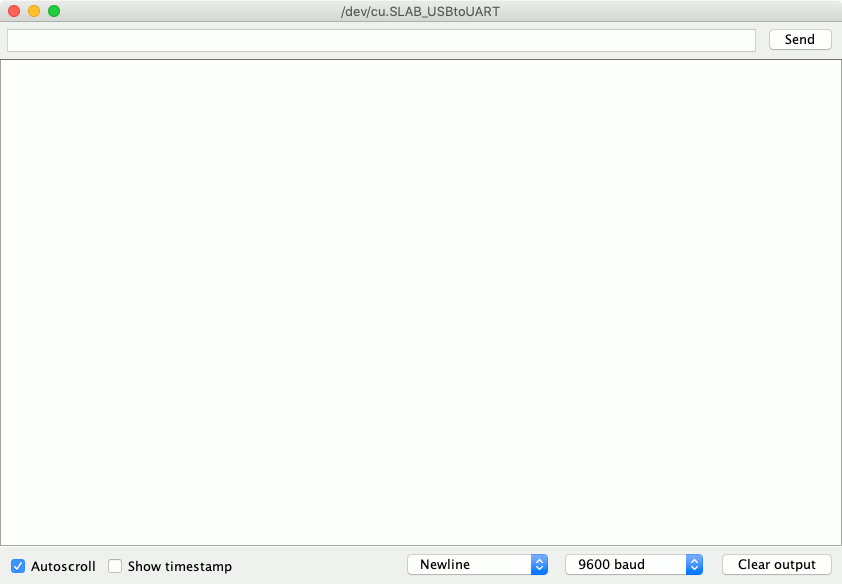
When your program runs on your board, the serial output of your program will appear here.
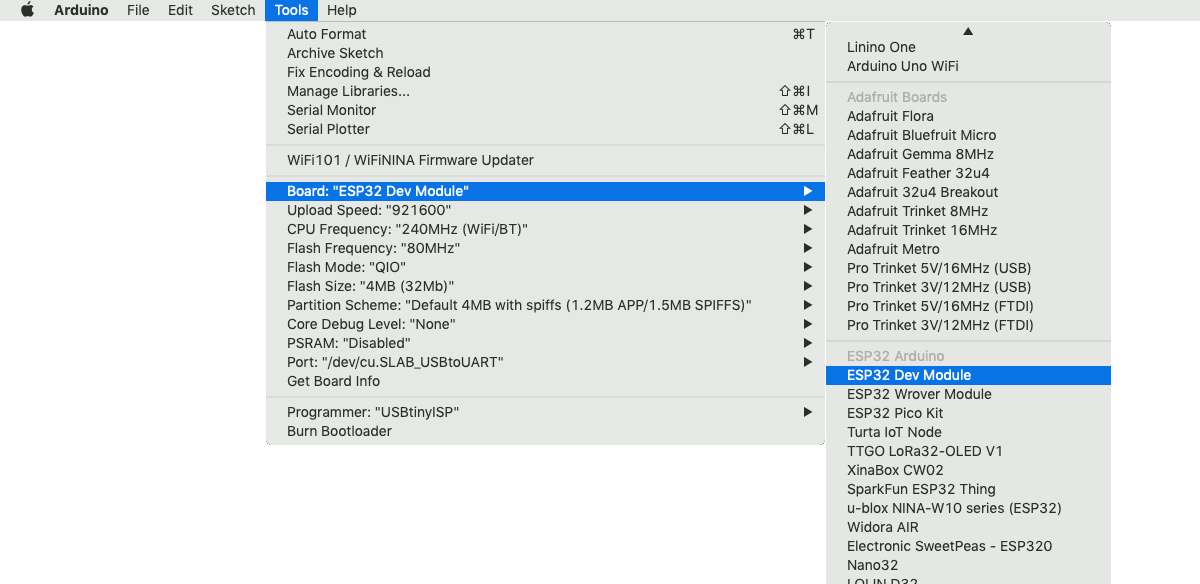
Next, click on your editor window and select ESP32 Dev Module as the development board:
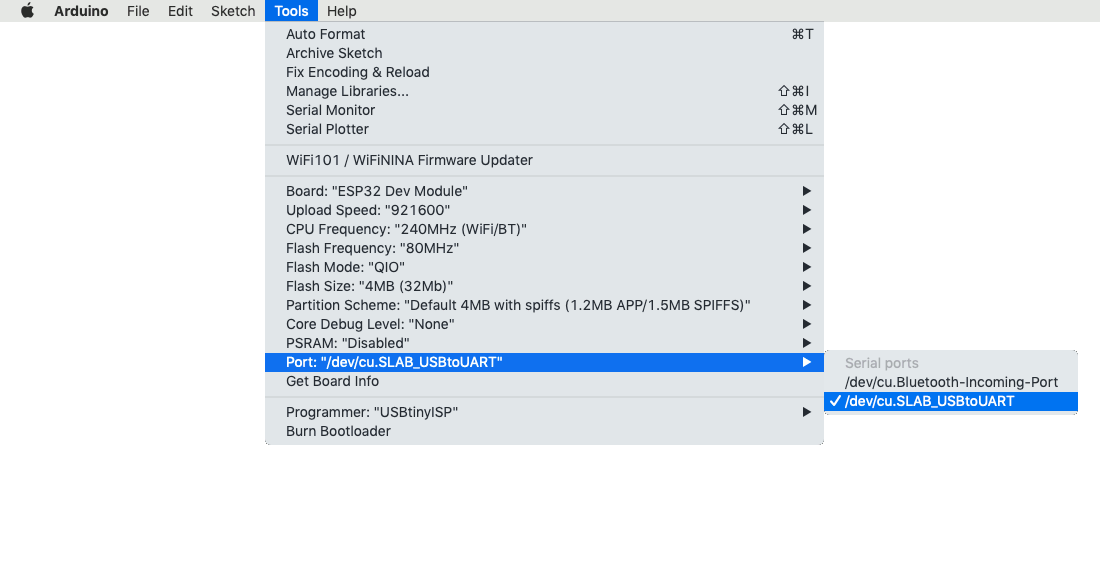
After you had selected the board, select the port on your computer that you will use to flash your program to your board:
At this point in time, you are ready to flash your program onto your board. In order to do so, click on the upload button on the editor:
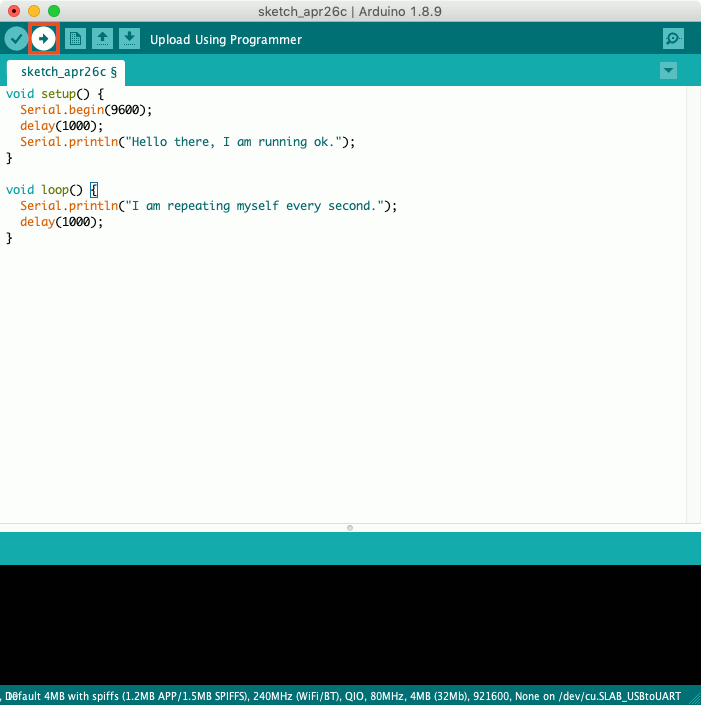
When you do that, Arduino IDE will prompt you to save the sketch. After you had saved the sketch, the Arduino IDE will flash your program onto the board.
When Arduino IDE had flashed your program onto the board, the serial monitor window should display similar output as the following: