How to setup Raspbian Stretch Lite with remote configuration over WiFi on first boot
Two of the good features of Raspbian Stretch Lite is that it allows us to enable the SSH server and connect to our WiFi network before it boots up for the first time.
Combining these two features is useful for projects based on Raspberry Pi Zero W as we can configure Raspbian Stretch Lite via SSH without connecting extra peripherals to it.
This post documents how you can enable remote configuration of your Raspbian Stretch Lite over WiFi on first boot.
Prerequisite hardware to install operating system onto the microSD
An operating system is required to be installed onto a microSD card in order to run Raspberry Pi. Hence, we will need to have a computer with a SD card reader. If your computer does not come with a SD card reader, you have to get one.
Downloading a copy of Raspbian Stretch Lite for your Raspberry Pi
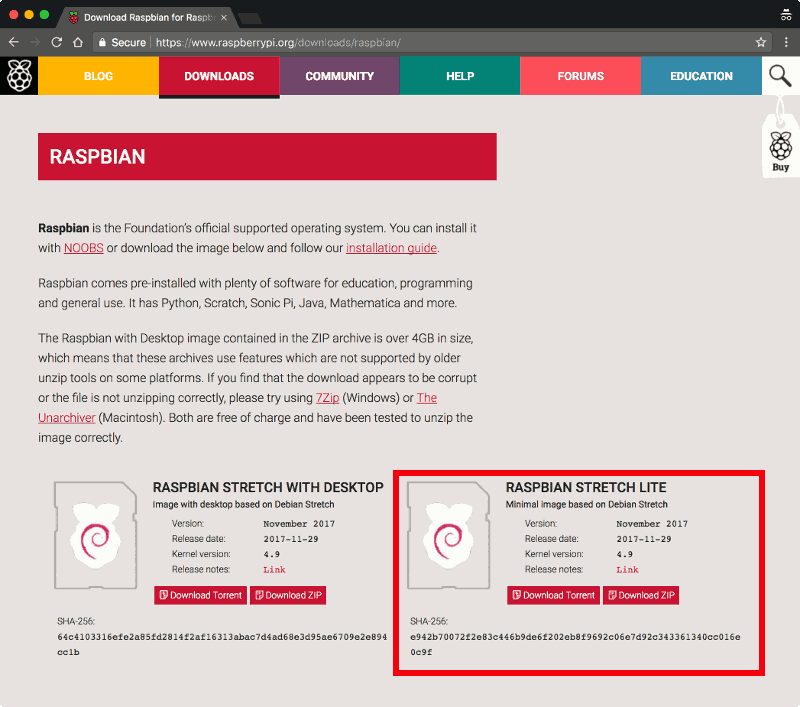
Once you had gathered all the necessary hardware, proceed to download a version of the Raspbian Stretch Lite operating system for your Raspberry Pi. As of this writing, the one that was available was dated 29th November 2017:

Click on the Download Zip button for Raspbian Stretch Lite and save the zip file onto your file system.
Installing Raspbian Stretch Lite on the microSD card
After your browser had downloaded the .zip file successfully, extract the .img file from the .zip file. The .img file is the operating system image that you will use for installing Raspbian Stretch Lite onto your microSD card.
Typically, I use Etcher on my MacBook Pro to install operating system images onto microSD cards.
If you are using a windows machine, you can use Win32DiskImager to install the operating system for your Raspberry Pi.
If you are using a Linux desktop, you should be able to use Etcher to install the operating system for your Raspberry Pi.
Creating an empty ssh file and copying it to the root folder
Although there are different ways to enable SSH server on Raspbian Stretch Lite, the best way is to enable on first boot.
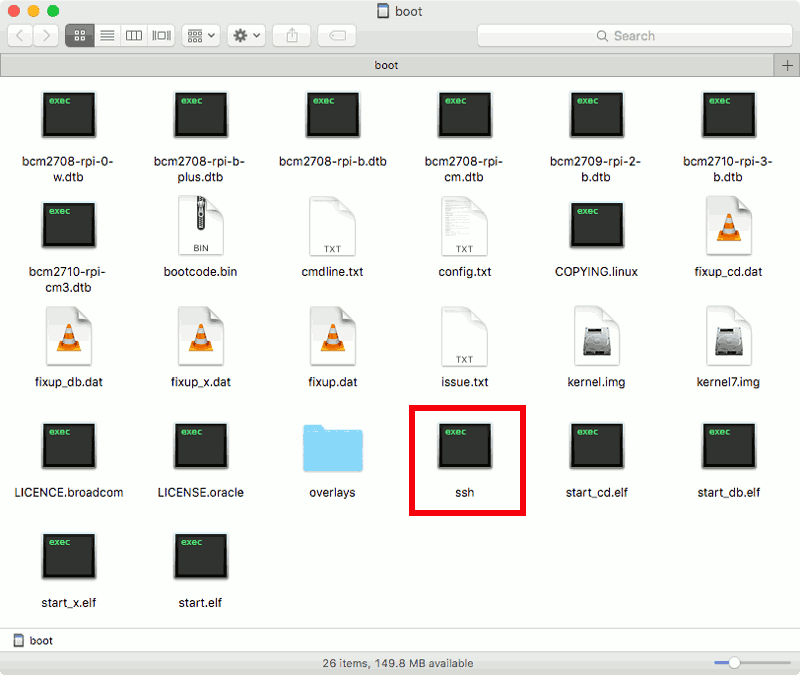
After you had written the Raspbian Stretch Lite image to the SD card, you can then tell Raspbian Stretch Lite that you want to enable the SSH server on first boot.
To do so, simply create an empty file named as "ssh" and copy it to the root directory of the SD card:

Creating a wpa_supplicant.conf file that contains your WiFi network configuration
Once you got the ssh file into the root directory of the SD card, use a text editor to create a file named as "wpa_supplicant.conf" with content similar to the following:
country=SG
ctrl_interface=DIR=/var/run/wpa_supplicant GROUP=netdev
update_config=1

network={
        scan_ssid=1
        ssid="the_2.4-hz-wireless-network"
        psk="the_2.4-hz-wireless-network_password"
        proto=WPA
        key_mgmt=WPA-PSK
}
You need to change the values for "country", "ssid", "psk", "proto" and "key_mgmt" to match your 2.4 Ghz Wireless network setup.
The name of your wireless network is represented by "ssid".
The password to connect to your wireless network is represented by "psk".
The communication protocol used by your router is represented by "proto". Some acceptable values are WPA and RSN.
The key management protocol used by your router is represented by "key_mgmt". Some acceptable values are "WPA-PSK" and "WPA-EAP".
The values for "proto" and "key_mgmt" are commonly set to WPA and WPA-PSK.
Copying the wpa_supplicant.conf file to the root directory of the SD card
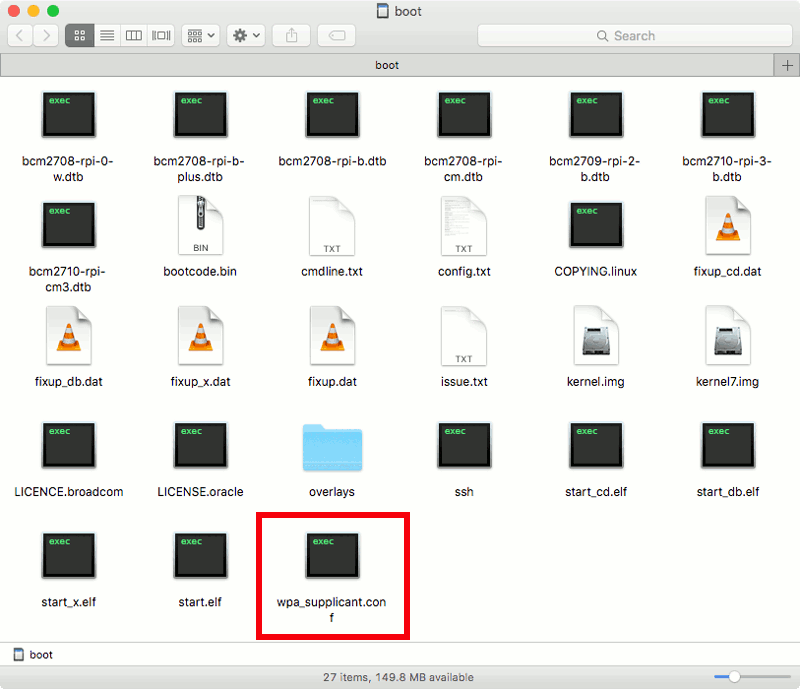
Once you had create the wpa_supplicant.conf file with your WiFi network configurations, you will then copy the file into the SD card:

Getting the IP address that your Raspbian Stretch Lite got from your router
Once you had copied over the wpa_supplicant.conf file into the SD card, you can then put it into the SD card slot of your Raspberry Pi. When you provide power to your Raspberry Pi, you can then look at your router's address allocation table and find an entry with the name raspberrypi.
Connecting to your Raspbian Stretch Lite via SSH
With the IP address given by your router, you can then SSH into your Raspbian Stretch Lite to configure it. Suppose the IP address is 192.168.1.123, you can then enter the following command into your favourite terminal program to access your Raspbian Stretch Lite:
ssh pi@192.168.1.123
The "pi" user is the default user that is created for us to configure our Raspbian Stretch Lite. When Raspbian Stretch Lite prompts for a password, enter "raspberry" without the quotes. This will get you into Raspbian Stretch Lite to perform further configurations.