How I setup Jenkins on my Raspberry Pi 3 with Raspbian Stretch Lite
Jenkins is a renowned open source automation server that can help offload programmers from performing repetitive tasks like:
- running unit tests to make sure new code does not break existing codes.
- compiling and packaging the binaries from codes and dependencies.
- deploying new binaries to testing servers.
- checking whether production server is up and running.
- and etc.
If you have a Raspberry Pi 3 and you want to automate some of the tasks for your side projects, you may want to consider setting up Jenkins on your Raspberry Pi 3 with Raspbian Stretch Lite as the operating system.
This post documents how I setup Jenkins on my Raspberry Pi 3 with Raspbian Stretch Lite.
My hardware list for this setup
I used the following hardware for my Jenkins server:
- Raspberry PI 3 Model B A1.2GHz 64-bit quad-core ARMv8 CPU, 1GB RAM
- Official Raspberry Pi 3 Case - Red/White
- Kingston Digital 32GB microSDHC Class 10 UHS-I 45R Flash Card (SDC10G2/32GBSP)
- Unused USB charger
- AmazonBasics RJ45 Cat-6 Ethernet Patch Cable - 3 Feet (0.9 Meters)
Setting up Raspbian Stretch Lite with SSH server enabled on my microSD card
Once I had gathered all the necessary hardware, I proceeded to setup Raspbian Stretch Lite with SSH server enabled on my microSD card. Doing so allowed me to SSH into my Raspbian Stretch Lite to perform further configurations in this post.
Assembling the hardware for the Raspberry Pi LEMP Server
Next, I removed my microSD card from my SD card reader and inserted it to the microSD card slot on the Raspberry Pi 3 board. After that, I went ahead to assemble the Raspberry Pi 3 board to the Official Raspberry Pi case.
Starting the Raspbian Stretch Lite operating system
With the assembly of my Raspberry Pi 3 board and Official Raspberry Pi case, I connected one end of the RJ45 cable to the RJ45 port on my Raspberry Pi 3 board and the other end of the cable to one of the switch port of my home router. After that, I connected my micro USB cable and supply power to my Raspberry Pi 3 board.
Changing default password, Locale and Timezone of my Raspbian Stretch Lite
There are a few configurations that we should perform on the first run of Raspbian Stretch Lite. Therefore, I proceeded on to change the default password, Locale and Timezone of Raspbian Stretch Lite.
Preventing Hash Sum mismatch errors
By default, this installation of Raspbian Stretch Lite will attempt to download packages from a mirror that is nearest to my location. However, the download processes for some of the packages threw Hash Sum mismatch errors. To prevent such errors from occurring, I configured apt-get to always download packages from archive.raspbian.org. To do so, I changed the contents of the /etc/apt/sources.list file to look like the following:
#deb http://mirrordirector.raspbian.org/raspbian/ stretch main contrib non-free rpi
# Uncomment line below then 'apt-get update' to enable 'apt-get source'
#deb-src http://archive.raspbian.org/raspbian/ stretch main contrib non-free rpi

deb http://archive.raspbian.org/raspbian/ stretch main contrib non-free rpi
Installing Java on my Raspbian Stretch Lite
Jenkins is written in Java. As such, I will need to get Java installed on my Raspbian Stretch Lite. To install the faster Java version on Raspbian Stretch Lite, I entered the following command:
sudo apt-get install oracle-java8-jdk -y
After the command had completed, I ran the following command:
java -version
and got the following output as an indication that Java 8 was installed successfully:
Java(TM) SE Runtime Environment (build 1.8.0_65-b17)
Java HotSpot(TM) Client VM (build 25.65-b01, mixed mode)
Installing Jenkins
Once I had installed Java on my Raspbian Stretch Lite, I continued on to install Jenkins. To do so, I entered the following command:
wget -q -O - https://jenkins-ci.org/debian/jenkins-ci.org.key | sudo apt-key add -
sudo sh -c 'echo deb http://pkg.jenkins-ci.org/debian binary/ > /etc/apt/sources.list.d/jenkins.list'
sudo apt-get update
sudo apt-get install jenkins -y
Once the command had completed, I ran the following command:
systemctl status jenkins.service
and got the following output as an indication that Jenkins was installed successfully:
● jenkins.service - LSB: Start Jenkins at boot time
   Loaded: loaded (/etc/init.d/jenkins; generated; vendor preset: enabled)
   Active: active (exited) since Wed 2017-12-27 22:14:45 +08; 4min 40s ago
     Docs: man:systemd-sysv-generator(8)

Dec 27 22:14:43 raspberrypi systemd[1]: Starting LSB: Start Jenkins at boot time...
Dec 27 22:14:43 raspberrypi jenkins[1670]: Correct java version found
Dec 27 22:14:43 raspberrypi su[1700]: Successful su for jenkins by root
Dec 27 22:14:43 raspberrypi su[1700]: + ??? root:jenkins
Dec 27 22:14:43 raspberrypi su[1700]: pam_unix(su:session): session opened for user jenkins by (uid=0)
Dec 27 22:14:45 raspberrypi jenkins[1670]: Starting Jenkins Automation Server: jenkins.
Dec 27 22:14:45 raspberrypi systemd[1]: Started LSB: Start Jenkins at boot time.
Once Jenkins was installed, I could access it with my browser via http://192.168.1.109:8080.
Unlocking Jenkins
The Jenkins that I had installed showed the following screen when I accessed it for the first time:
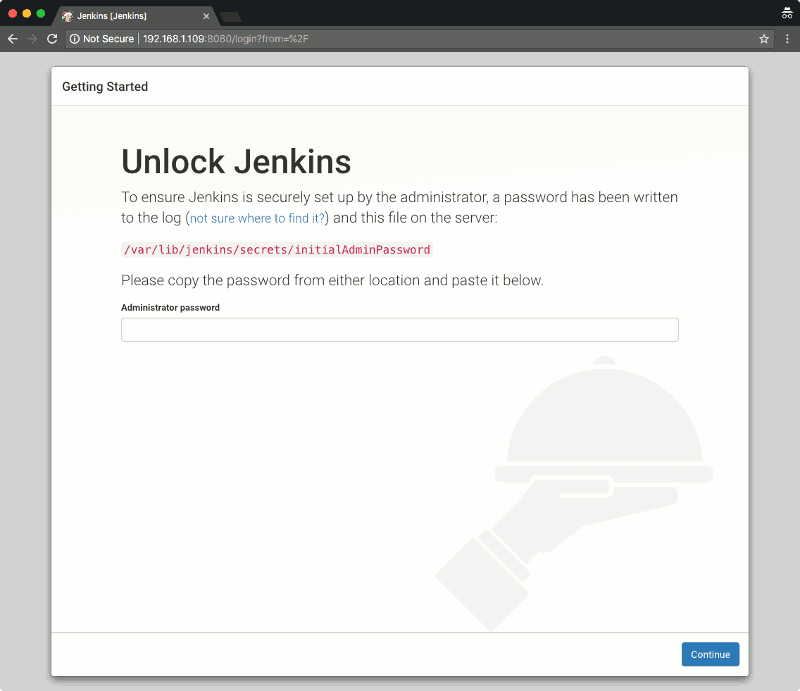
Following the instructions, I got the initial admin password for Jenkins on my terminal screen with the following command:
sudo cat /var/lib/jenkins/secrets/initialAdminPassword
and supplied it to the text field on the Unlock Jenkins page. I then clicked on the Continue button to proceed with the initial configurations of Jenkins.
Going through Jenkins initial configurations
Once Jenkins is unlocked, I then followed through some initial configurations screens.
Firstly, I clicked on Skip Plugin Installations button at the screen that notified that my Jenkins instance was offline.
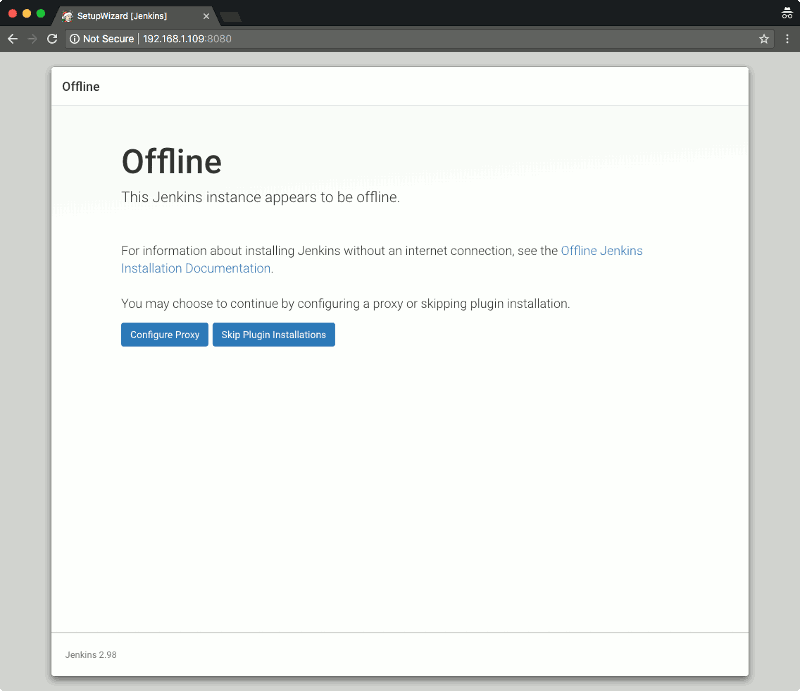
In the Create First Admin User page, I supplied the first admin user credentials and clicked on the Save and Finish button.
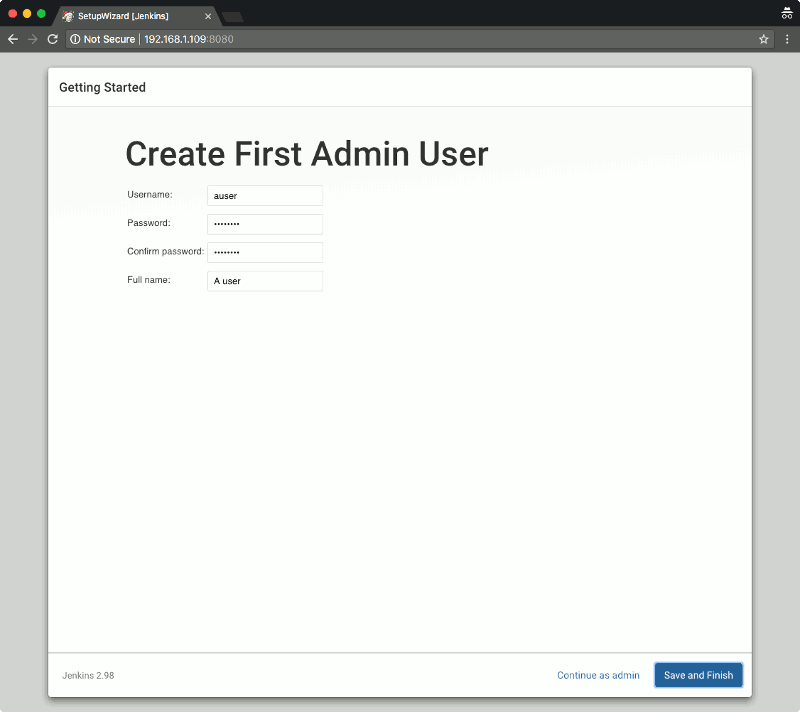
After the first admin user was created, I clicked on the Start Using Jenkins button to start using Jenkins.
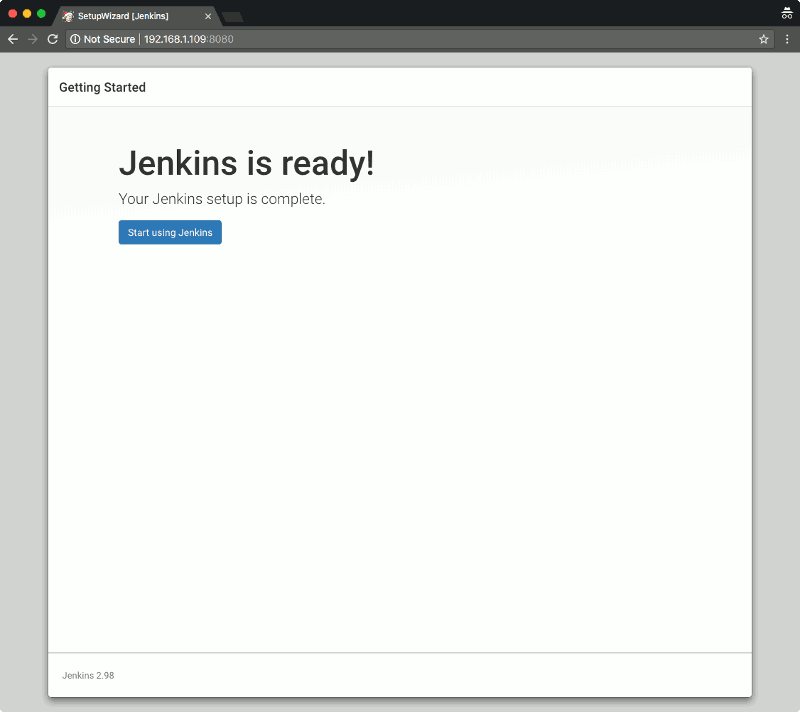
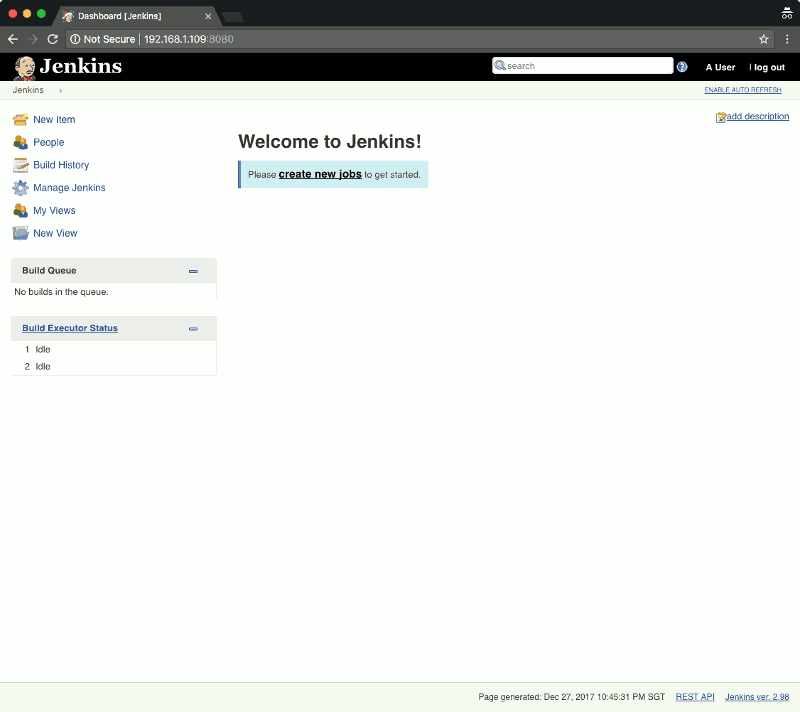
That marked the end of the initial configurations for Jenkins. With that, I Jenkins showed me the home screen to create new jobs.
Buying the hardware to build your Jenkins server on a Raspberry Pi 3
If you do not have the Raspberry Pi 3 hardware mentioned in this post yet, you may want to purchase them from Amazon. Simply click on the button below to add the Raspberry Pi 3 hardware to your cart. You may remove anything that you already have or replace some of the hardware with other hardware.