How to setup a Raspberry Pi security camera with motionEyeOS
When you want to turn your unused Raspberry Pi into a security camera, you can take a look at motionEyeOS.
So what is motionEyeOS? In short, motionEyeOS is a Linux distribution that turns your single board computer into a video surveillance system. Therefore, it is convenient to setup a Raspberry Pi security camera with motionEyeOS.
Given these points, let us look at how we can setup a Raspberry Pi security camera with motionEyeOS.
Steps to setup a Raspberry Pi security camera with motionEyeOS
Typically, setting up a Raspberry Pi security camera with motionEyeOS involves the following steps:
- Gather the hardware parts for your Raspberry Pi security camera.
- Download the motionEyeOS image for the Raspberry Pi board version that you are using for the security camera.
- Install motionEyeOS on your microSD card.
- Assemble the hardware parts for your Raspberry Pi security camera.
- Get the IP address of your Raspberry Pi security camera.
- Configure motionEye settings for your Raspberry Pi security camera.
1. Gathering the hardware parts for your Raspberry Pi security camera
If you are an ardent fan of Raspberry Pi, then you may find it easy to gather the hardware parts. However, if you are unable to do so, here are hardware combinations that you can procure for your Raspberry Pi security camera:
Parts to build a Raspberry Pi Zero W security camera
- CanaKit Raspberry Pi Zero W (Wireless) with Official Case and Power Supply
- SanDisk Ultra 128GB microSDXC UHS-I card with Adapter
- Raspberry Pi Camera Module V2 8 Megapixel 1080P
Parts to build a Raspberry Pi 3B+ security camera
- CanaKit Raspberry Pi 3 B+ (B Plus) with 2.5A Power Supply (UL Listed)
- Raspberry Pi Model B+ Case Enclosure
- SanDisk Ultra 128GB microSDXC UHS-I card with Adapter
- Raspberry Pi Camera Module V2 8 Megapixel 1080P
- RJ45 cable (if you wish to connect your Raspberry Pi to the switch port of your router)
Parts to install motionEyeOS onto the microSD card
- If your computer does not have a microSD card drive, then you will need to get a microSD card adapter.
- In order for Raspberry Pi Zero W to communicate with your computer, you need to have a router that supports 2.4GHz WiFi network.
2. Downloading the latest motionEyeOS image for the Raspberry Pi board version that you are using for the security camera
Once you have gotten the hardware parts to build your security camera, proceed to download a copy of motionEyeOS image. Given that, go to motionEyeOS latest release page with your web browser to find the image for your security camera.
When you do so, you should find a list of motionEyeOS images to download. For example, I got the following list at this point of writing:
So which motionEyeOS should you download? As shown above, you should look for an image with raspberrypi as part of the file name. In addition to that, you should download the one with the same version number as the Raspberry Pi board that you choose. When you have a Raspberry Pi Zero W, you will download the image for Raspberry Pi version 1.
If you are using a Raspberry Pi Zero W, then you will download motioneyeos-raspberrypi-20190911.img.xz.
However, if you are using a Raspberry Pi 3B+, then you will download motioneyeos-raspberrypi3-20190911.img.xz.
3. Installing motionEyeOS on your microSD card
Once you have downloaded a copy of motionEyeOS for your Raspberry Pi security camera, install it onto your microSD card.
In order to do so, you will need a tool like balenaEtcher. Given that, insert your microSD card into the microSD card drive/adapter of your computer and flash the image onto your microSD card:

Making your Raspberry Pi security camera connect to WiFi on first boot
If you are connecting your Raspberry Pi security camera through your WiFi network, then you may want to make it do so on first boot.
In order to do so, prepare a wpa_supplicant.conf file with the following contents:
update_config=1
ctrl_interface=/var/run/wpa_supplicant

network={
        scan_ssid=1
        ssid="wifiSsid"
        psk="wifiPassword"
}
Once you have done so, reinsert your microSD card into the drive/adapter. When your computer detects your microSD card again, copy the file into the root directory of your microSD card:
4. Assembling the hardware parts for your Raspberry Pi security camera
At this point in time, you are ready to assemble the hardware parts for your Raspberry Pi security camera.
For Raspberry Pi Zero W security camera
Connect Raspberry Pi camera module to Raspberry Pi Zero W and the official case.
For Raspberry Pi 3B+ security camera
Connect the Raspberry Pi Camera Module to Raspberry Pi 3B+ and put it into the case.
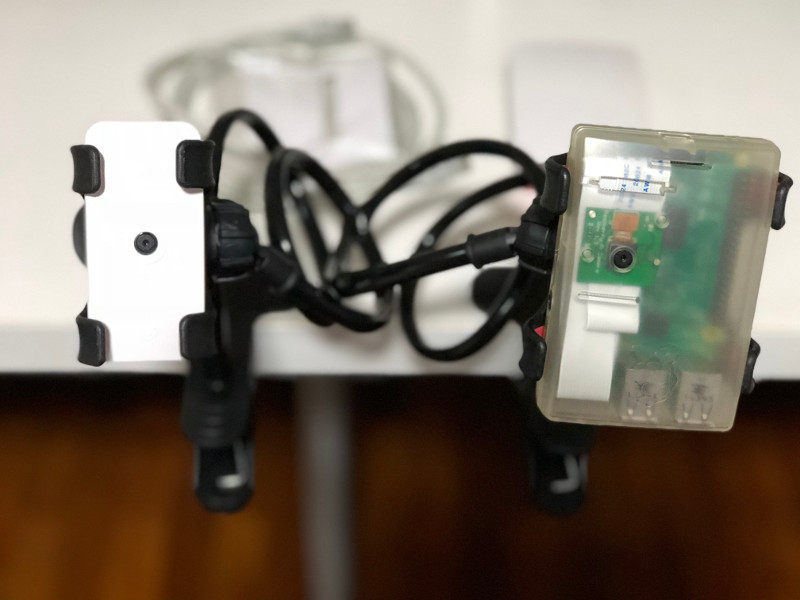
When you have done so, your Raspberry Pi security camera should look like the following:
5. Getting the IP address of your Raspberry Pi security camera
After you had assembled your Raspberry Pi security camera, supply power to it. If you are using an RJ45 cable, then connect the cable with your Raspberry Pi and switch port of your router.
When motionEyeOS loads, it will get an IP address from your router. Therefore, you can either get the IP address from your router portal or an IP scanning tool.
For example, if you are using a Linksys router, you can get the IP address of your Raspberry Pi security camera from Network map.
As shown above, motionEyeOS will take a hostname in the form MEYE-XXXXXXXX. In this case, the motionEyeOS had gotten 192.168.1.136 as the IP address.
6. Configuring motionEye settings for your Raspberry Pi security camera
Given the IP address that you had gotten, access it with a browser from a computer in the same network. When you do so, you will find a video stream from your Raspberry Pi security camera.
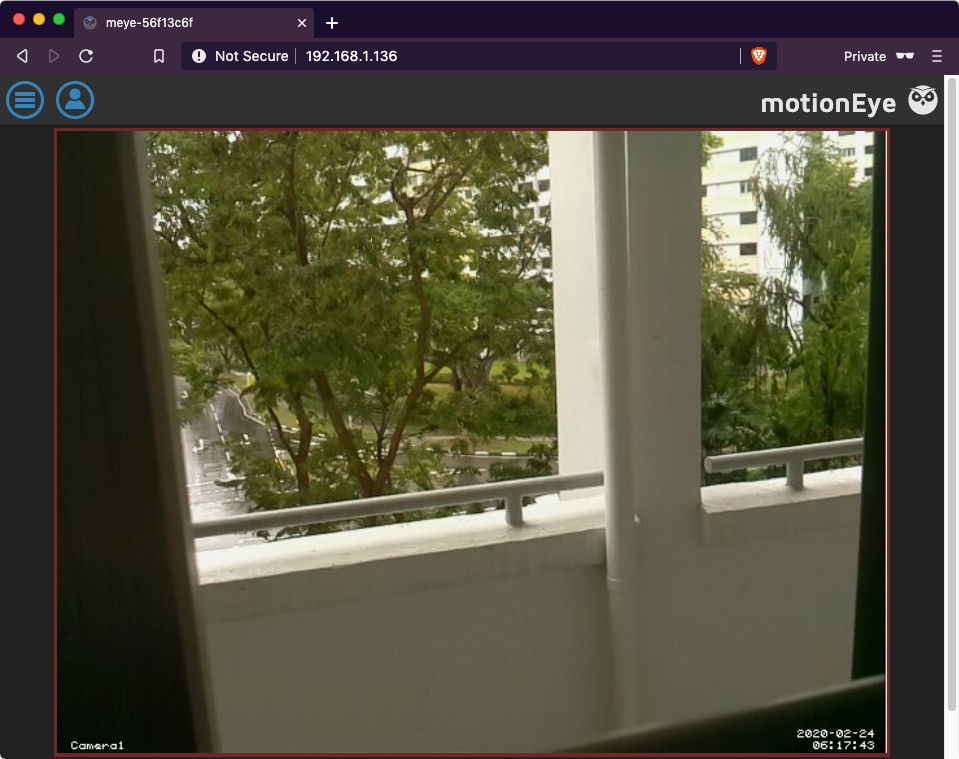
At this point in time, you will be able to configure motionEye settings for your Raspberry Pi security camera.
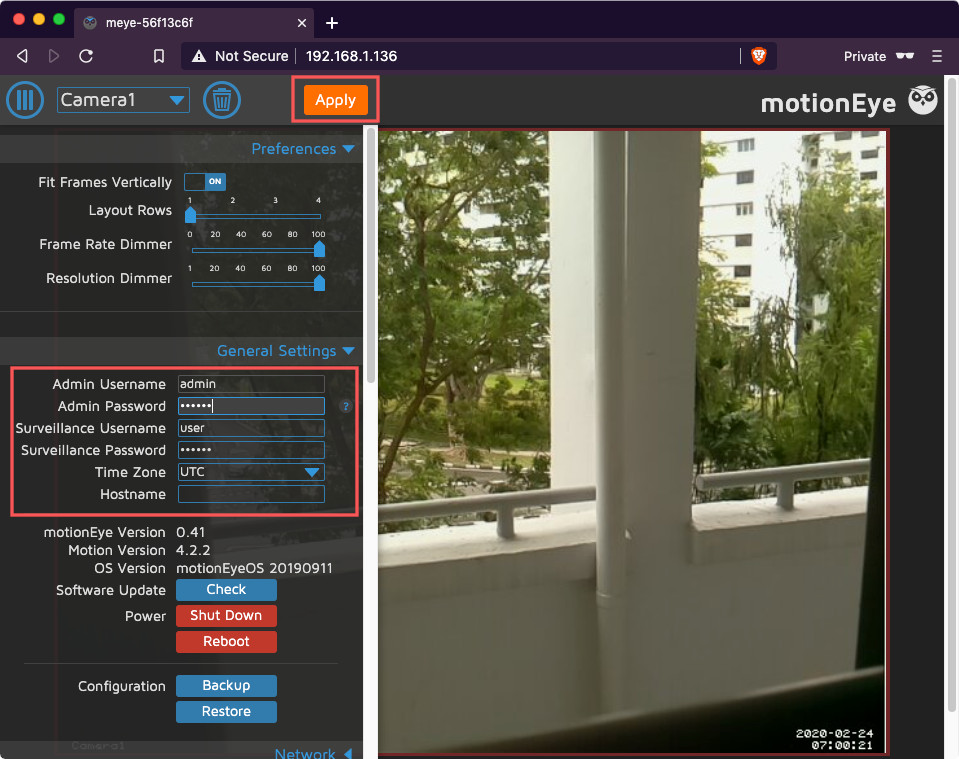
Changing the login credentials for the admin user and surveillance user
When you click on the second button at the top left corner, you will be presented with the login screen. In order to change the login credentials, you need to login as the admin user. Therefore, enter admin in the Username field, leave the Password field empty and click Login:
After you had logged in, you will be presented with the video stream of your camera again. Next, click on the first button at the top left corner to access the settings drawer:
In addition to the admin user, there is a surveillance user as well. While the admin user can configure every setting on your security camera, the surveillance user can only view the video feed.
Another point to note is that we can create a custom username for the surveillance user but we cannot change the username for admin.
Given these points, provide a value for Admin Password, Surveillance Username and Surveillance Password. Once you have done so, click Apply to save the changes.
Changing video resolution of video feed
If you wish to increase the video resolution of your video feed, then you can do so via the Video Device section:
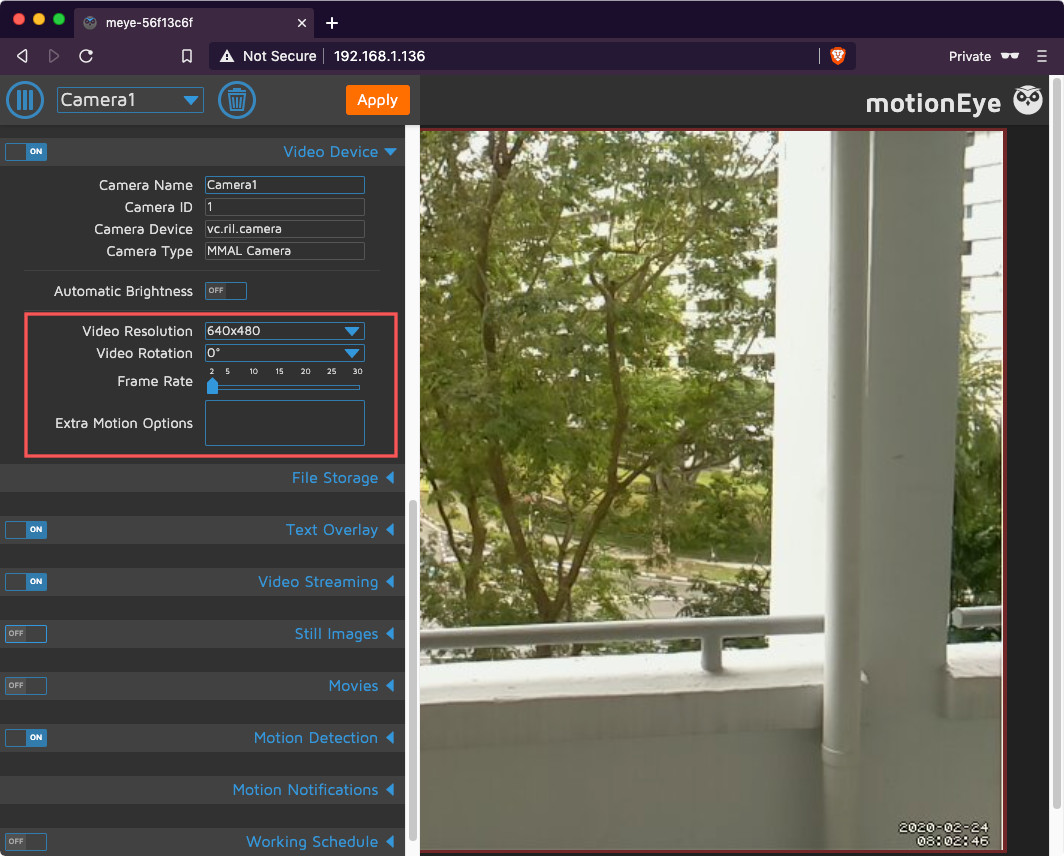
After you select your ideal video resolution, click on Apply to apply the changes. When you do so, you should see the video feed in the new resolution.
Enabling recording of still images and movies
If you wish to record your video feed, then you will want to enable recording of still images and movies:
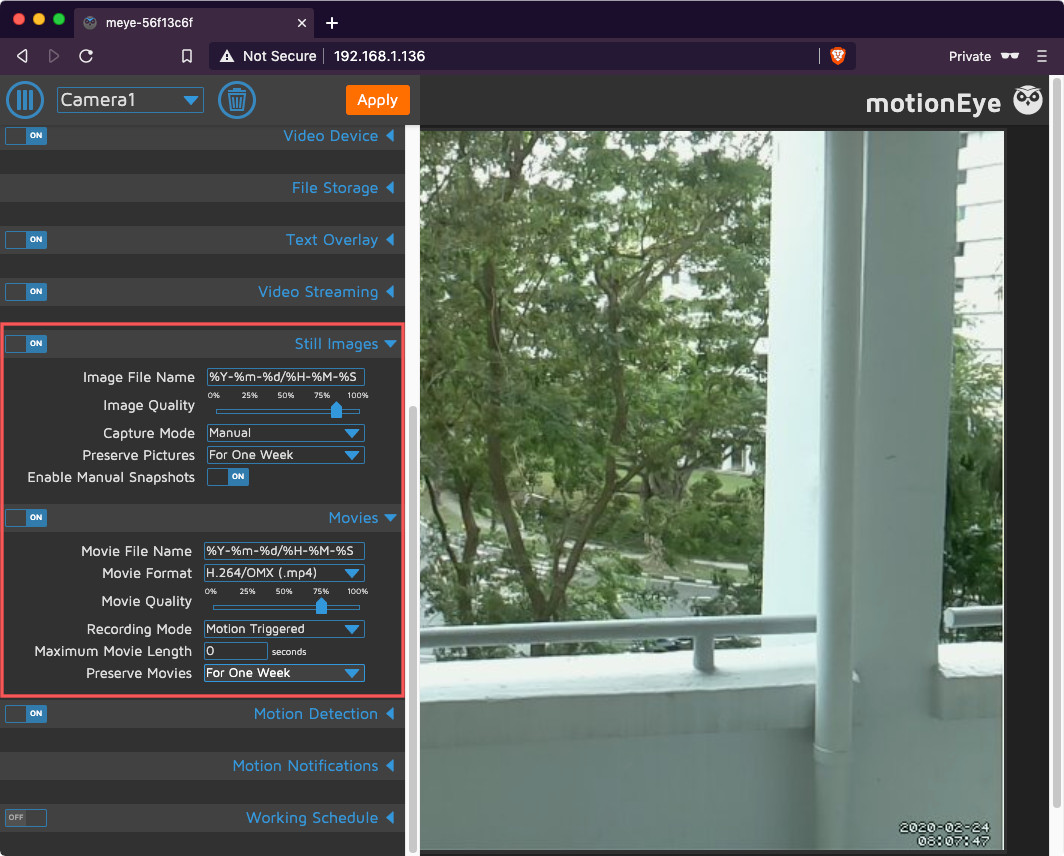
As shown above, you can also decide the mode of capture, preservation periods and other relevant configurations.
Configuring motionEye to only capture video if there are movements in particular sections of the surveillance area
When you only want motion detection to trigger if parts of the video feed changes, you can check out the Motion Detection section. Given that, this is how to configure motionEye to only capture video if there are movements in particular sections of the surveillance area.