Setting up a LEMP web server on Raspberry Pi 3 with an Ubuntu Server 15.10.3 image to host a WordPress website
I was trying to start a new WordPress site. Before hosting it on a Digital Ocean droplet, I decided to incubate the WordPress site on a Raspberry Pi 3 to clock some content. This post documents the steps that I took to set up a LEMP web server on Raspberry Pi 3 with an Ubuntu server 15.10.3 image to host a new WordPress site.
Getting the hardware that I need for my Raspberry Pi 3 LEMP web server
The hardware for this project is pretty straightforward - I got myself the following items:
- A Raspberry Pi 3 motherboard
- A PiBlox LEGO® Compatible Case
- A SanDisk Ultra 32GB microSDHC UHS-I Card with Adapter
Since my laptop came with a SD card reader, I do not have to get a SD card reader.
Getting the Ubuntu Server 15.10.3 image for my Raspberry Pi 3 onto the micro SD card
After I got the hardware that I need, the next step was to get the Ubuntu Server 15.10.3 image for my Raspberry Pi 3. The awesome folks at Ubuntu Pi Flavour Maker had made a few variations of Ubuntu images available for me to download.
I downloaded a copy of the Ubuntu Server Standard 15.10.3 image onto my windows machine via torrent.
Once I got the .xz file, I used 7-zip to extract the .img file. I then used Win32 Disk Imager to write the .img file into the SanDisk microSD card via the SD card drive on my laptop.
Booting into Ubuntu Server 15.10.3 on my Raspberry Pi 3
Once Win32 Disk Imager completed writing the Ubuntu Server 15.10.3 image onto my SanDisk microSD card, I removed it from my SD card reader and inserted it to the SD card slot on the Raspberry Pi 3 motherboard. Note that unlike the Raspberry Pi 2, the microSD slot of the Raspberry Pi 3 motherboard is not a spring loaded one. This means that you just push to insert your microSD card and pull to remove your microSD card.
I then attached my trusty mouse, keyboard, monitor, a RJ45 network cable from my DLink router and my old samsung charger to my Raspberry Pi 3 motherboard. After turning on the power, the login screen appears. The default username is ubuntu and the password is ubuntu.
Adding a new user
I do not like a default username for my web server, even though it is not going to be used as the production server. Hence, I first added a new user via the command as follows:
sudo adduser techcoil
I then went through the following Q and As:
Adding user `techcoil' ...
Adding new group `techcoil' (1000) ...
Adding new user `techcoil' (1000) with group `techcoil' ...
Creating home directory `/home/techcoil' ...
Copying files from `/etc/skel' ...
Enter new UNIX password:
Retype new UNIX password:
passwd: password updated successfully
Changing the user information for techcoil
Enter the new value, or press ENTER for the default
	Full Name []: Techcoil
	Room Number []: #1234
	Work Phone []: 12345678
	Home Phone []: 12345678
	Other []: 12345678
After I had created my new user account, I proceeded to add it to the sudo group so that I was able to continue with installing the necessary software:
sudo adduser techcoil sudo
Deleting the default user
Once I had created my user, I proceeded to delete the default user.
I first restarted the server:
sudo reboot
After the server booted up again, I logged in with my new user.
I typed the following in the terminal to delete the default user:
sudo deluser --remove-home ubuntu
Installing Nginx on my Ubuntu Server 15.10.3
I installed Nginx with the following command:
sudo apt-get install nginx
After the installation had completed, I ran the following command:
curl -0 localhost
And got the following output:
<!DOCTYPE html>
<html>
<head>
<title>Welcome to nginx!</title>
<style>
    body {
        width: 35em;
        margin: 0 auto;
        font-family: Tahoma, Verdana, Arial, sans-serif;
    }
</style>
</head>
<body>
<h1>Welcome to nginx!</h1>
<p>If you see this page, the nginx web server is successfully installed and
working. Further configuration is required.</p>

<p>For online documentation and support please refer to
<a href="http://nginx.org/">nginx.org</a>.<br/>
Commercial support is available at
<a href="http://nginx.com/">nginx.com</a>.</p>

<p><em>Thank you for using nginx.</em></p>
</body>
</html>
This output assured me that my Nginx web server was successfully installed.
Installing the MySQL database server on my Ubuntu Server 15.10.3
I then proceeded to install the MySQL database server for my WordPress site.
To do so, I typed the following in the terminal:
sudo apt-get install mysql-server mysql-client
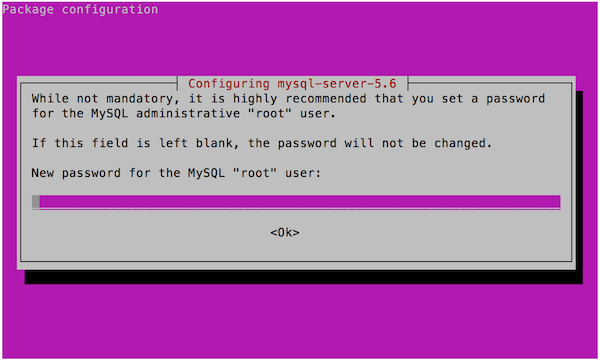
This led to the screen to enter a password for the root user:
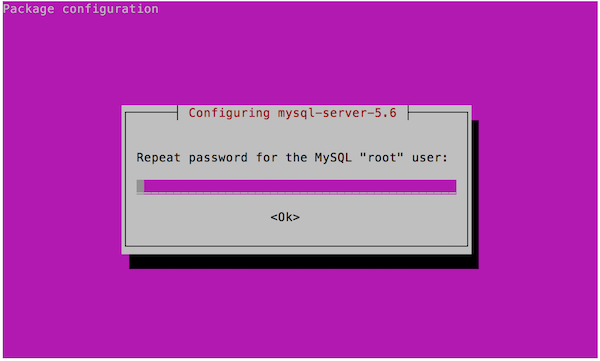
And the screen to repeat the password for the root user:
I verified my MySQL database installation by entering the command:
sudo systemctl status mysql
Which produced the following output:
● mysql.service - MySQL Community Server
   Loaded: loaded (/lib/systemd/system/mysql.service; enabled; vendor preset: enabled)
   Active: active (running) since Wed 2016-04-06 12:10:25 UTC; 15min ago
 Main PID: 4534 (mysqld_safe)
   CGroup: /system.slice/mysql.service
           ├─4534 /bin/sh /usr/bin/mysqld_safe
           └─4881 /usr/sbin/mysqld --basedir=/usr --datadir=/var/lib/mysql --...

Apr 06 12:10:23 ubuntu-standard systemd[1]: Starting MySQL Community Server...
Apr 06 12:10:24 ubuntu-standard mysqld_safe[4534]: 160406 12:10:24 mysqld_saf...
Apr 06 12:10:24 ubuntu-standard mysqld_safe[4534]: 160406 12:10:24 mysqld_saf...
Apr 06 12:10:24 ubuntu-standard mysqld_safe[4534]: 160406 12:10:24 mysqld_saf...
Apr 06 12:10:25 ubuntu-standard systemd[1]: Started MySQL Community Server.
Hint: Some lines were ellipsized, use -l to show in full.
With that, I got myself a MySQL database server and a root account for the database related tasks later on.
Installing PHP
The final part of the LEMP stack was PHP. I would need to install, the PHP binary, the PHP Fast Process Manager and the PHP MySQL driver. To do so, I entered the following command:
sudo apt-get install php5 php5-fpm php5-mysql
After the installation had completed, I entered the following command:
sudo systemctl status php5-fpm
And got the following verification:
● php5-fpm.service - The PHP FastCGI Process Manager
   Loaded: loaded (/lib/systemd/system/php5-fpm.service; enabled; vendor preset: enabled)
   Active: active (running) since Wed 2016-04-06 12:52:55 UTC; 4min 59s ago
 Main PID: 7300 (php5-fpm)
   Status: "Processes active: 0, idle: 2, Requests: 0, slow: 0, Traffic: 0req/sec"
   CGroup: /system.slice/php5-fpm.service
           ├─7300 php-fpm: master process (/etc/php5/fpm/php-fpm.conf)
           ├─7302 php-fpm: pool www
           └─7303 php-fpm: pool www

Apr 06 12:52:55 ubuntu-standard systemd[1]: Starting The PHP FastCGI Process....
Apr 06 12:52:55 ubuntu-standard systemd[1]: Started The PHP FastCGI Process ....
Apr 06 12:52:58 ubuntu-standard systemd[1]: Started The PHP FastCGI Process ....
Hint: Some lines were ellipsized, use -l to show in full.
Getting a copy of WordPress
After I had installed the main pieces of the LEMP stack, I went on to get a copy of WordPress from the internet.
I got into the /var/www directory that was created when I installed the Nginx server:
cd /var/www
Once I got into that directory, I downloaded the latest WordPress files:
wget https://wordpress.org/latest.tar.gz
After the download had completed, I extracted the "wordpress" directory from the downloaded file:
tar xvfz latest.tar.gz
When the "wordpress" directory had been extracted, I deleted the tar file:
rm latest.tar.gz
I then changed the name of the "wordpress" directory to a name which I like:
sudo mv wordpress my_new_wordpress_site
With that, my "/var/www" folder contained a directory named as "my_new_wordpress_site". This would be the folder which I configure Nginx to get PHP FPM to look into when serving HTTP requests directed at my new WordPress site.
Configuring Nginx web server to serve HTTP requests for the WordPress site
It was relatively straightforward to configure the Nginx to serve HTTP requests for the WordPress site as WordPress provides a good guide on doing so.
Creating the set of common files
I created a folder "global" inside of "/etc/nginx" folder:
sudo mkdir /etc/nginx/global
With the "global" directory created, I got into it:
cd /etc/nginx/global
Inside "/etc/nginx/global", I created the global restriction rules inside the file: restrictions.conf, with the following contents:
# Global restrictions configuration file.
# Designed to be included in any server {} block.
location = /favicon.ico {
	log_not_found off;
	access_log off;
}

location = /robots.txt {
	allow all;
	log_not_found off;
	access_log off;
}
I then created the general WordPress rules inside of wordpress.conf, with the following contents:
# WordPress single site rules.
# Designed to be included in any server {} block.

# This order might seem weird - this is attempted to match last if rules below fail.
# http://wiki.nginx.org/HttpCoreModule
location / {
	try_files $uri $uri/ /index.php?$args;
}

# Add trailing slash to */wp-admin requests.
rewrite /wp-admin$ $scheme://$host$uri/ permanent;

# Directives to send expires headers and turn off 404 error logging.
location ~* ^.+\.(ogg|ogv|svg|svgz|eot|otf|woff|mp4|ttf|rss|atom|jpg|jpeg|gif|png|ico|zip|tgz|gz|rar|bz2|doc|xls|exe|ppt|tar|mid|midi|wav|bmp|rtf)$ {
       access_log off; log_not_found off; expires max;
}

# Uncomment one of the lines below for the appropriate caching plugin (if used).
#include global/wordpress-wp-super-cache.conf;
#include global/wordpress-w3-total-cache.conf;

# Pass all .php files onto a php-fpm/php-fcgi server.
location ~ [^/]\.php(/|$) {
	fastcgi_split_path_info ^(.+?\.php)(/.*)$;
	if (!-f $document_root$fastcgi_script_name) {
		return 404;
	}
	# This is a robust solution for path info security issue and works with "cgi.fix_pathinfo = 1" in /etc/php.ini (default)

	include fastcgi_params;
	fastcgi_index index.php;
	fastcgi_param SCRIPT_FILENAME $document_root$fastcgi_script_name;
#	fastcgi_intercept_errors on;
	fastcgi_pass unix:/var/run/php5-fpm.sock;
}

# Deny all attempts to access hidden files such as .htaccess, .htpasswd, .DS_Store (Mac).
# Keep logging the requests to parse later (or to pass to firewall utilities such as fail2ban)
location ~ /\. {
	deny all;
}

# Deny access to any files with a .php extension in the uploads directory
# Works in sub-directory installs and also in multisite network
# Keep logging the requests to parse later (or to pass to firewall utilities such as fail2ban)
location ~* /(?:uploads|files)/.*\.php$ {
	deny all;
}
Creating the Nginx configuration rules for the new WordPress site
With the common files, restrictions.conf and wordpress.conf, created, I then went on to create the Nginx configurations that will tell Nginx how to serve HTTP requests directed at the domain name of my new WordPress site:
server {
	listen 80;
	server_name anewwebsite.com www.anewwebsite.com;
	root /var/www/my_new_wordpress_site;

	index index.php;

	include global/restrictions.conf;

	# Only include one of the files below.
	include global/wordpress.conf;
}
I saved this file as anewwebsite.com.conf and placed it in the /etc/nginx/sites-enabled directory.
After I was done with my Nginx settings, I restarted the Nginx server:
sudo systemctl restart nginx
Creating a new MySQL user and a database instance for the WordPress site
The new WordPress site will need a new MySQL user to log into a database instance. To do so, I first login to the MySQL server with MySQL root user via the terminal:
mysql -u root -p
After keying the password for the MySQL root user, I created a database instance:
mysql> CREATE DATABASE newWordPressDb;
After creating the new database instance successfully, I went on to create the MySQL user which could interact with newWordPressDb:
mysql> CREATE USER 'anewuser'@'localhost' IDENTIFIED BY 'password';
mysql> GRANT ALL ON newWordPressDb.* TO 'anewuser'@'localhost';
With that, I would have a MySQL user that is able to interact with a database instance on behalf of my new WordPress site.
Creating the WordPress configurations to talk to the database instance
With the dependencies being configured, the final set of configurations that I needed to create was for WordPress to take.
To begin with the configurations, I renamed wp-config-sample.php to wp-config.php:
sudo mv /var/www/my_new_wordpress_site/wp-config-sample.php /var/www/my_new_wordpress_site/wp-config.php
I then open up the wp-config.php file inside my WordPress installation directory, /var/www/my_new_wordpress_site, and updated the sections that looked like the following:
// ** MySQL settings - You can get this info from your web host ** //
/** The name of the database for WordPress */
define('DB_NAME', 'newWordPressDb');

/** MySQL database username */
define('DB_USER', 'anewuser');

/** MySQL database password */
define('DB_PASSWORD', 'password');

/** MySQL hostname */
define('DB_HOST', 'localhost');

// .... Other settings ...

// Generated from https://api.wordpress.org/secret-key/1.1/salt/
define('AUTH_KEY',         '9b{65l@weJn+4Svc;]pz9b6vB[q-Py!>L_;=wM[trXTHyan+Suhq|w})9uvX4DKl');
define('SECURE_AUTH_KEY',  '.J& 4`BMG#L#)t-+8Lv$DPT3X.mg}^kY^E2x!Ow8n7}Z|!s4B#RTc`<Ap]$~${%+');
define('LOGGED_IN_KEY',    'DTo`gm+NE5ej6QB-5}+QOrk)B?SyR=PioYBLIo.Q_-|UjqhNvy]6y*@nDgs*F;68');
define('NONCE_KEY',        '@2<U|{md-l3`|^VV2[S#i&kH7|WF|qB%*kXCw||zVuvr<$q3/^,.+bRbSb){JLN7');
define('AUTH_SALT',        ']_L90r+ NbL;m.&Y<>^4 ^Jw-)H&H18YrqBqOpeDA0i*Lb4|&}a+yUUp9R2Zi3+!');
define('SECURE_AUTH_SALT', 'm61%<@s>3+;k(4-,^bT:BMf*yYxyxVG+80WV=X/f8GtI>R^V+iE1GO@0XA%Sw_U{');
define('LOGGED_IN_SALT',   '#F7SQ QhgviCMIFnBK~Z_J-TiV{Gj@|CjS|rM[kIquM;v,ce&Sk/gn.X9kt1_[*]');
define('NONCE_SALT',       'HEpM<urflJp(|~c`=-pt#C+M:f=R;rY/E$_klu[ly`J.Sc|P,pnyW.FaZ-|>Pq]F');
Be sure to access https://api.wordpress.org/secret-key/1.1/salt/ with your browser to get the values for the section starting from "AUTH_KEY" to "NONCE_SALT".
Editing the hosts file on my work computer so that I can direct HTTP requests for the new domain onto the Raspberry Pi 3 server
After creating the necessary configurations that allowed WordPress to talk to my MySQL server, I proceeded on to making my Windows machine direct HTTP requests for anewwebsite.com or www.anewwebsite.com over to my LEMP web server on Raspberry Pi 3.
On my Raspberry Pi 3, I ran the following command to get the IP address of its eth0 network interface:
ifconfig
With the IP address, 10.0.2.112, from the output, I went over to my Windows work machine and looked for the hosts file at the C:/Windows/System32/drivers/etc/ folder and added the following lines of configurations:
10.0.2.112 anewwebsite.com
10.0.2.112 www.anewwebsite.com
Running the WordPress install script
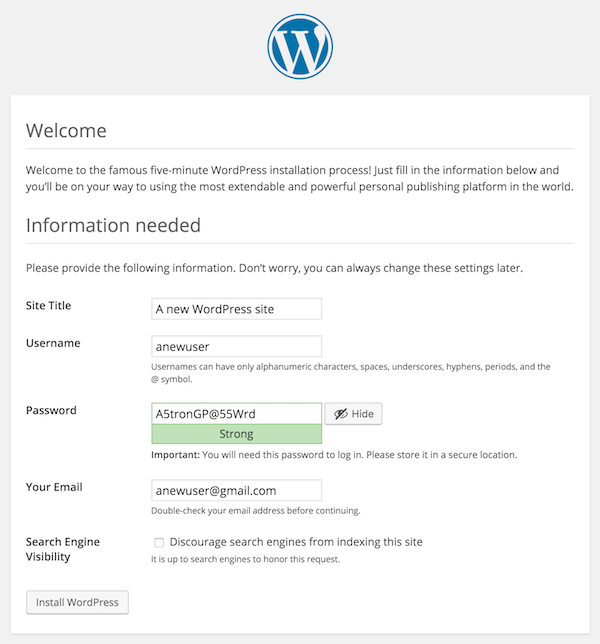
After all the configurations were done, I typed 'www.anewwebsite.com' into the browser on my Windows work machine.
With that, I was shown the following page:
After I filled up all the necessary fields and clicked on the "Install WordPress" button, I got the following screen:
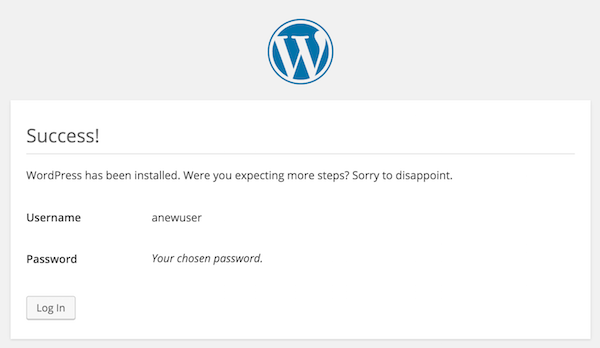
This page indicated that I had managed to set up a LEMP web server on Raspberry Pi 3 with an Ubuntu Server 15.10.3 image to host my new WordPress site.
Clicking on the "Log In" button brought me to the login page where I could supply my username and password to begin creating my content.
Buying the Raspberry Pi 3 hardware to build your own LEMP web server
If you do not have the Raspberry Pi 3 hardware mentioned in this post yet, you may want to purchase them from Amazon. Simply click on the button below to add the Raspberry Pi 3 hardware to your cart. You may remove anything that you already have or replace some of the hardware with other hardware.