Setting up a free CA signed SSL certificate from Let’s Encrypt for my LEMP server on my Raspberry Pi 3 with an Ubuntu Server 15.10.3 image to secure my WordPress site
After setting up a LEMP web server on Raspberry Pi 3 with an Ubuntu Server 15.10.3 image to host my new WordPress website, a good colleague of mine recommended me to try implementing a free certified SSL certificate. The intelligent and generous folks from Let's Encrypt had created a free and open Certificate Authority and an automated workflow for websites to generate certified SSL certificates for serving trusted and encrypted communication.
Since, there is no cost involved in implementing the SSL certificate, I went on to try and implement one on the Nginx server on my Raspberry Pi 3.
This post documents my process on setting up a Let's Encrypt certified SSL certificate for my Nginx server on my Raspberry Pi 3.
Understanding how the Let's Encrypt works
In my opinion, Let's Encrypt provides two major functionalities to domain name owners:
- A certificate authority which assures browsers that the web servers that they are connecting to are who they claim they are so that the lock icon can turn green.
- A workflow that allows web servers to create / renew certificates signed by Let's Encrypt certificate authority automatically.
The certificate authority which assures browsers that the web servers that they are connecting to are who they claim they are
A typical SSL communication is established with the following steps:
- The browser asks the web server that it wishes to establish an SSL communication with for an SSL certificate.
- The server returns its SSL certificate, A, which will contain a public key which the browser can use to encrypt contents that it wishes to send to the server.
- The browser then checks with a third party on whether to trust that the web server is who it claims to be. The browser first checks whether the SSL certificate A is stored in its local trust store; if not, it looks at the certification path within the SSL certificate for the server that signed the SSL certificate. This server is known as the certificate authority for signing SSL certificate A.
- The browser then contacts the certificate authority (let's call it B) to check whether the SSL certificate is valid.
- If the certificate authority is not at the root of the certificate path, it repeats the verification process with the certificate authority that signs the SSL certificate of certificate authority B. The SSL certificate of the root certificate authority is verified against the browser's local trust store.
- When the browser successfully verifies the identity of all the servers mentioned in the certification path of SSL certificate A, the browser will then use the public key that is contained inside of SSL certificate A to encrypt contents that it wishes to send to the server. The browser can be sure that the contents can only be seen by the server because the only key that can decrypt the contents is the private one that the server holds.
Let's Encrypt provides us with a certificate authority whose SSL certificate is signed by a certificate authority which exists in the local trust store of most of our browsers. Hence, when it in turn signs the SSL certificate for our web server, the browser is able to complete the trust verification process to mark our web server as being safe to communicate with.
The Let's Encrypt workflow that allows web servers to create / renew certificates signed by Let's Encrypt certificate authority automatically
In order to get into Let's Encrypt workflow, we need to get a copy of Let's Encrypt application that we can use to contact the Let's Encrypt server.
On the web server where we want to apply a Let's Encrypt certified SSL certificate, the application will first create a secret document that should be accessible via the /.well-known/acme-challenge uri prefix. For example if the Let's Encrypt application created a document ABCDEFGHIJK on my web root, it shall be accessible via the url, http://www.anewwebsite.com/.well-known/acme-challenge/ABCDEFGHIJK.
After creating the secret document, the Let's Encrypt application then contacts the server which will create the certified SSL certificate for our web server. Before the Let's Encrypt server creates the certified SSL certificate for our web server, it needs to be sure that the Let's Encrypt application was run from the web server that serves the www.anewwebsite.com domain. To do so, it accesses our web server by the url provided by the Let's Encrypt application to get the secret content.
When it is able to match the content with the one that is received from the Let's Encrypt application, the Let's Encrypt server creates an SSL certificate and the corresponding private key for our web server. The Let's Encrypt server also signs our SSL certificate.
The Let's Encrypt client then downloads the signed SSL certificate and the private key and places them in the file system of our web server. Our web server can then reference the signed SSL certificate and the private key to serve HTTPS traffic.
Getting a copy of the Let's Encrypt application on Ubuntu Server 15.10.3
As mentioned earlier, the Let's Encrypt application is an important component for creating a free certified SSL certificate for our web server. As such, the first thing that I did was to get a copy of the Let's Encrypt application for my Ubuntu Server 15.10.3. The Let's Encrypt application can be downloaded from the github repository at https://github.com/letsencrypt/letsencrypt.
Installing the git program on Ubuntu Server 15.10.3
Since I do not have the git program installed on my Ubuntu Server 15.10.3, I first installed the git program via the following command line:
sudo apt-add-repository ppa:git-core/ppa
sudo apt-get update
sudo apt-get install git -y
After the git program had been installed, I used it to clone a copy of the Let's Encrypt application onto the local file system of my server:
cd /opt
sudo git clone https://github.com/letsencrypt/letsencrypt.git
With that I would have a copy of the Let's Encrypt application for me to request a free certified SSL certificate and the corresponding private key from the Let's Encrypt server.
Making my Raspberry Pi accessible via my domain name
As mentioned, earlier, the Let's Encrypt server will contact our web server to request for the secret document that the Let's Encrypt application creates. Since my Raspberry Pi 3 is sitting behind my home router, I will need to perform the following steps to make it contactable via the Internet:
- Get the public IP address of my home router.
- Create the Network Address Translation entry that maps my Raspberry Pi's private IP address at port 80 to my router's public IP address at port 80. For convenience sake, I also create the Network Address Translation entry for port 443 for the HTTPS traffic that I would enable later.
- Create a type A entry on my DNS host that points anewwebsite.com to the public IP address of my router.
- Create a type CNAME entry on my DNS host that points www.anewwebsite.com to anewwebsite.com
Allowing traffic to /.well-known uri path
Once I had made my Raspberry Pi accessible via my domain name, I opened up /etc/nginx/sites-enabled/anewwebsite.com.conf that I had created earlier and modified it to be as follows:
server {
	listen 80;
	server_name anewwebsite.com www.anewwebsite.com;
	root /var/www/my_new_wordpress_site;

	index index.php;

	location ~ /.well-known {
		allow all;
	}

	include global/restrictions.conf;

	# Only include one of the files below.
	include global/wordpress.conf;
}
Note that the location block for /.well-known is placed before the restrictions.conf file as there is a location block inside restrictions.conf that denies access to all paths that begin with a dot (.).
Getting the Let's Encrypt application to create a free certified SSL certificate and the corresponding private key
Once I had made sure that url paths prefixed with http://www.anewwebsite.com/.wellknown can be accessed via the internet, I went ahead to use the Let's Encrypt application to create a free certified SSL certificate for my web server. To do so, I used the letsencrypt-auto script as follows:
/opt/letsencrypt/letsencrypt-auto certonly -a webroot --webroot-path=/var/www/my_new_wordpress_site -d anewwebsite.com -d www.anewwebsite.com
This took quite a while as the Let's Encrypt application installs the python dependencies for it to communicate with the Let's Encrypt server.
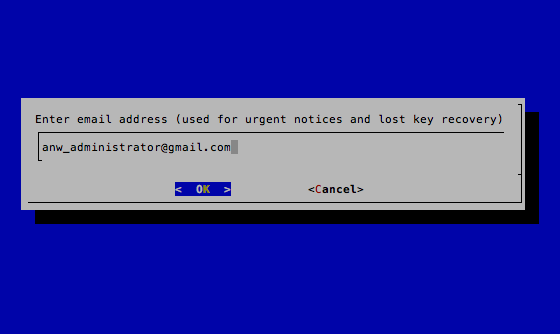
After the installation had completed, I was then presented with the following screen where I entered my email address that I could use in the event that I needed to recover my key:
I was then shown the following screen to agree with Let's Encrypt Terms of Service:
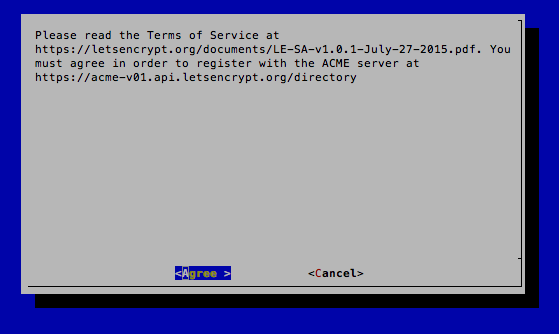
Once I had agreed to Let's Encrypt Terms of Service, the Let's Encrypt application then proceeded with getting a Let's Encrypt signed SSL certificate and the corresponding private key for me.
I was shown the following output as an indication that the Let's Encrypt application had successfully downloaded the Let's Encrypt signed SSL certificate and the corresponding private key for me:
IMPORTANT NOTES:
 - Congratulations! Your certificate and chain have been saved at
   /etc/letsencrypt/live/anewwebsite.com/fullchain.pem. Your cert
   will expire on 2016-08-01. To obtain a new version of the
   certificate in the future, simply run Let's Encrypt again.
 - If you lose your account credentials, you can recover through
   e-mails sent to anw_administrator@gmail.com.
 - Your account credentials have been saved in your Let's Encrypt
   configuration directory at /etc/letsencrypt. You should make a
   secure backup of this folder now. This configuration directory will
   also contain certificates and private keys obtained by Let's
   Encrypt so making regular backups of this folder is ideal.
 - If you like Let's Encrypt, please consider supporting our work by:

   Donating to ISRG / Let's Encrypt:   https://letsencrypt.org/donate
   Donating to EFF:                    https://eff.org/donate-le
After the installation had completed, I saw the following file aliases:
/etc/letsencrypt/live/anewwebsite.com/fullchain.pem, which points to the signed certificate and the certificate chain from Let's Encrypt./etc/letsencrypt/live/anewwebsite.com/privkey.pem, which points to the corresponding private key from Let's Encrypt.
Generating a strong Diffie-Hellman group
After the SSL certificate and the corresponding private key were created successfully, I went on to precompute a strong Diffie-Hellman group for my server to use for exchanging cryptographic keys with its clients:
sudo openssl dhparam -out /etc/ssl/certs/dhparam.pem 2048
This process took a very long time to complete but it was worth the effort as it would make communicating with my server more secure.
Configuring Nginx to use the Let's Encrypt SSL certificate and private key for serving HTTPS traffic
With the strong Diffie-Hellman group, the signed SSL certificate and the private key in place, the final step would be for me to configure Nginx to use the Let's Encrypt SSL certificate and private key for serving HTTPS traffic.
I opened up /etc/nginx/sites-enabled/anewwebsite.com.conf which I had created earlier and replaced its contents with the following text:
    server {

        listen 80;
        server_name   anewwebsite.com www.anewwebsite.com;
        return 301 https://$host$request_uri;

    }

    # For ssl
    server {

        ssl on;

        ssl_certificate /etc/letsencrypt/live/anewwebsite.com/fullchain.pem;
        ssl_certificate_key /etc/letsencrypt/live/anewwebsite.com/privkey.pem;

        ssl_protocols TLSv1 TLSv1.1 TLSv1.2;
        ssl_prefer_server_ciphers on;
        ssl_dhparam /etc/ssl/certs/dhparam.pem;
	ssl_ciphers 'ECDHE-RSA-AES128-GCM-SHA256:ECDHE-ECDSA-AES128-GCM-SHA256:ECDHE-RSA-AES256-GCM-SHA384:ECDHE-ECDSA-AES256-GCM-SHA384:DHE-RSA-AES128-GCM-SHA256:DHE-DSS-AES128-GCM-SHA256:kEDH+AESGCM:ECDHE-RSA-AES128-SHA256:ECDHE-ECDSA-AES128-SHA256:ECDHE-RSA-AES128-SHA:ECDHE-ECDSA-AES128-SHA:ECDHE-RSA-AES256-SHA384:ECDHE-ECDSA-AES256-SHA384:ECDHE-RSA-AES256-SHA:ECDHE-ECDSA-AES256-SHA:DHE-RSA-AES128-SHA256:DHE-RSA-AES128-SHA:DHE-DSS-AES128-SHA256:DHE-RSA-AES256-SHA256:DHE-DSS-AES256-SHA:DHE-RSA-AES256-SHA:AES128-GCM-SHA256:AES256-GCM-SHA384:AES128-SHA256:AES256-SHA256:AES128-SHA:AES256-SHA:AES:CAMELLIA:DES-CBC3-SHA:!aNULL:!eNULL:!EXPORT:!DES:!RC4:!MD5:!PSK:!aECDH:!EDH-DSS-DES-CBC3-SHA:!EDH-RSA-DES-CBC3-SHA:!KRB5-DES-CBC3-SHA';
        ssl_session_timeout 1d;
        ssl_session_cache shared:SSL:50m;
        ssl_stapling on;
        ssl_stapling_verify on;
        add_header Strict-Transport-Security max-age=15768000;

        default_type  application/octet-stream;

	listen 443;
        server_name   anewwebsite.com www.anewwebsite.com;

	root /var/www/my_new_wordpress_site;

        index index.php;

        location ~ /.well-known {
            allow all;
        }

        include global/restrictions.conf;

        # Only include one of the files below.
        include global/wordpress.conf;

    }
The first server block would make my Nginx server listen on port 80 and redirect all traffic to its HTTPS counterpart.
The second server block would configure my Nginx server to serve SSL traffic on port 443. In that block, I point my server to the strong Diffie-Hellman group, the Let's Encrypt certified SSL certificate and the private key.
I kept the location block to requests made to the /.well-known prefix so that I could renew my SSL certificate with the Let's Encrypt application in the future.
The WordPress related configurations remained unchanged.
I saved the changes made to /etc/nginx/sites-enabled/anewwebsite.com.conf and restarted my Nginx server with the following command:
sudo systemctl restart nginx
Renewing the SSL certificate in future
The expiration date for my SSL certificate will be set six months after I ran the Let's Encrypt application to create a new SSL certificate.
If I want to renew my SSL certificate in the future, I will run the following command:
/opt/letsencrypt/letsencrypt-auto certonly --force-renewal -a webroot --webroot-path=/var/www/my_new_wordpress_site -d anewwebsite.com -d www.anewwebsite.com
This command will force a renewal of my SSL certificate even if it is not going to expire anytime soon.
And to get my Nginx server to take the renewal of my SSL certificate, I will run the following command to restart my Nginx server:
sudo systemctl restart nginx