How to setup Taiga project management platform on Raspberry Pi 3 with Raspbian Stretch Lite
![]()
A project management platform is useful for us to keep tabs on what we want to build. Taiga is a popular open source project management platform that is highly recommended by opensource.com to be the top open source alternative to Trello.
Taiga runs well on a Raspberry Pi 3. If you want to setup something at home to help you manage the projects that you are working on, you can consider setting up the Taiga project management platform on a Raspberry Pi 3 with Raspbian Stretch Lite as the base operating system.
This post is adapted from Taiga's installation guide to serve as a guide to setting up Taiga project management platform on Raspberry Pi 3 with Raspbian Stretch Lite.
Recommended hardware list
- CanaKit Raspberry Pi 3 with 2.5A Micro USB Power Supply or CanaKit Raspberry Pi 3 B+ (B Plus) with 2.5A Power Supply (UL Listed)
- Raspberry Pi 2/3 official case Black/Grey or Raspberry Pi 2/3 official case Red/White
- Sandisk Ultra 32GB Micro SDHC UHS-I Card with Adapter
- AmazonBasics RJ45 Cat-6 Ethernet Patch Cable - 3 Feet (0.9 Meters)
Setting up Raspbian Stretch Lite on Raspberry Pi 3 to run Python 3 applications
As a first step setting up your Taiga project management platform on Raspberry Pi 3, follow this tutorial to setup Raspbian Stretch Lite on Raspberry Pi 3 to run Python 3 applications. After doing so, you will get your Raspberry Pi 3 running the Raspbian Stretch Lite operating system with the following software pieces:
- SSH server which enables you to configure Raspbian Stretch Lite from another computer in your home network.
- Python 3 for running one of Taiga's component, Taiga backend, that is based on Django.
- Python 3 package manager (pip3) for installing the dependencies for Taiga backend.
- Virtualenv for you to create an isolated environment for running Taiga backend.
Installing other dependency packages for Taiga
Apart from the Python packages that we had installed earlier, there are more dependency packages that we need to install for the three modules that made up the Taiga project management platform. To install those packages, run the following commands:
sudo apt-get update
sudo apt-get install -y build-essential binutils-doc autoconf flex bison libjpeg-dev
sudo apt-get install -y libfreetype6-dev zlib1g-dev libzmq3-dev libgdbm-dev libncurses5-dev
sudo apt-get install -y automake libtool libffi-dev curl git tmux gettext
sudo apt-get install -y rabbitmq-server redis-server
sudo apt-get install -y nginx supervisor
sudo apt-get install -y postgresql postgresql-contrib
sudo apt-get install -y postgresql-doc postgresql-server-dev-9.6
sudo apt-get install -y python-dev
sudo apt-get install -y libxml2-dev libxslt-dev
sudo apt-get install -y libssl-dev libffi-dev
sudo apt-get install -y libopenjp2-7-dev
Creating a system user taiga, giving it root permissions and switch the current user with taiga
Once you had installed all the dependency packages needed by Taiga project management platform, proceed on to create a system user taiga, give it root permissions and switch the current user to taiga:
sudo adduser taiga
sudo adduser taiga sudo
sudo su taiga
cd ~
You will need to use the taiga user to proceed with the rest of this guide.
Setting up PostgreSQL with the initial user and database
Once you had switched over to the taiga user, run the following commands to setup PostgreSQL for the Taiga project management platform:
sudo -u postgres createuser taiga
sudo -u postgres createdb taiga -O taiga --encoding='utf-8' --locale=en_US.utf8 --template=template0
Creating a user named taiga, and a virtual host for RabbitMQ
Once you had configured PostgreSQL for the Taiga project management platform, run the following commands to configure RabbitMQ for taiga-events:
sudo rabbitmqctl add_user taiga PASSWORD_FOR_EVENTS
sudo rabbitmqctl add_vhost taiga
sudo rabbitmqctl set_permissions -p taiga taiga ".*" ".*" ".*"
Creating the logs folder
Once you had created the RabbitMQ user and virtual host for it, create a logs directory for the various Taiga components to write logs to:
mkdir -p ~/logs
Setting up Taiga backend
After the creation of the logs directory, we can then proceed to setup Taiga backend.
Downloading a copy of Taiga backend
Run the following commands to download a copy of Taiga backend:
cd ~
git clone https://github.com/taigaio/taiga-back.git taiga-back
cd taiga-back
git checkout stable
Creating a virtual environment for Taiga backend
Run the following commands to create a virtual environment for Taiga backend:
cd ~
virtualenv -p python3 taiga-back_env
Installing Taiga backend dependencies in virtual environment
Run the following commands to install Taiga backend dependencies in the virtual environment that we had created earlier:
cd ~
source taiga-back_env/bin/activate
cd taiga-back
pip install -r requirements.txt
Populating the database with initial basic data
Run the following commands to populate the database with some initial basic data:
python manage.py migrate --noinput
python manage.py loaddata initial_user
python manage.py loaddata initial_project_templates
python manage.py compilemessages
python manage.py collectstatic --noinput
This will create the administrator account with login username admin with password 123123.
Creating the initial configuration file
Run the following command to get nano to create the initial configuration file for taiga backend:
nano ~/taiga-back/settings/local.py
And suppose that your Raspberry Pi 3 is reachable via 192.168.1.109, create the following content inside local.py:
from .common import *

MEDIA_URL = "http://192.168.1.109/media/"
STATIC_URL = "http://192.168.1.109/static/"
SITES["front"]["scheme"] = "http"
SITES["front"]["domain"] = "192.168.1.109"

SECRET_KEY = "theveryultratopsecretkey"

DEBUG = False
PUBLIC_REGISTER_ENABLED = False

DEFAULT_FROM_EMAIL = "no-reply@192.168.1.109"
SERVER_EMAIL = DEFAULT_FROM_EMAIL

#CELERY_ENABLED = True

EVENTS_PUSH_BACKEND = "taiga.events.backends.rabbitmq.EventsPushBackend"
EVENTS_PUSH_BACKEND_OPTIONS = {"url": "amqp://taiga:PASSWORD_FOR_EVENTS@localhost:5672/taiga"}

# Uncomment and populate with proper connection parameters
# for enable email sending. EMAIL_HOST_USER should end by @domain.tld
#EMAIL_BACKEND = "django.core.mail.backends.smtp.EmailBackend"
#EMAIL_USE_TLS = False
#EMAIL_HOST = "localhost"
#EMAIL_HOST_USER = ""
#EMAIL_HOST_PASSWORD = ""
#EMAIL_PORT = 25

# Uncomment and populate with proper connection parameters
# for enable github login/singin.
#GITHUB_API_CLIENT_ID = "yourgithubclientid"
#GITHUB_API_CLIENT_SECRET = "yourgithubclientsecret"
Save the configuration file when you had completed filling up your details.
Verifying Taiga backend installation
Once you had created the initial configuration file, run the following commands to run Taiga backend temporarily:
source ~/taiga-back_env/bin/activate
python ~/taiga-back/manage.py runserver
Open up another SSH session to your raspberry pi:
ssh pi@192.168.1.109
And type the following command:
curl -0 http://localhost:8000/api/v1/
If taiga-back is setup correctly, you should be able to see a JSON representing the list of endpoints at the url: http://localhost:8000/api/v1/.
Once you had verified that taiga-back is setup correctly, go back to the SSH session that you run Taiga backend from. Stop running Taiga backend by pressing CONTROL-C.
Setting up Taiga frontend
After setting up Taiga backend, proceed on to setup Taiga frontend.
Downloading a copy of Taiga frontend
Run the following commands to download a copy of Taiga frontend:
cd ~
git clone https://github.com/taigaio/taiga-front-dist.git taiga-front-dist
cd taiga-front-dist
git checkout stable
After the commands had completed, create the configuration file from the sample configuration:
cp ~/taiga-front-dist/dist/conf.example.json ~/taiga-front-dist/dist/conf.json
Use nano to open up conf.json:
sudo nano ~/taiga-front-dist/dist/conf.json
And supposing that your Raspberry Pi 3 is reachable via 192.168.1.109, edit conf.json to look like the following:
{
    "api": "http://192.168.1.109/api/v1/",
    "eventsUrl": "ws://192.168.1.109/events",
    "eventsMaxMissedHeartbeats": 5,
    "eventsHeartbeatIntervalTime": 60000,
    "eventsReconnectTryInterval": 10000,
    "debug": true,
    "debugInfo": false,
    "defaultLanguage": "en",
    "themes": ["taiga"],
    "defaultTheme": "taiga",
    "publicRegisterEnabled": false,
    "feedbackEnabled": true,
    "supportUrl": "https://tree.taiga.io/support",
    "privacyPolicyUrl": null,
    "termsOfServiceUrl": null,
    "maxUploadFileSize": null,
    "contribPlugins": [],
    "tribeHost": null,
    "importers": [],
    "gravatar": true
}
Setting up Taiga events
Once you had setup Taiga frontend on your Raspberry Pi 3, you may choose to setup Taiga events which is an optional component.
Taiga-events is the Taiga websocket server, it allows taiga frontend to show realtime changes in the backlog, taskboard, kanban and issues listing. Taiga events uses RabbitMQ as the message broker.
Downloading a copy of Taiga events
Run the following commands to get a copy of Taiga events:
cd ~
git clone https://github.com/taigaio/taiga-events.git taiga-events
cd taiga-events
Installing nodejs
Run the following commands to install Node.js on your Raspberry Pi 3:
curl -sL https://deb.nodesource.com/setup_6.x | sudo -E bash -
sudo apt-get install -y nodejs
Installing JavaScript dependencies
Run the following commands to install the JavaScript dependencies that is required to run Taiga events:
npm install
sudo npm install -g coffee-script
Creating the configuration for Taiga events
Run the following command to base the configurations for Taiga events from the given sample:
cp config.example.json config.json
After the copy command completes, use nano to open up config.json:
nano config.json
And update the contents with your RabbitMQ URI and the secret key. Your config.json file should look like this:
{
    "url": "amqp://taiga:PASSWORD_FOR_EVENTS@localhost:5672/taiga",
    "secret": "theveryultratopsecretkey",
    "webSocketServer": {
        "port": 8888
    }
}
Note: The 'secret' in your config.json must be the same as the "SECRET_KEY" in ~/taiga-back/settings/local.py.
Configuring Supervisor to run Taiga backend and Taiga events
Supervisor is a process control system that can help keep Taiga backend and Taiga events running on your Raspberry Pi 3.
Once we had the codes for Taiga components and Taiga events in our Raspberry Pi 3, we can proceed to configure Supervisor to run them.
Configuring Supervisor to run Taiga backend
We first create a bash script for Supervisor to run Taiga backend. Inside the bash script, we will instruct gunicorn to start Taiga backend for us.
First create a file at taiga home directory:
nano ~/run_taiga_backend.sh
And inside taiga_backend.sh, create the following content:
#!/bin/bash

source taiga-back_env/bin/activate
gunicorn -w 3 -t 60 --pythonpath=./taiga-back -b 127.0.0.1:8001 taiga-back.taiga.wsgi
deactivate
Once you had saved taiga_backend.sh, run the following command to make it executable by the taiga user:
chmod u+x ~/run_taiga_backend.sh
After you had made run_taiga_backend.sh executable by the taiga user, create a supervisor configuration file at /etc/supervisor/conf.d/taiga-back.conf:
sudo nano /etc/supervisor/conf.d/taiga-back.conf
And inside taiga-back.conf create the following content:
[program:taiga-back]
directory=/home/taiga
command=/bin/bash -E -c ./run_taiga_backend.sh
autostart=true
autorestart=true
stopsignal=INT
stopasgroup=true
killasgroup=true
stdout_logfile=/home/taiga/logs/taiga-back.stdout.log
stderr_logfile=/home/taiga/logs/taiga-back.stderr.log
user=taiga
Configuring Supervisor to run Taiga events
Next up, proceed to configure Supervisor to run Taiga events. To do so, create a supervisor configuration file at /etc/supervisor/conf.d/taiga-events.conf:
sudo nano /etc/supervisor/conf.d/taiga-events.conf
And inside /etc/supervisor/conf.d/taiga-events.conf, create the following content:
[program:taiga-events]
directory=/home/taiga/taiga-events
command=/usr/bin/coffee index.coffee
autostart=true
autorestart=true
stopsignal=INT
stopasgroup=true
killasgroup=true
stdout_logfile=/home/taiga/logs/taiga-events.stdout.log
stderr_logfile=/home/taiga/logs/taiga-events.stderr.log
user=taiga
Restarting Supervisor
After you had created the Supervisor configurations, restart Supervisor to get it to run Taiga backend and Taiga events:
sudo systemctl restart supervisor.service
Configuring Nginx to serve Taiga frontend, Taiga backend and Taiga events
The next step is configure Nginx as a reverse proxy server for Taiga frontend, Taiga backend and Taiga events. To do so, remove /etc/nginx/sites-enabled/default:
sudo rm /etc/nginx/sites-enabled/default
And create /etc/nginx/sites-enabled/taiga.conf:
sudo nano /etc/nginx/sites-enabled/taiga.conf
Inside taiga.conf, create the following content:
server {
    listen 80 default_server;
    server_name _;

    large_client_header_buffers 4 32k;
    client_max_body_size 50M;
    charset utf-8;

    access_log /home/taiga/logs/nginx.access.log;
    error_log /home/taiga/logs/nginx.error.log;

    # Frontend
    location / {
        root /home/taiga/taiga-front-dist/dist/;
        try_files $uri $uri/ /index.html;
    }

    # Backend
    location /api {
        include proxy_params;
        proxy_set_header X-Scheme $scheme;
        proxy_pass http://127.0.0.1:8001/api;
        proxy_redirect off;
    }

    # Django admin access (/admin/)
    location /admin {
        include proxy_params;
        proxy_set_header X-Scheme $scheme;
        proxy_pass http://127.0.0.1:8001$request_uri;
        proxy_redirect off;
    }

    # Static files
    location /static {
        alias /home/taiga/taiga-back/static;
    }

    # Media files
    location /media {
        alias /home/taiga/taiga-back/media;
    }

    # Taiga-events
    location /events {
        proxy_pass http://127.0.0.1:8888/events;
        proxy_http_version 1.1;
        proxy_set_header Upgrade $http_upgrade;
        proxy_set_header Connection "upgrade";
        proxy_connect_timeout 7d;
        proxy_send_timeout 7d;
        proxy_read_timeout 7d;
    }
}
Save the file and restart Nginx:
sudo systemctl restart nginx.service
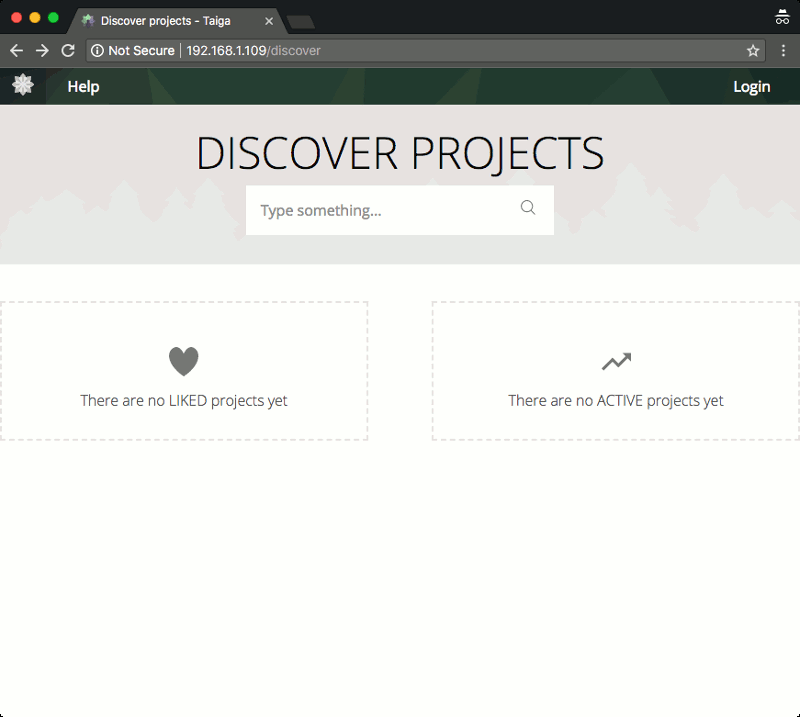
Accessing Taiga from your home computer
Once you had restarted Nginx, you can use the browser on your home computer to access your Taiga installation on your Raspberry Pi 3.
Suppose that your Raspberry Pi 3 is reachable from your home computer via 192.168.1.109, enter http://192.168.1.109 in the location bar.
You should see the following screen:
Changing the default password of the administrator account
Remember that we had created an administrator account with login username admin with password 123123. This is not safe as anybody who read this post can get administrator access to your Taiga installation.
To change the password of the administrator account, click on the "login" button at the top right corner to get to the login page. Enter the default administrator account credentials in the login page:
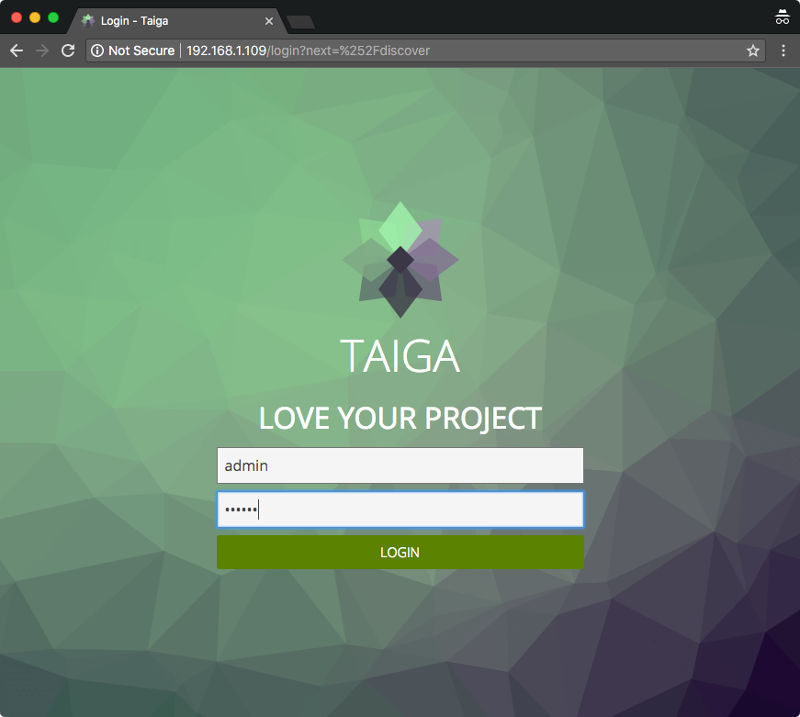
And click on the "LOGIN" button.
Once you had logged into Taiga successfully, click on the "Administrator" button at the top, and then the "EDIT BIO" button at the right. You will see the "USER SETTINGS" page:
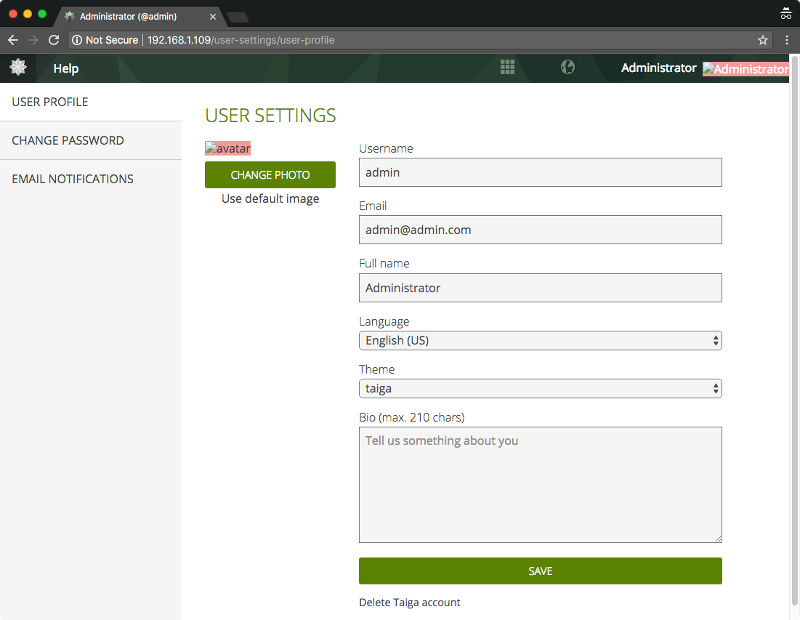
Click on the "CHANGE PASSWORD" button on the left to access the "CHANGE PASSWORD" page:
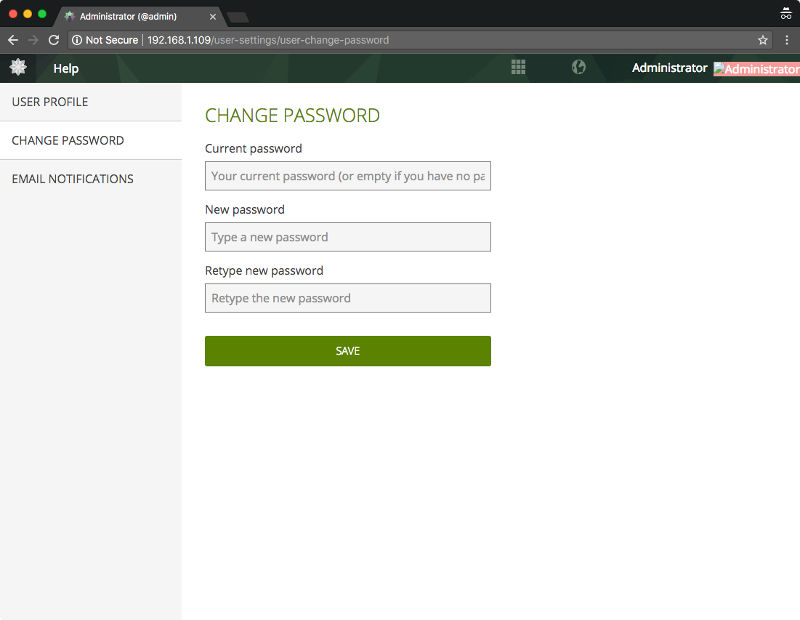
Enter the relevant input and click on the "SAVE" button.
Changing profile photo
Notice that the profile photo is broken. To correct that, go to the "USER SETTINGS" page by clicking on the "USER PROFILE" tab at the left. In the "USER SETTINGS" page, click on the "CHANGE PHOTO" button to choose a picture from your computer as the new profile picture.
Configuring your Taiga installation to be accessed from outside your home network via HTTPS with Let's Encrypt certificate
At this point in time, you had setup a Taiga installation on your Raspberry Pi 3 that can only be accessed from within your home network.
If you want to be able to access your Taiga installation from outside your home network, there are more configurations to be done.
Pre-requisites
As mentioned in an earlier post on how to host multiple websites from home, you will need the following pieces for enabling your Taiga installation to be accessed from outside your home network via HTTPS with Let's Encrypt browser-trusted certificate:
- A domain or subdomain name that is mapped to the public IP address that your home router had gotten from the Internet Service Provider. If your public IP address changes frequently, you may want to buy a Namecheap domain and get your Raspberry Pi 3 to use Namecheap dynamic DNS to update your domain when your home’s public IP address changes.
- Forwarding of network traffic made to port 80 and 443 of your home router public IP address to the IP address of the Raspberry Pi 3 that contains your Taiga installation. If you happen to use Linksys EA7500 Max-Stream AC1900 router, you can checkout this post on how to do so.
Installing CertBot
Once you had met the pre-requisites, proceed to install Certbot on Raspbian Stretch Lite.
Configuring Nginx to facilitate Certbot in acquiring the SSL certificate for your domain or subdomain
Suppose that you had designated taiga.yourdomain.com as the domain to reach your Taiga installation on your Raspberry Pi 3.
With that, let's first move /etc/nginx/sites-enabled/taiga.conf to /etc/nginx/sites-enabled/taiga.yourdomain.com.conf:
sudo mv /etc/nginx/sites-enabled/taiga.conf /etc/nginx/sites-enabled/taiga.yourdomain.com.conf
Next, open up /etc/nginx/sites-enabled/taiga.yourdomain.com.conf with nano:
sudo nano /etc/nginx/sites-enabled/taiga.yourdomain.com.conf
And change the contents of taiga.yourdomain.com.conf to look like the following:
server {
    listen 80;
    server_name taiga.yourdomain.com;

    large_client_header_buffers 4 32k;
    client_max_body_size 50M;
    charset utf-8;

    access_log /home/taiga/logs/nginx.access.log;
    error_log /home/taiga/logs/nginx.error.log;

    # For ACME challenge
    location ~ /.well-known {
        root /home/taiga;
        allow all;
    }

    # Frontend
    location / {
        root /home/taiga/taiga-front-dist/dist/;
        try_files $uri $uri/ /index.html;
    }

    # Backend
    location /api {
        include proxy_params;
        proxy_set_header X-Scheme $scheme;
        proxy_pass http://127.0.0.1:8001/api;
        proxy_redirect off;
    }

    # Django admin access (/admin/)
    location /admin {
        include proxy_params;
        proxy_set_header X-Scheme $scheme;
        proxy_pass http://127.0.0.1:8001$request_uri;
        proxy_redirect off;
    }

    # Static files
    location /static {
        alias /home/taiga/taiga-back/static;
    }

    # Media files
    location /media {
        alias /home/taiga/taiga-back/media;
    }

    # Taiga-events
    location /events {
        proxy_pass http://127.0.0.1:8888/events;
        proxy_http_version 1.1;
        proxy_set_header Upgrade $http_upgrade;
        proxy_set_header Connection "upgrade";
        proxy_connect_timeout 7d;
        proxy_send_timeout 7d;
        proxy_read_timeout 7d;
    }

}
These configuration changes will make Nginx server proxies HTTP requests bound for http://taiga.yourdomain.com to the respective Taiga components.
In addition, these configuration changes allow Let's Encrypt servers to access a secret file that Certbot will create inside /home/taiga/.well-known directory in the process of requesting for Let's Encrypt browser-trusted certificate.
After you have saved the Nginx configuration changes, restart Nginx:
sudo systemctl restart nginx.service
Running Certbot to get the SSL certificate artefacts for your domain / subdomain
Once Nginx had restarted successfully, run the following command to get the Let's Encrypt artefacts for your domain / subdomain:
sudo certbot certonly -a webroot --webroot-path=/home/taiga -d taiga.yourdomain.com
Generating a Diffie-Hellman group
Once Certbot had fetched the SSL certificate artefacts for your domain / subdomain, proceed on to generate a Diffie-Hellman group for Nginx to use for exchanging cryptographic keys with its clients:
sudo openssl dhparam -out /etc/ssl/certs/dhparam.pem 2048
Configuring Nginx to serve HTTPS traffic
With the Diffie-Hellman group generated, we can then proceed on to configure Nginx to serve HTTPS traffic for requests made to our Taiga installation.
To do so, open up /etc/nginx/sites-enabled/taiga.yourdomain.com.conf with nano:
sudo nano /etc/nginx/sites-enabled/taiga.yourdomain.com.conf
And change the contents of taiga.yourdomain.com.conf to look like the following:
server {
    listen 80;
    server_name  taiga.yourdomain.com;
    return 301 https://$host$request_uri;
}

# For ssl
server {
    ssl on;
    ssl_certificate /etc/letsencrypt/live/taiga.yourdomain.com/fullchain.pem;
    ssl_certificate_key /etc/letsencrypt/live/taiga.yourdomain.com/privkey.pem;
    ssl_protocols TLSv1 TLSv1.1 TLSv1.2;
    ssl_prefer_server_ciphers on;
    ssl_dhparam /etc/ssl/certs/dhparam.pem;
    ssl_ciphers 'ECDHE-RSA-AES128-GCM-SHA256:ECDHE-ECDSA-AES128-GCM-SHA256:ECDHE-RSA-AES256-GCM-SHA384:ECDHE-ECDSA-AES256-GCM-SHA384:DHE-RSA-AES128-GCM-SHA256:DHE-DSS-AES128-GCM-SHA256:kEDH+AESGCM:ECDHE-RSA-AES128-SHA256:ECDHE-ECDSA-AES128-SHA256:ECDHE-RSA-AES128-SHA:ECDHE-ECDSA-AES128-SHA:ECDHE-RSA-AES256-SHA384:ECDHE-ECDSA-AES256-SHA384:ECDHE-RSA-AES256-SHA:ECDHE-ECDSA-AES256-SHA:DHE-RSA-AES128-SHA256:DHE-RSA-AES128-SHA:DHE-DSS-AES128-SHA256:DHE-RSA-AES256-SHA256:DHE-DSS-AES256-SHA:DHE-RSA-AES256-SHA:AES128-GCM-SHA256:AES256-GCM-SHA384:AES128-SHA256:AES256-SHA256:AES128-SHA:AES256-SHA:AES:CAMELLIA:DES-CBC3-SHA:!aNULL:!eNULL:!EXPORT:!DES:!RC4:!MD5:!PSK:!aECDH:!EDH-DSS-DES-CBC3-SHA:!EDH-RSA-DES-CBC3-SHA:!KRB5-DES-CBC3-SHA';
    ssl_session_timeout 1d;
    ssl_session_cache shared:SSL:50m;
    ssl_stapling on;
    ssl_stapling_verify on;
    add_header Strict-Transport-Security max-age=15768000;

    default_type  application/octet-stream;

    listen 443;
    server_name  taiga.yourdomain.com;

    access_log /home/taiga/logs/nginx.access.log;
    error_log /home/taiga/logs/nginx.error.log;

    # For ACME challenge
    location ~ /.well-known {
        root /home/taiga;
        allow all;
    }

    # Frontend
    location / {
        root /home/taiga/taiga-front-dist/dist/;
        try_files $uri $uri/ /index.html;
    }

    # Backend
    location /api {
        include proxy_params;
        proxy_set_header X-Scheme $scheme;
        proxy_pass http://127.0.0.1:8001/api;
        proxy_redirect off;
    }

    # Django admin access (/admin/)
    location /admin {
        include proxy_params;
        proxy_set_header X-Scheme $scheme;
        proxy_pass http://127.0.0.1:8001$request_uri;
        proxy_redirect off;
    }

    # Static files
    location /static {
        alias /home/taiga/taiga-back/static;
    }

    # Media files
    location /media {
        alias /home/taiga/taiga-back/media;
    }

    # Taiga-events
    location /events {
        proxy_pass http://127.0.0.1:8888/events;
        proxy_http_version 1.1;
        proxy_set_header Upgrade $http_upgrade;
        proxy_set_header Connection "upgrade";
        proxy_connect_timeout 7d;
        proxy_send_timeout 7d;
        proxy_read_timeout 7d;
    }

}
Save the configuration changes and restart Nginx:
sudo systemctl restart nginx.service
Updating Taiga backend and Taiga frontend configurations to take the new url settings
The last step is to update Taiga backend and Taiga frontend configurations.
Open up ~/taiga-back/settings/local.py:
nano ~/taiga-back/settings/local.py
And change the contents to look like the following:
from .common import *

MEDIA_URL = "https://taiga.yourdomain.com/media/"
STATIC_URL = "https://taiga.yourdomain.com/static/"
SITES["front"]["scheme"] = "https"
SITES["front"]["domain"] = "taiga.yourdomain.com"

SECRET_KEY = "theveryultratopsecretkey"

DEBUG = False
PUBLIC_REGISTER_ENABLED = False

DEFAULT_FROM_EMAIL = "no-reply@example.com"
SERVER_EMAIL = DEFAULT_FROM_EMAIL

#CELERY_ENABLED = True

EVENTS_PUSH_BACKEND = "taiga.events.backends.rabbitmq.EventsPushBackend"
EVENTS_PUSH_BACKEND_OPTIONS = {"url": "amqp://taiga:PASSWORD_FOR_EVENTS@localhost:5672/taiga"}

# Uncomment and populate with proper connection parameters
# for enable email sending. EMAIL_HOST_USER should end by @domain.tld
#EMAIL_BACKEND = "django.core.mail.backends.smtp.EmailBackend"
#EMAIL_USE_TLS = False
#EMAIL_HOST = "localhost"
#EMAIL_HOST_USER = ""
#EMAIL_HOST_PASSWORD = ""
#EMAIL_PORT = 25

# Uncomment and populate with proper connection parameters
# for enable github login/singin.
#GITHUB_API_CLIENT_ID = "yourgithubclientid"
#GITHUB_API_CLIENT_SECRET = "yourgithubclientsecret"
Open up ~/taiga-front-dist/dist/conf.json:
nano ~/taiga-front-dist/dist/conf.json
And change the contents to look like the following:
{
    "api": "https://taiga.yourdomain.com/api/v1/",
    "eventsUrl": "wss://taiga.yourdomain.com/events",
    "eventsMaxMissedHeartbeats": 5,
    "eventsHeartbeatIntervalTime": 60000,
    "eventsReconnectTryInterval": 10000,
    "debug": true,
    "debugInfo": false,
    "defaultLanguage": "en",
    "themes": ["taiga"],
    "defaultTheme": "taiga",
    "publicRegisterEnabled": false,
    "feedbackEnabled": true,
    "supportUrl": "https://tree.taiga.io/support",
    "privacyPolicyUrl": null,
    "termsOfServiceUrl": null,
    "maxUploadFileSize": null,
    "contribPlugins": [],
    "tribeHost": null,
    "importers": [],
    "gravatar": true
}
Once you had saved the configuration files, restart Supervisor:
sudo systemctl restart supervisor.service
With that when you use your browser to access taiga.yourdomain.com, your browser will be redirected to https://taiga.yourdomain.com which allows your browser to communicate with your Taiga installation via HTTPS.
Setting up Taiga to send email
At this point in time, our Taiga installation will not be able to send email.
Installing Postfix for Taiga to send email
To allow email to be sent by Taiga, first install Postfix as the SMTP server for programs to send email from Raspbian Stretch Lite.
Changing the Taiga backend configurations to allow the sending of email
Once you had installed Postfix on your Raspbian Stretch Lite, open up ~/taiga-back/settings/local.py:
nano ~/taiga-back/settings/local.py
And change the contents to look like the following:
from .common import *

MEDIA_URL = "https://taiga.yourdomain.com/media/"
STATIC_URL = "https://taiga.yourdomain.com/static/"
SITES["front"]["scheme"] = "https"
SITES["front"]["domain"] = "taiga.yourdomain.com"

SECRET_KEY = "theveryultratopsecretkey"

DEBUG = False
PUBLIC_REGISTER_ENABLED = False

DEFAULT_FROM_EMAIL = "no-reply@taiga.yourdomain.com"
SERVER_EMAIL = DEFAULT_FROM_EMAIL

#CELERY_ENABLED = True

EVENTS_PUSH_BACKEND = "taiga.events.backends.rabbitmq.EventsPushBackend"
EVENTS_PUSH_BACKEND_OPTIONS = {"url": "amqp://taiga:PASSWORD_FOR_EVENTS@localhost:5672/taiga"}

# Uncomment and populate with proper connection parameters
# for enable email sending. EMAIL_HOST_USER should end by @domain.tld
EMAIL_BACKEND = "django.core.mail.backends.smtp.EmailBackend"
EMAIL_USE_TLS = False
EMAIL_HOST = "localhost"
EMAIL_HOST_USER = ""
EMAIL_HOST_PASSWORD = ""
EMAIL_PORT = 25

# Uncomment and populate with proper connection parameters
# for enable github login/singin.
#GITHUB_API_CLIENT_ID = "yourgithubclientid"
Once you had saved the changes, restart Supervisor:
sudo systemctl restart supervisor.service
Buying the Raspberry Pi 3 hardware to host your own Taiga project management platform
If you do not have the Raspberry Pi 3 hardware mentioned in this post yet, you may want to purchase them from Amazon. Simply click on the button below to add the Raspberry Pi 3 hardware to your cart. You may remove anything that you already have or replace some of the hardware with other hardware.