How to post JSON data to a HTTP server endpoint from your ESP32 development board with ArduinoJson
When sending data from your ESP32 development board, you may choose to send the data in JSON.
In such a situation, you can consider using ArduinoJson to help you construct the JSON data.
Given that, let us look at how we can post JSON data to a HTTP server endpoint from a ESP32 development board with ArduinoJson.
Enabling ESP32 Development on Arduino IDE
Before continuing, be sure that you have enable ESP32 Development on Arduino IDE. After you have done so, you should be able to use the HttpClient library from your Arduino sketch to send HTTP requests.
Installing the ArduinoJson library on Arduino IDE
After starting your Arduino IDE, install the ArduinoJson library.
In order to do so, go to Tools -> Manage Libraries... after your Arduino IDE had started.
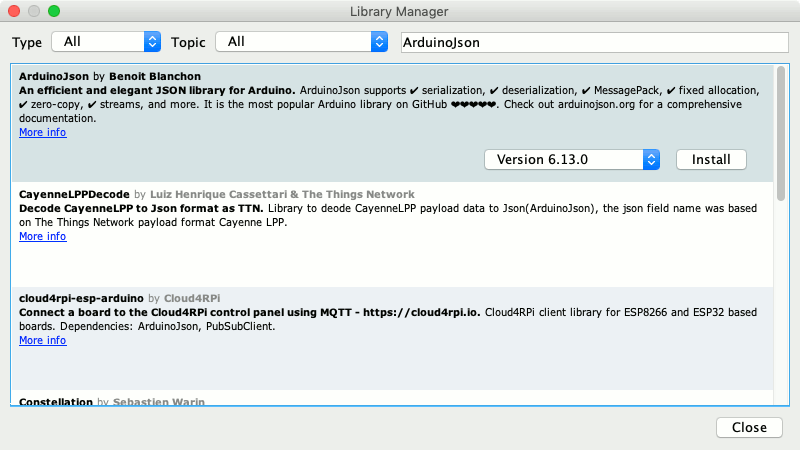
When the Library Manager window appeared in the foreground, search for ArduinoJson and install it:
Writing the Arduino Sketch to post JSON data to a HTTP server endpoint from your ESP32 development board
Once you have installed the ArduinoJson library, you can then write the Arduino Sketch to post JSON data to a HTTP server endpoint.
In order to simplify this post, let's use one of the endpoints from httpbin.org. When we send a request to https://httpbin.org/anything, the server will respond with the data from the request.
Given that, this is an example Arduino sketch for posting JSON data to a HTTP server endpoint from your ESP32 development board:
#include <ArduinoJson.h>
#include <HTTPClient.h>
#include <WiFiMulti.h>

const char *AP_SSID = "my_ssid";
const char *AP_PWD = "ap_password";

WiFiMulti wifiMulti;

void setup() {
  Serial.begin(9600);

  delay(4000);
  wifiMulti.addAP(AP_SSID, AP_PWD);

  postDataToServer();
}

void loop() {
  // Not used in this example
}

void postDataToServer() {

  Serial.println("Posting JSON data to server...");
  // Block until we are able to connect to the WiFi access point
  if (wifiMulti.run() == WL_CONNECTED) {

    HTTPClient http;

    http.begin("https://httpbin.org/anything");
    http.addHeader("Content-Type", "application/json");

    StaticJsonDocument<200> doc;
    // Add values in the document
    //
    doc["sensor"] = "gps";
    doc["time"] = 1351824120;

    // Add an array.
    //
    JsonArray data = doc.createNestedArray("data");
    data.add(48.756080);
    data.add(2.302038);

    String requestBody;
    serializeJson(doc, requestBody);

    int httpResponseCode = http.POST(requestBody);

    if(httpResponseCode>0){

      String response = http.getString();

      Serial.println(httpResponseCode);
      Serial.println(response);

    }
    else {

      Serial.printf("Error occurred while sending HTTP POST: %s\n", httpClient.errorToString(statusCode).c_str());

    }

  }
}
So what does the Arduino Sketch do?
First of all, it includes the ArduinoJson, HTTPClient and WiFiMulti libraries that we will use in the sketch.
After that, the sketch defines the SSID and password of the wireless access point that the ESP32 board will connect with. If you are using a different set of wireless credentials, then be sure to change them.
Next, an instance of WiFiMulti is created.
Inside the setup function
When the ESP32 board runs the setup function, it defines a baud rate of 9600 for the board's serial connection. After that, it waits for 4 seconds before adding the wireless credentials to wifiMulti.
Once the wireless credentials is specified, it then calls the postDataToServer function.
Inside the postDataToServer function
When the postDataToServer function is called, the board will print an indication to serial.
After doing so, the code calls wifiMulti.run() to check if the board is connected to the WiFi network. At this point in time, code execution will block until your ESP32 board is able to connect to the wireless network.
When the ESP32 board can connect to the network, an instance of HTTPClient is created. After that, we include the server url with http.begin and the content type with http.addHeader. Since the code will send JSON data in the request body, we indicate the content type to be application/json.
After defining the url and content type of the request, the code begin to construct the JSON data.
Constructing a sample JSON document
In order to do, an instance of StaticJsonDocument is created. After that, two root elements to the JSON document. After that, a nested array is created with doc.createNestedArray. When the code is ready to send the HTTP request, it calls serializeJson to construct the JSON data as a String. In this case, the JSON string is kept inside requestBody.
Sending the JSON data inside the HTTP post request
Once the JSON data is available as a String, the code calls http.POST to send out the HTTP request with POST as the request method. When the call returns, the status code of the HTTP response that the server returns back is stored in httpResponseCode.
Given that status code, we will be able to determine if the HTTP request is being sent. When we get a positive number, we know that the server has returned us with a response. In this situation, the code will print the response status code and body out to serial.
However, if we get a negative number, it indicates that the HTTP request was not sent successfully. In this case, the code will print the corresponding error to serial.
Sample output from running the Arduino sketch to post JSON data to a HTTP server endpoint from your ESP32 development board
When you upload the Arduino sketch to a ESP32 development board, you will find output similar to the following in your Serial monitor:
Posting JSON data to server...
200
{
  "args": {},
  "data": "{\"sensor\":\"gps\",\"time\":1351824120,\"data\":[48.75608,2.302038]}",
  "files": {},
  "form": {},
  "headers": {
    "Accept-Encoding": "identity;q=1,chunked;q=0.1,*;q=0",
    "Content-Length": "61",
    "Content-Type": "application/json",
    "Host": "httpbin.org",
    "User-Agent": "ESP32HTTPClient"
  },
  "json": {
    "data": [
      48.75608,
      2.302038
    ],
    "sensor": "gps",
    "time": 1351824120
  },
  "method": "POST",
  "origin": "182.29.216.177, 182.29.216.177",
  "url": "https://httpbin.org/anything"
}