How to setup a Raspberry Pi security camera for home surveillance with Raspbian Buster Lite and motionEye
Even though a Raspberry Pi security camera is not the cheapest surveillance camera, it can be worthwhile building one.
Especially for Raspberry Pi fans, you may have several unused Raspberry Pis because you buy one for each release. In such a case, a big part of your Raspberry Pi security camera is sunken cost.
Given that, let's look at how we can setup a Raspberry Pi security camera with Raspbian Buster Lite and motionEye.
Why use Raspbian Buster Lite + motionEye instead of motionEyeOS?
First of all, Raspbian Buster Lite does not come with a windowing system that we do not need for a security camera. Therefore, we won't be wasting too much of the Raspberry Pi computing resources. In addition to that, we can put other software on the same box when we choose the Raspbian Buster Lite + motionEye combination for our Raspberry Pi camera.
Steps to setup a Raspberry Pi security camera with Raspbian Buster Lite and motionEye
Before we dive into the details, let's take a look at the steps to setup a Raspberry Pi security camera:
- Gather the hardware parts for your Raspberry Pi security camera.
- Install Raspbian Buster Lite on your Raspberry Pi.
- Assemble the hardware parts for your Raspberry Pi security camera.
- Enable the camera interface for your Raspberry Pi security camera.
- Install motionEye and dependencies on Raspbian Buster Lite.
- Configure motionEye settings on your Raspberry Pi security camera.
1. Gathering the hardware parts for your Raspberry Pi security camera
In case you need it, here are some hardware combinations that you can procure for your Raspberry Pi security camera.
Parts to build a Raspberry Pi Zero W security camera
- CanaKit Raspberry Pi Zero W (Wireless) with Official Case and Power Supply
- SanDisk Ultra 128GB microSDXC UHS-I card with Adapter
- Raspberry Pi Camera Module V2 8 Megapixel 1080P
Parts to build a Raspberry Pi 3B+ security camera
- CanaKit Raspberry Pi 3 B+ (B Plus) with 2.5A Power Supply (UL Listed)
- Raspberry Pi Model B+ Case Enclosure
- SanDisk Ultra 128GB microSDXC UHS-I card with Adapter
- Raspberry Pi Camera Module V2 8 Megapixel 1080P
- RJ45 cable (if you wish to connect your Raspberry Pi to the switch port of your router)
Parts to install Raspbian Buster Lite onto the microSD card
- If your computer does not have a microSD card drive, then you will need to get a microSD card adapter.
- In order for Raspberry Pi to communicate with your computer, you need to have a router that supports 2.4GHz WiFi network.
2. Installing Raspbian Buster Lite on your Raspberry Pi
After you have gathered the hardware to build your Raspberry Pi security camera, setup Raspbian Buster Lite on your Raspberry Pi.
Once you have done so, you should be able to get into your Raspbian Buster Lite with a terminal program running ssh. Given that, shutdown your Raspberry Pi with the following command:
sudo shutdown now
3. Assembling your Raspberry Pi security camera
After your Raspberry Pi powers down, proceed to assemble your Raspberry Pi security camera.
For Raspberry Pi Zero W security camera
Connect Raspberry Pi camera module to Raspberry Pi Zero W and the official case.
For Raspberry Pi 3B+ security camera
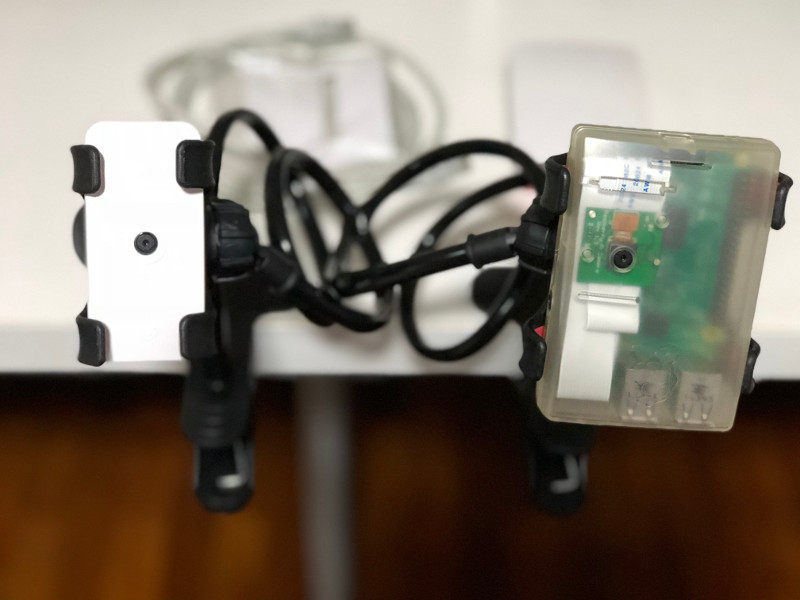
Connect the Raspberry Pi Camera Module to Raspberry Pi 3B+ and put it into the case.
When you have done so, your Raspberry Pi security camera should look like the following:
4. Enabling the camera interface for your Raspberry Pi security camera
After you had assembled your Raspberry Pi security camera, turn it on again.
When Raspbian Buster Lite had started, use ssh from a computer shell terminal to configure it again.
Since the camera interface is disabled on Raspbian Buster Lite by default, we need to enable the camera interface.
In order to do so, proceed to enable the camera interface on Raspbian Lite.
5. Installing motionEye and dependencies on Raspbian Buster Lite
After you had enabled the camera interface, go through the following steps to install motionEye and other dependencies on your Raspbian Buster Lite:
- Become root:
sudo -i
- Update Raspbian:
apt-get update
- Install ffmpeg and other motion dependencies:
apt-get install ffmpeg libmariadb3 libpq5 libmicrohttpd12 -y
- Setup motion:
 wget https://github.com/Motion-Project/motion/releases/download/release-4.2.2/pi_buster_motion_4.2.2-1_armhf.deb
 dpkg -i pi_buster_motion_4.2.2-1_armhf.deb
- Install Python Pillow:
apt-get install python-pillow -y
- Setup the dependencies from the repositories:
apt-get install python-pip python-dev libssl-dev libcurl4-openssl-dev libjpeg-dev libz-dev -y
- Install motionEye:
pip install motioneye
- Prepare the configuration directory:
mkdir -p /etc/motioneye
cp /usr/local/share/motioneye/extra/motioneye.conf.sample /etc/motioneye/motioneye.conf
- Create the media directory:
mkdir -p /var/lib/motioneye
- Add an init script, configure it to run at startup and start the motionEye server:
cp /usr/local/share/motioneye/extra/motioneye.systemd-unit-local /etc/systemd/system/motioneye.service
systemctl daemon-reload
systemctl enable motioneye
systemctl start motioneye
6. Configuring motionEye on your Raspberry Pi security camera
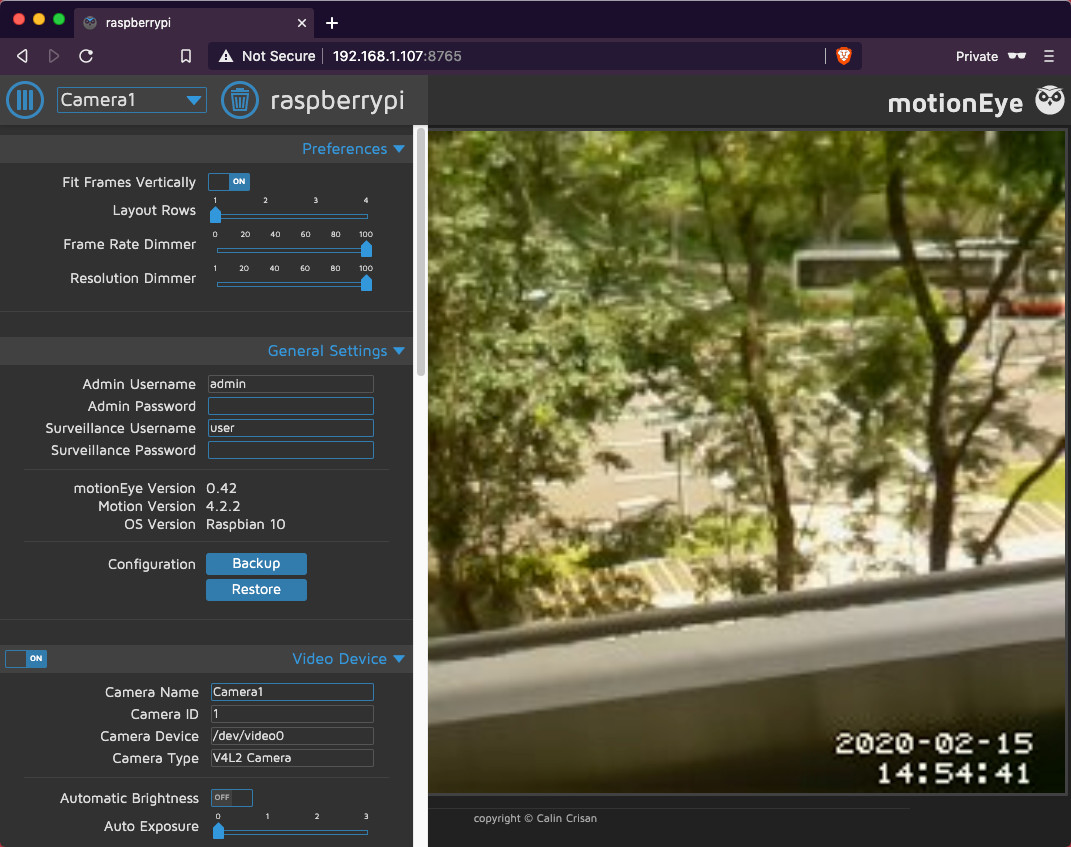
At this point in time, you are ready to access the motionEye web portal to configure your Raspberry Pi security camera.
Given that, enter the IP address of your Raspberry Pi security camera, with port 8765, into the location bar of your browser.
For example, if the IP address of your camera is 192.168.1.107, you will enter 192.168.1.107:8765 into the location bar of your browser. When you do so, you should be greeted with the login screen:
Given that, enter admin for the username field and leave the password field blank.
Adding a camera for your Raspberry Pi security camera
After you had logged into the web portal, motionEye will prompt you to add a camera:
Therefore, click on the link to add your camera. When you do so, motionEye will show you a dialog to add a locally attached camera.
Given that, choose mmal service 16.1 as the camera:
Next, click OK and you will see a video feed from your Raspberry Pi security camera:
If you do not see mmal service 16.1 as an option, then you need to check if you have enabled the camera interface.
Changing the login credentials for the admin user and surveillance user
In addition to the admin user, there is a surveillance user as well. While the admin user can configure every setting on your security camera, the surveillance user can only view the video feed.
Another point to note is that we can create a custom username for the surveillance user but we cannot change the username for admin.
Since it is insecure to use the default credentials, change the login credentials for both users through the form at the General Settings section:
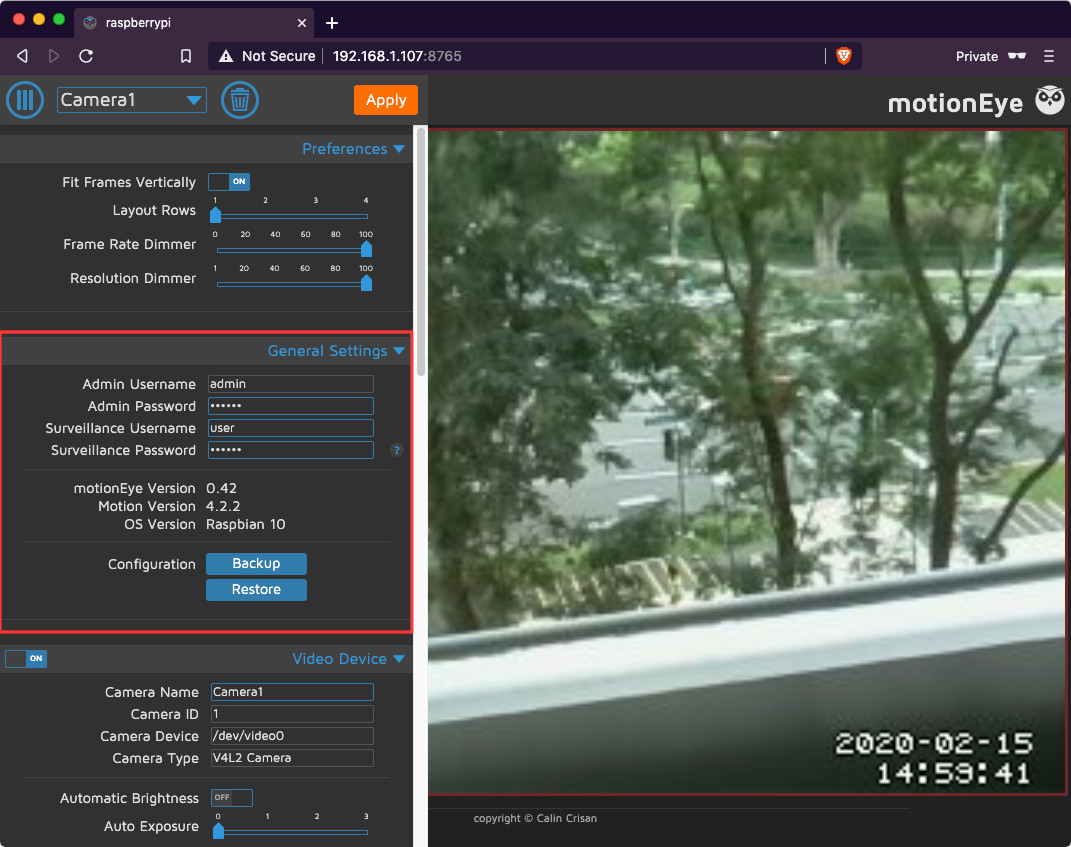
After you have entered the new credentials, click Apply to apply the changes. When you do so, you will be prompted to login with the new credentials.
Changing video resolution of video feed
If you wish to increase the video resolution of your video feed, then you can do so via the Video Device section:
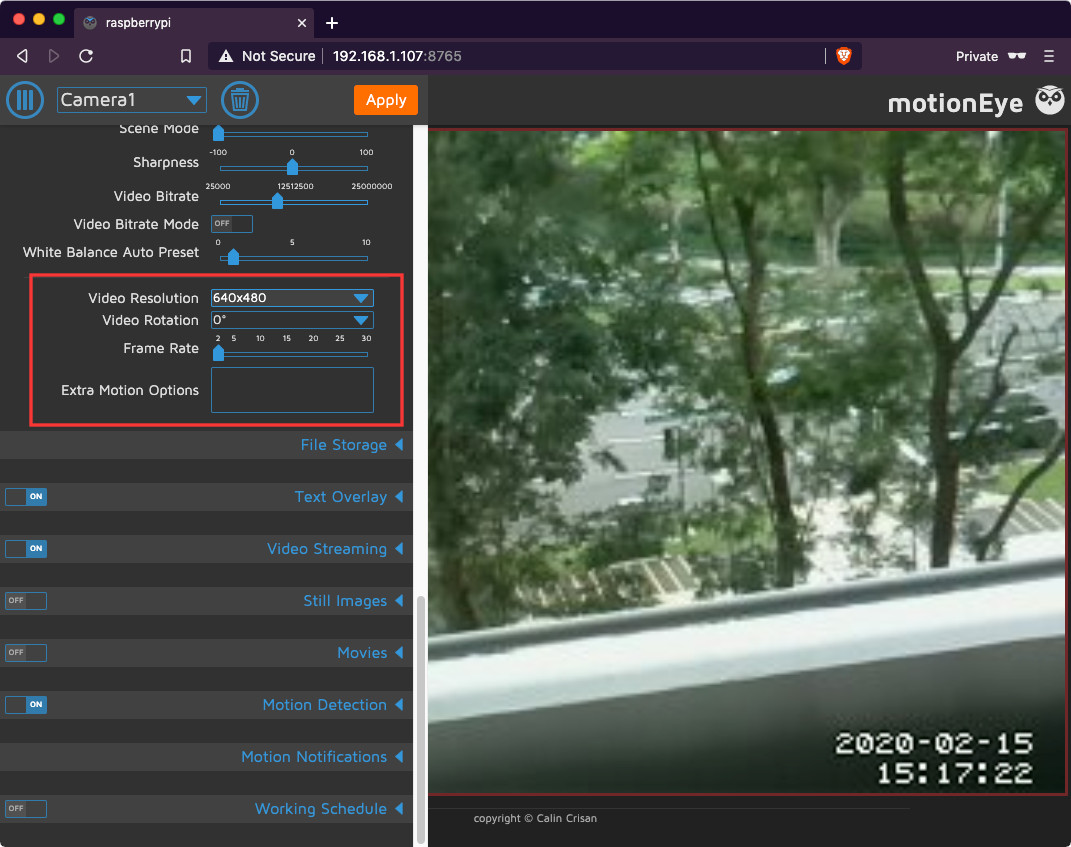
After you select your ideal video resolution, click on Apply to apply the changes. When you do so, you should see the video feed in the new resolution.
Enabling recording of still images and movies
If you wish to record your video feed, then you will want to enable recording of still images and movies:
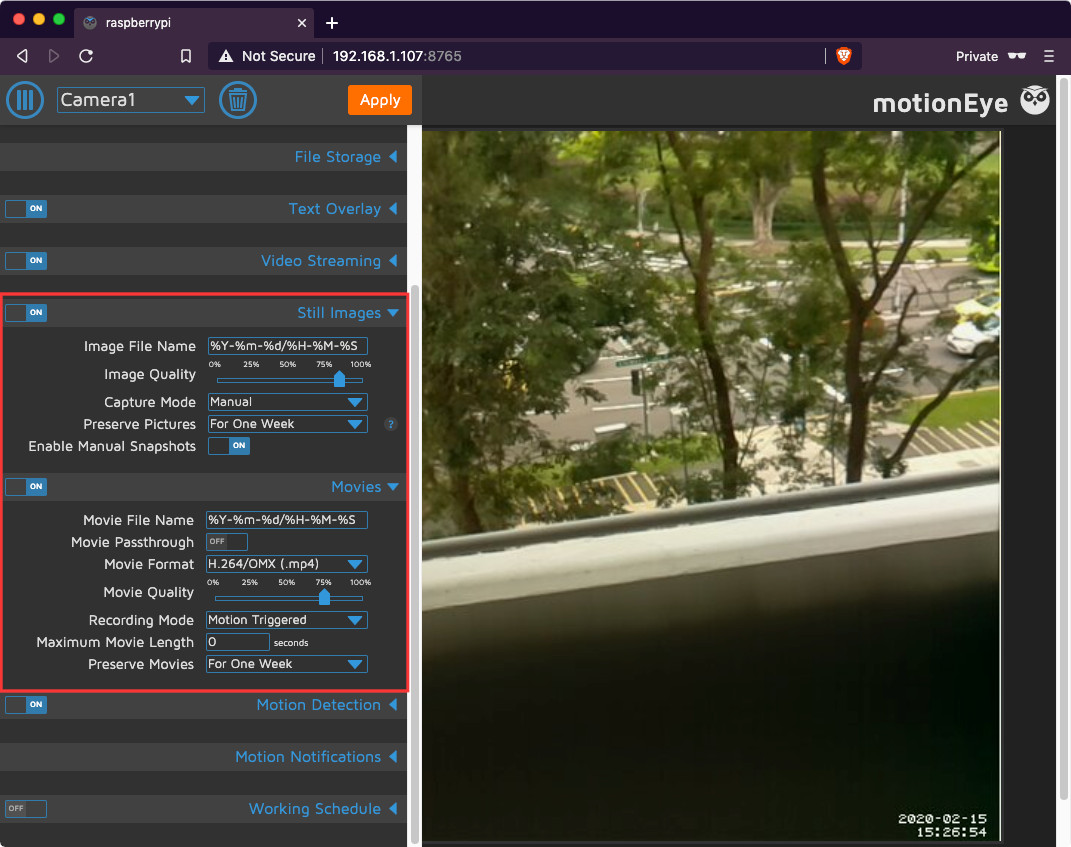
As shown above, you can also decide the mode of capture, preservation periods and other relevant configurations.
Configuring motionEye to only capture video if there are movements in particular sections of the surveillance area
When you only want motion detection to trigger if parts of the video feed changes, you can check out the Motion Detection section. Given that, this is how to configure motionEye to only capture video if there are movements in particular sections of the surveillance area.