How to control a servo motor with an ESP32 development board
When I try to reuse the Ardunio Sketch to control a servo motor with a ESP8266, I encountered the following error during compile time:
WARNING: library Servo claims to run on (avr, sam, samd, nrf52, stm32f4) architecture(s) and may be incompatible with your current board which runs on (esp32) architecture(s).
In file included from /Users/i309663/Documents/learning/Arduino-sketches/sketch_arduino_servo/sketch_arduino_servo.ino:1:0:
/Users/i309663/Arduino.1.8.7/Arduino.app/Contents/Java/libraries/Servo/src/Servo.h:73:2: error: #error "This library only supports boards with an AVR, SAM, SAMD, NRF52 or STM32F4 processor."
#error "This library only supports boards with an AVR, SAM, SAMD, NRF52 or STM32F4 processor."
^
exit status 1
Error compiling for board ESP32 Dev Module.
Therefore, I had to find another way to control my SG90 servo motor with an ESP32 development board.
Given that, this post shows how to control a servo motor with an ESP32 development board.
How to connect your servo motor to your ESP32 development board
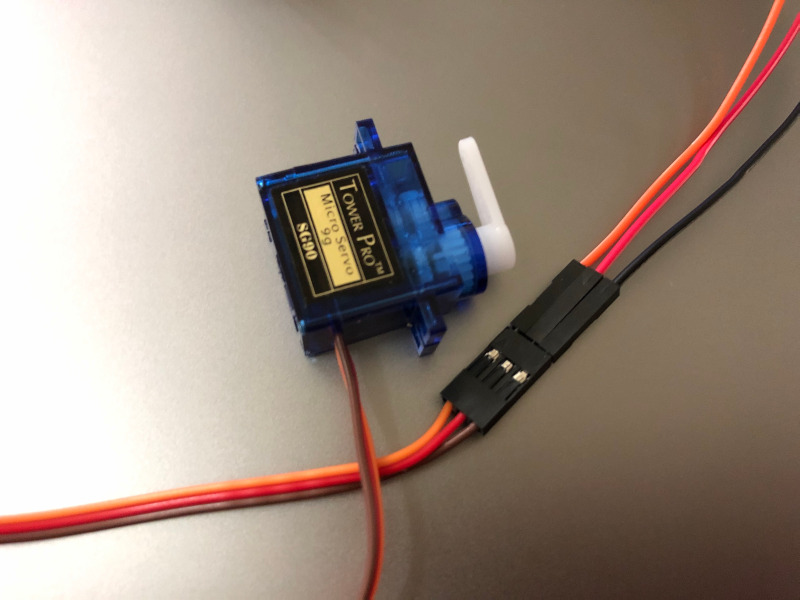
If you look at your servo motor data sheet, then you will find information about how to connect your servo motor.
For example, the SG90 servo motor data sheet indicated that the:
- orange wire has to be connected to a pin on your ESP32 that can apply pulse width modulation.
- red wire has to be connected to VCC.
- brown wire has to be connected to ground.
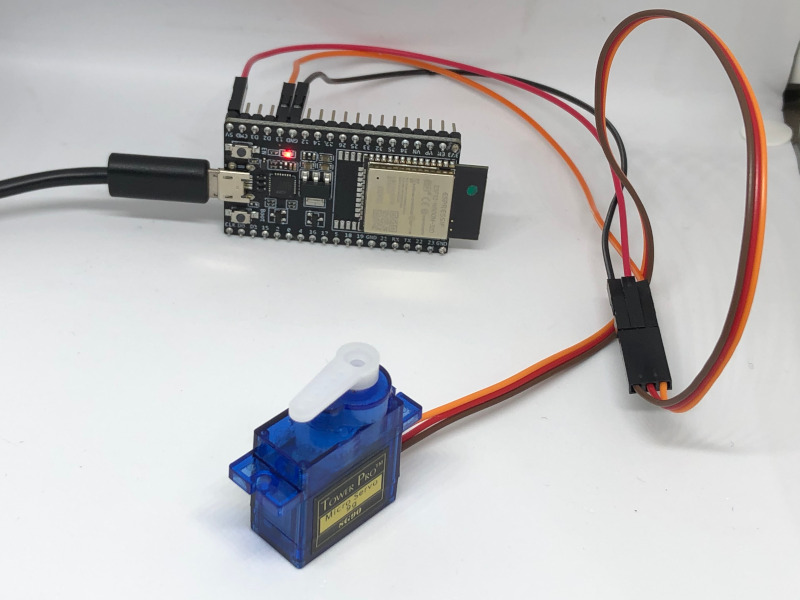
Given that, this is how I had connected my SG90 servo motor to my ESP32 development board:
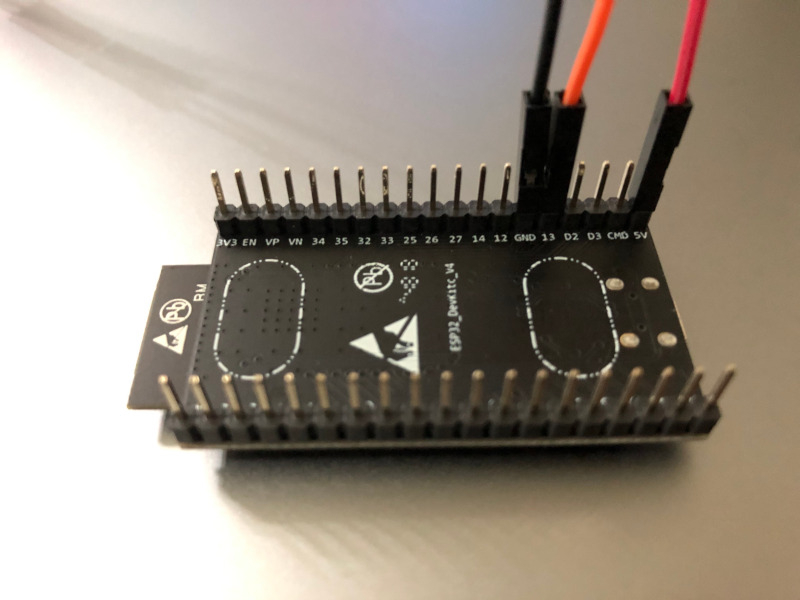
As shown above, I had connected the:
- orange wire of my SG90 servo motor to GPIO13 on my ESP32 development board.
- red wire of my SG90 servo motor to 5V pin on my ESP32 development board.
- brown wire of my SG90 servo motor to GND pin on my ESP32 development board.
Writing an Arduino Sketch to control a servo motor connected to an ESP32 board
Once you have connected your servo motor to your ESP32 board, you can write the software to control it.
If you enable ESP32 Development on Arduino IDE, then you can upload an Arduino Sketch to your ESP32 board to control servo motor.
Installing a library to help us control servo motors connected to an ESP32 development board
Since I was not able use the default Arduino Servo library, I had to find another library to control the servo motor.
Given that, I proceeded to install the ESP32Servo library by John K. Bennett and Kevin Harrington.
In order to do so, I went to Tools -> Manage Libraries... after my Arduino IDE had started. After I had done so, the Library Manager window appeared in the foreground. Given that, I search for ESP32Servo and installed the ESP32Servo library by John K. Bennett and Kevin Harrington:
Example Arduino Sketch to control a servo motor connected to an ESP32 development board
Once I had installed the library, I took out parts of an example sketch from the library and wrote the following sketch:
#include <ESP32Servo.h>

Servo myservo;  // create servo object to control a servo

// Recommended PWM GPIO pins on the ESP32 include 2,4,12-19,21-23,25-27,32-33
int servoPin = 13;

void setup() {
  myservo.setPeriodHertz(50);
  myservo.attach(servoPin);
}

void loop() {
  myservo.write(0);
  delay(2000);
  myservo.write(180);
  delay(2000);
}
So what will the sketch do?
First of all, we include the ESP32Servo library into the sketch.
After that, we create a Servo object for controlling the servo.
When the setup function is called, we set the frequency of the PWM period to 50Hz. After that, we attach the Servo object to the GPIO13 pin of our ESP32 development board.
Whenever the loop function is called, we position the servo motor at an angle of 0 and 180 degrees with a 2 seconds delay in between calls to myservo.write.
After uploading the Arduino Sketch to my ESP32 development board, the servo motor starts to rotate to 0 and 180 degrees in 2 seconds interval: