How to configure motionEye to only capture video if there are movements in particular sections of the surveillance area
Undeniably, Calin Crisan had created one of the best way for us to build a Raspberry Pi security camera. In addition to the ease of setup via motionEyeOS, the motionEye web-based frontend is also easy to use.
Since a Raspberry Pi security camera is used for surveillance, we will want it to record videos of things that happened when we were not looking.
However, recording footages of the surveillance area when there were no motion being detected is wasteful. Moreover, it is hard to get to the video recording of a stranger moving your flower pot when there are too many redundant video clips in your Raspberry Pi security camera.
Even if we switched on motion detection for the entire video frame, there could be motion detected outside of the area of interest. For example, we may be interested in birds resting on our plant rather than birds flying in the sky.
So how do we configure motionEye to only capture video if there are movements in a particular section of the surveillance area?
This post will show you how to do so.
Setting up a Raspberry Pi security camera
In case you are looking for some references on setting up a Raspberry Pi security camera, you can refer to one of the following guides:
- Setup a CCTV camera with Raspberry Pi Zero W and motionEyeOS image for home surveillance
- Setup a Raspberry Pi Zero W CCTV camera with motionEye and Raspbian Stretch Lite
- Setup a Raspberry Pi 3 CCTV camera with motionEyeOS
Unless you want to run some other applications on your Raspberry Pi, it is recommended to setup your security camera with motionEyeOS.
Steps to create mask on motionEye to ignore motion detection on certain parts of the camera view
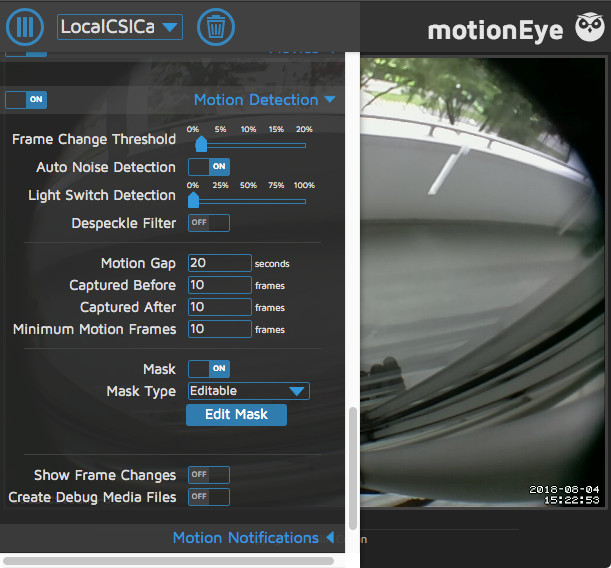
The following is a view from my Raspberry Pi Zero W security camera equipped with a Fisheye lens:

This view was shown after I had logged in as the admin user.
In the top area of the footage, there is a road that is relatively busy. In this situation, I would not want my Raspberry Pi Zero W security camera to record a video every time a vehicle passes my building. In addition, I do not want video footages of my window grill shaking while I am cleaning it.
Therefore, I applied a mask over the top and bottom areas of the camera view.
Firstly, I clicked on the icon at the top left corner.
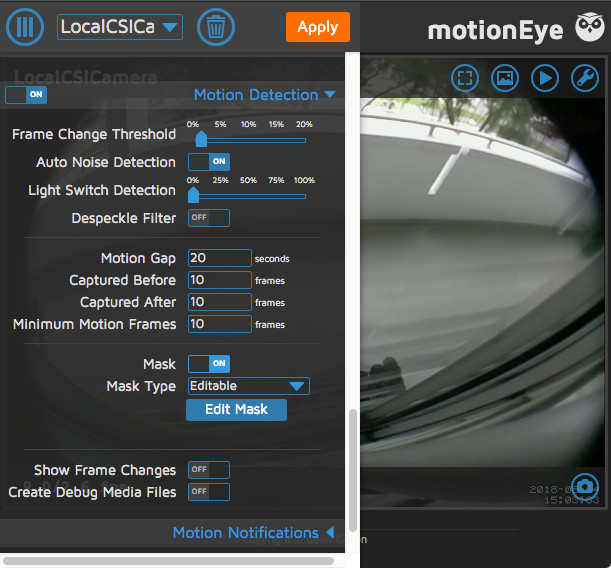
After the settings panel appears, I scrolled to the Motion Detection section, clicked on the arrow to show the Motion Detection settings.
Next, I turned on Mask and choose Editable as the Masking Type.
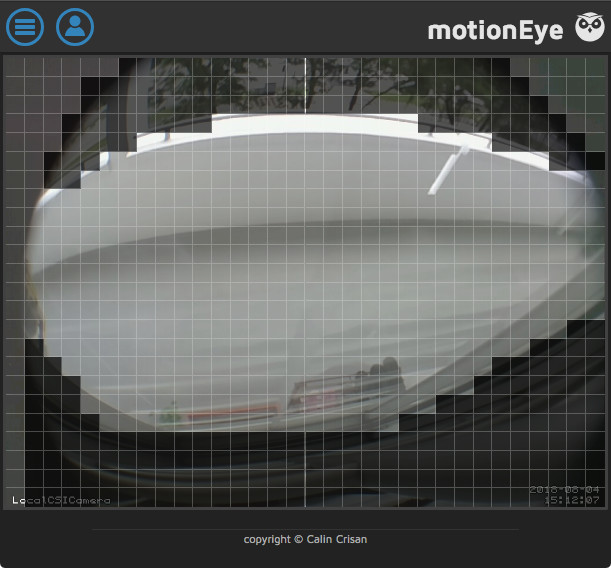
After that, I clicked on Edit Mask and grids appeared on the camera view.
I then hid the settings panel by clicking on the top left icon again so that I could display the camera view in its entirety.
I then clicked on all the grids that I wanted to have motion detection disabled. Alternatively, I can also hold the left-click button of my mouse while dragging the pointer over the areas that I want to mask.
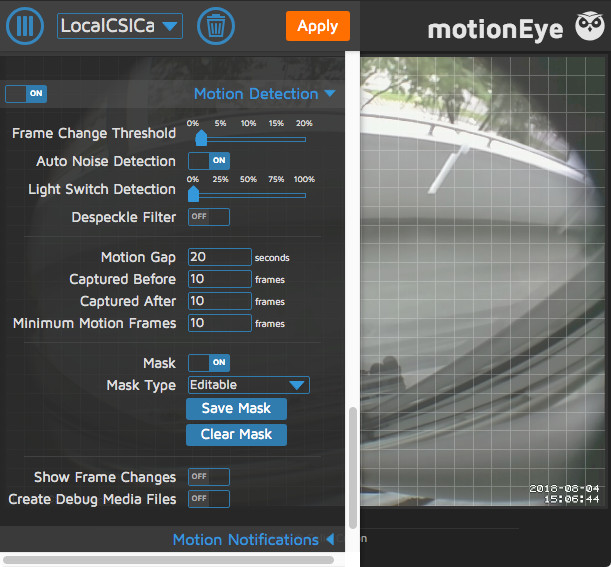
After I was satisfied with the mask that I had selected, I clicked on the icon on the top left corner. Once the settings panel appeared, I scrolled back to the Motion Detection section and clicked Save Mask and then Apply.
With the mask, my Raspberry Pi Zero W security camera only record videos of people walking past my unit.