How to connect Raspberry Pi camera module to Raspberry Pi Zero W and the official case
Equipped with a wireless LAN and priced at only $10, I see the Raspberry Pi Zero W as a good candidate for a low cost CCTV that I can deploy at my house for surveillance purposes. With the arrival of my Raspberry Pi Zero W and the official case, I could free up the Raspberry Pi 3 that I had been using for home surveillance for other projects.
This post documents how I connect my Raspberry Pi camera module to my Raspberry Pi Zero W and the official case.
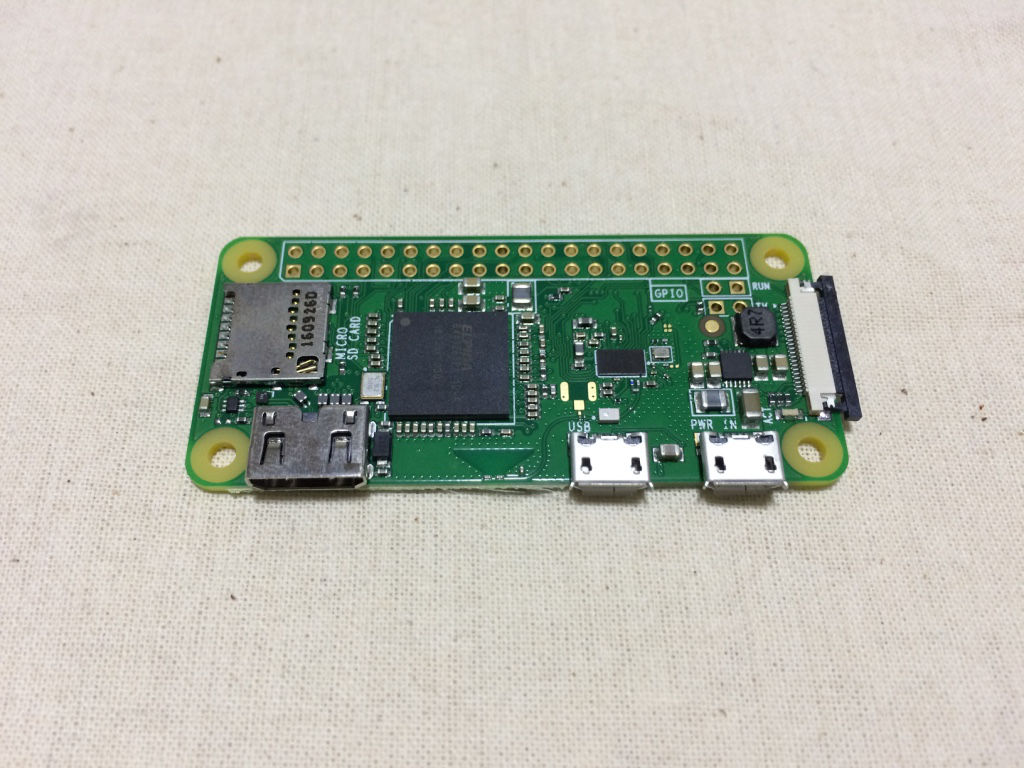
Parts to be assembled together for Raspberry Pi Zero W CCTV with official case
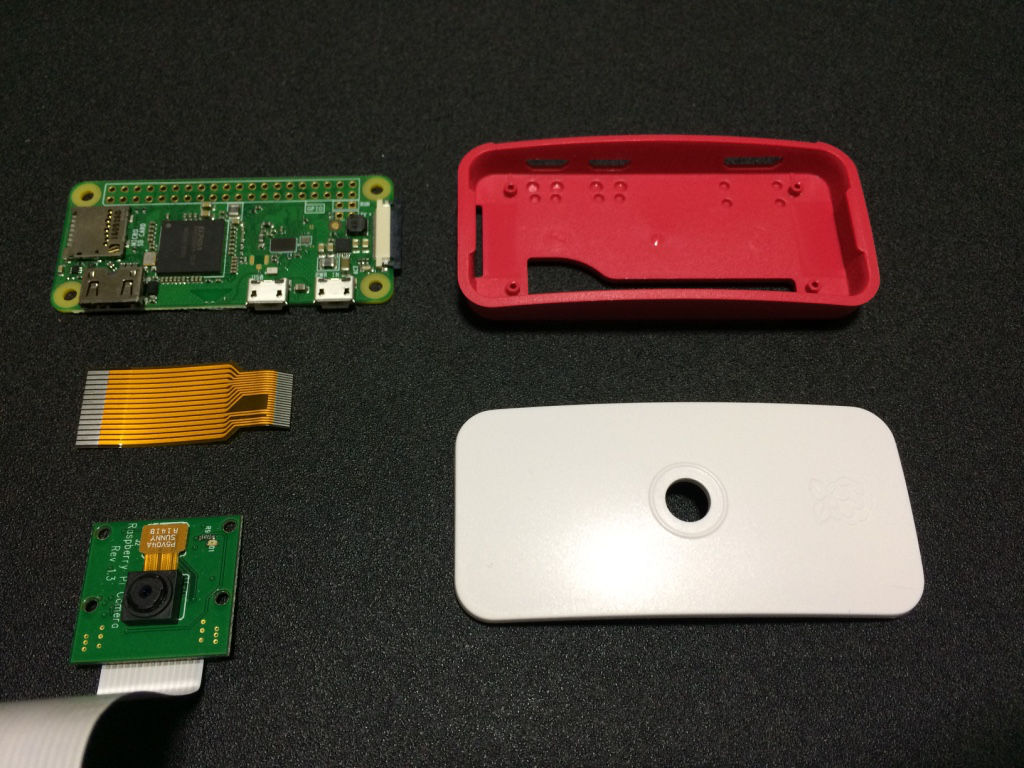
In this setup, I have with me the following parts to be assembled together:
- Raspberry Pi Zero W board
- Raspberry Pi Camera Module V1
- Raspberry Pi Zero Official Case base, camera lid and camera cable
Removing the original flex cable from the Raspberry Pi camera module
The camera module comes with a flex cable that will not fit into the CSI camera connector on the Raspberry Pi Zero W. Hence, we will need to remove the flex cable from the camera module. To do so, we pull the black connector downwards as shown in the picture below:
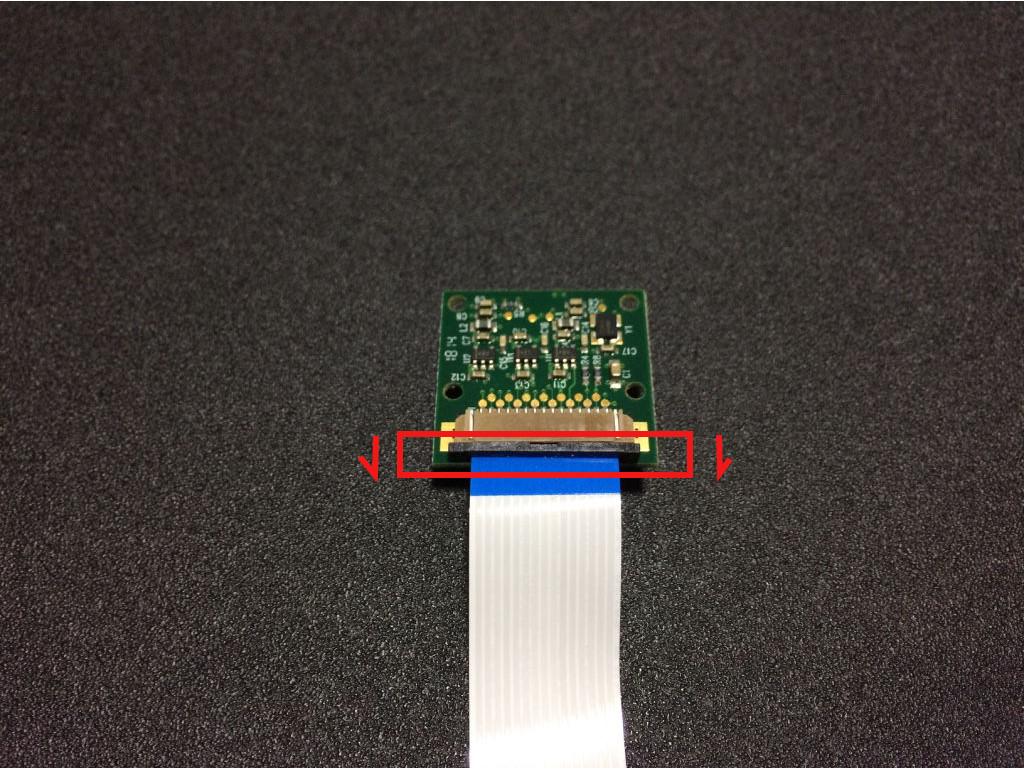
A loosened camera connector will look like the following:
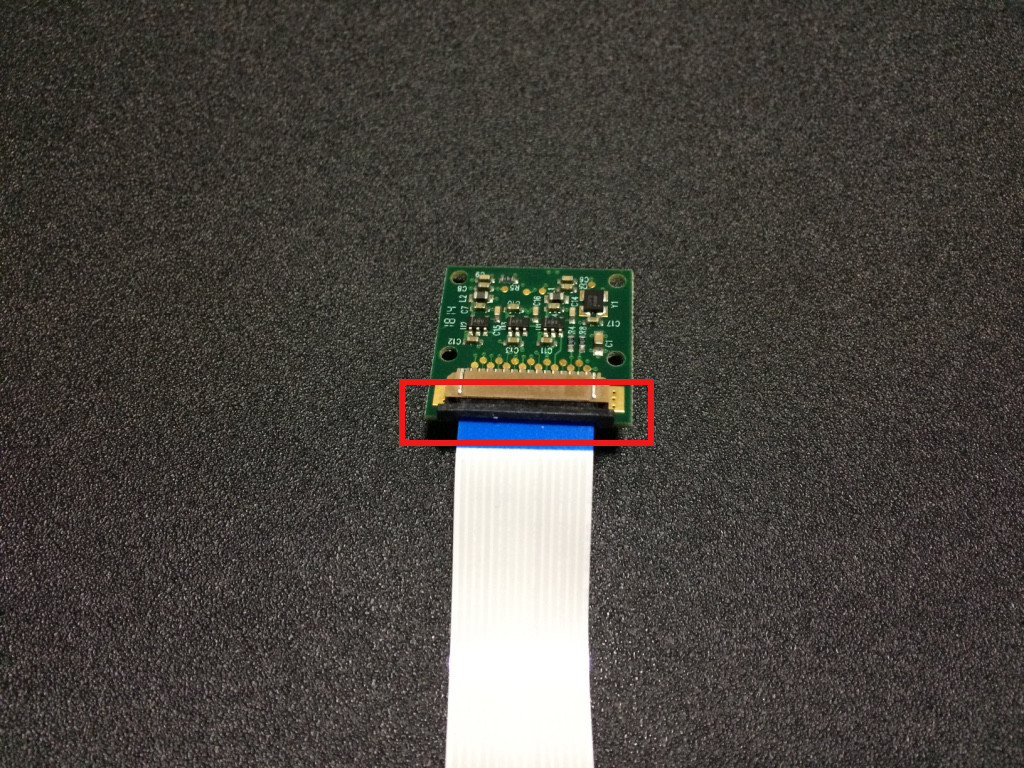
With the camera connector loosened, you can then remove the flex cable from the camera module.
Connecting the Raspberry Pi Zero W flex cable to the Raspberry Pi camera module
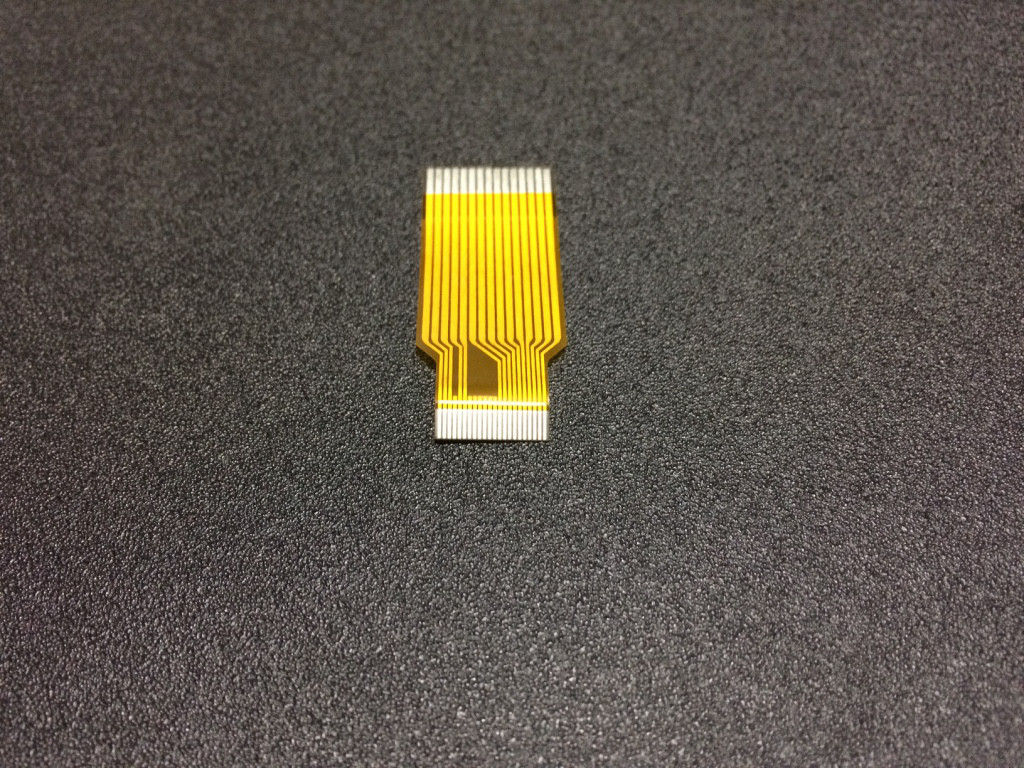
The camera cable that comes with the Raspberry Pi Zero Official Case looks like this:
We will need to connect the wider end to the Raspberry Pi camera module and push the connector clip back up:
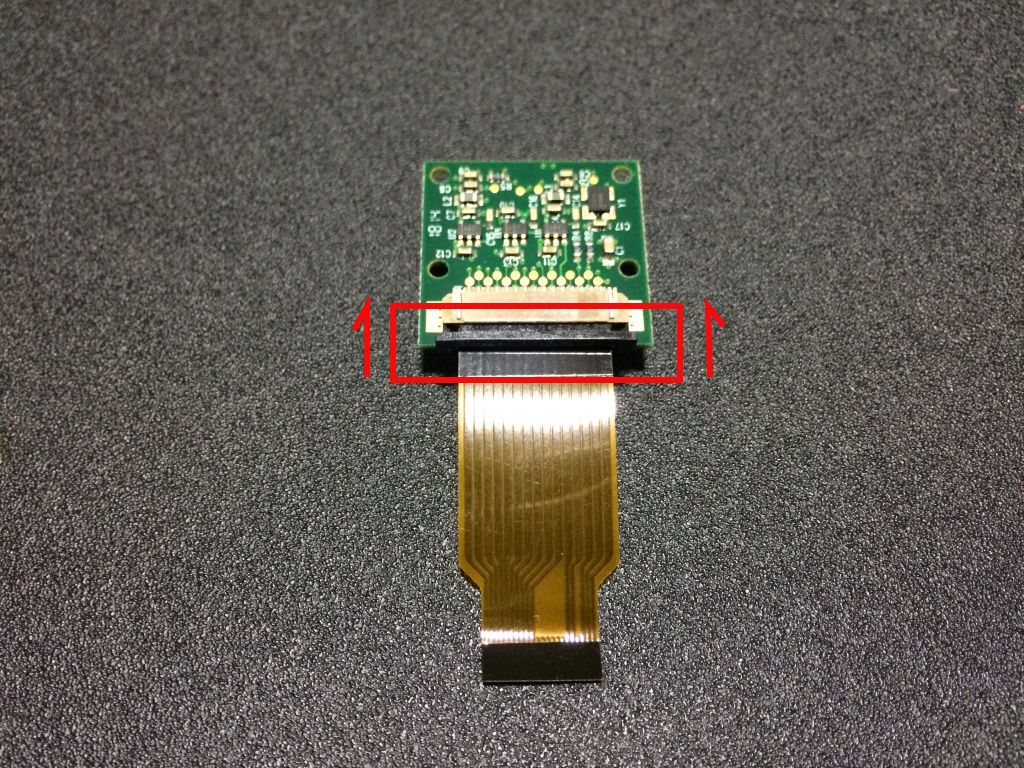
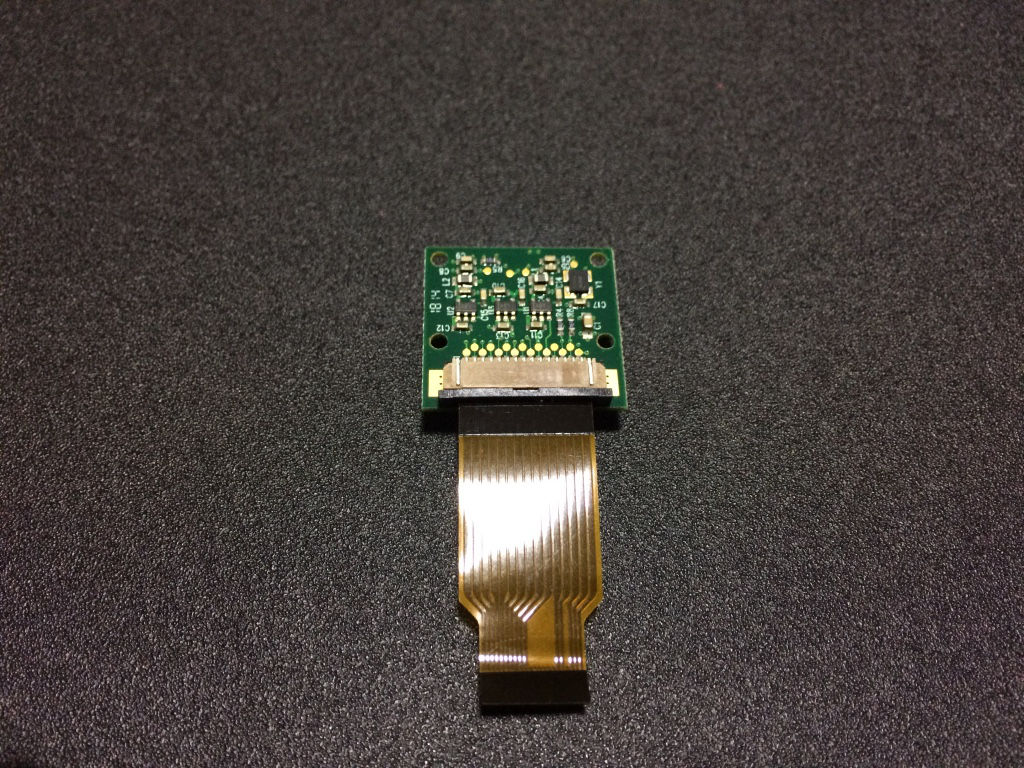
The fastened camera connector looks like this:
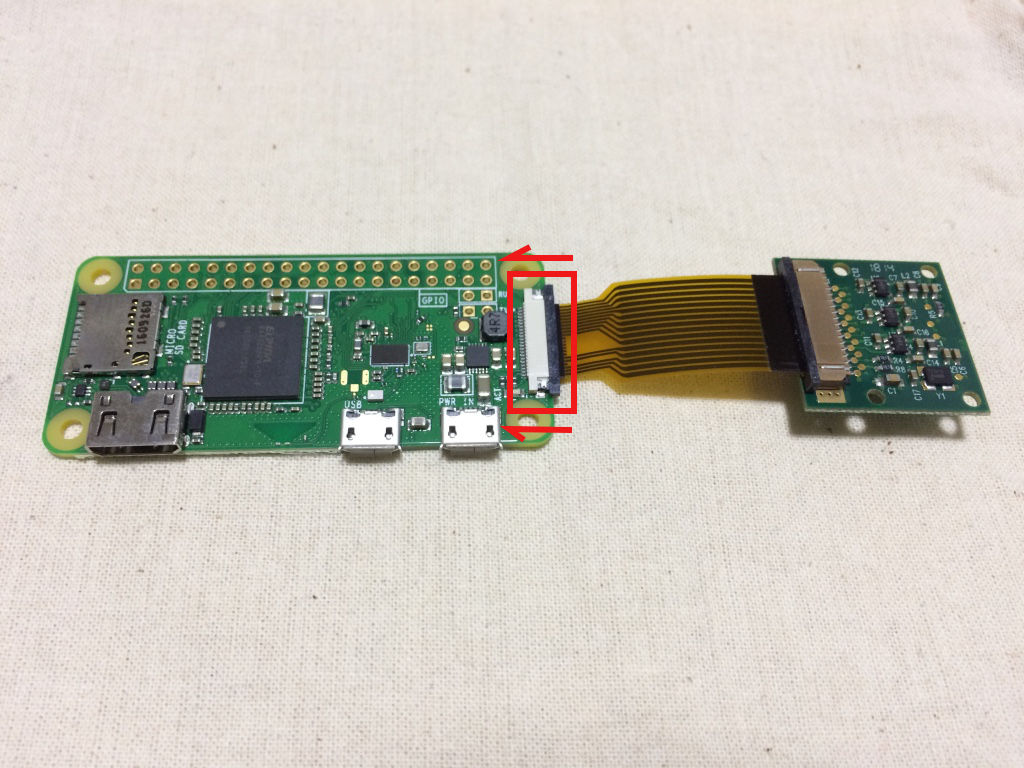
Connecting the camera cable to the Raspberry Pi Zero W board
To connect the camera cable to the Raspberry Pi Zero W board, we first loosen the clip of the CSI connector on the board:
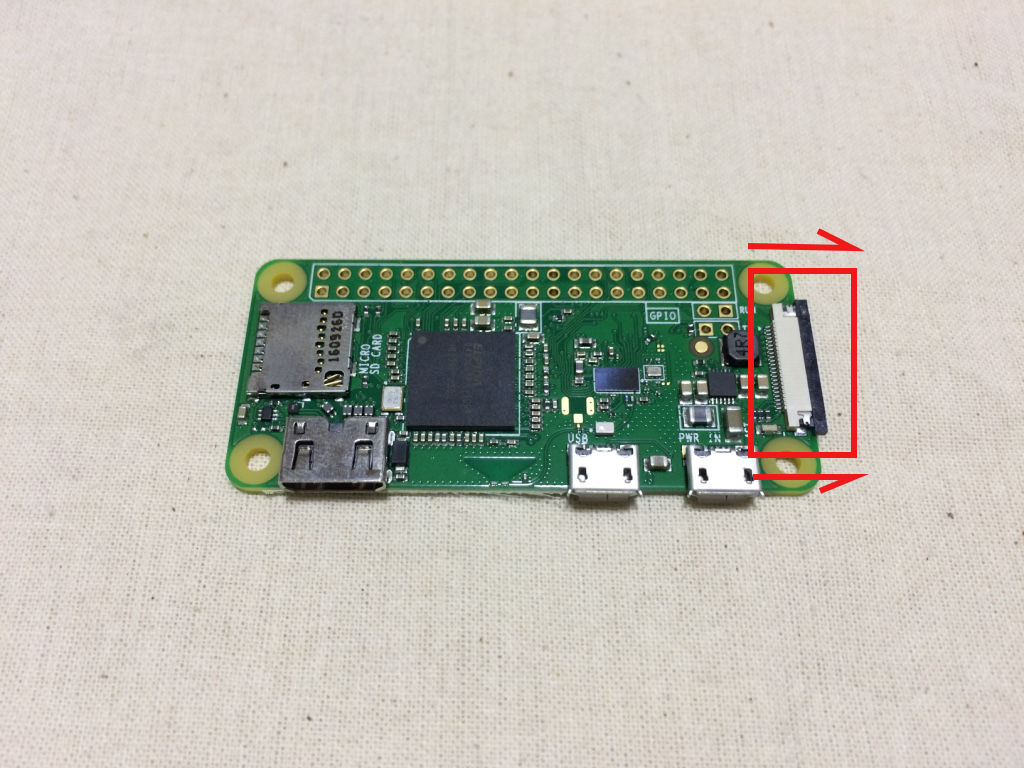
The loosened clip will look like this:
With the clip loosened, we can then slot in the camera cable:
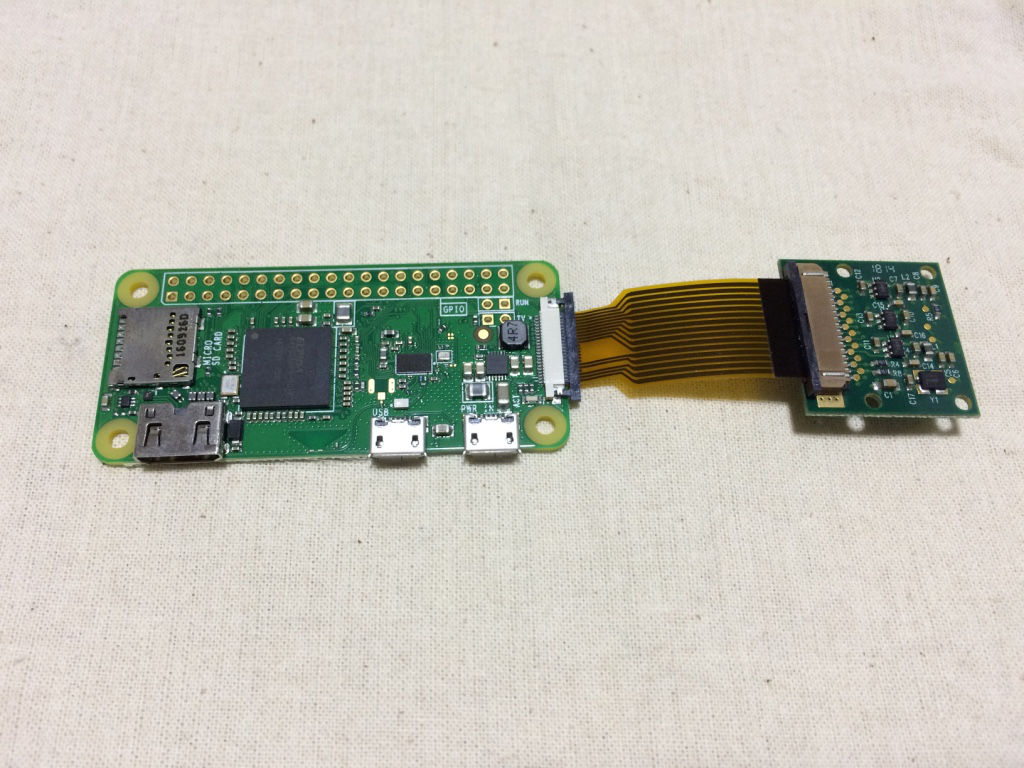
Once we slot in the camera cable, we then fastened the CSI connector clip:
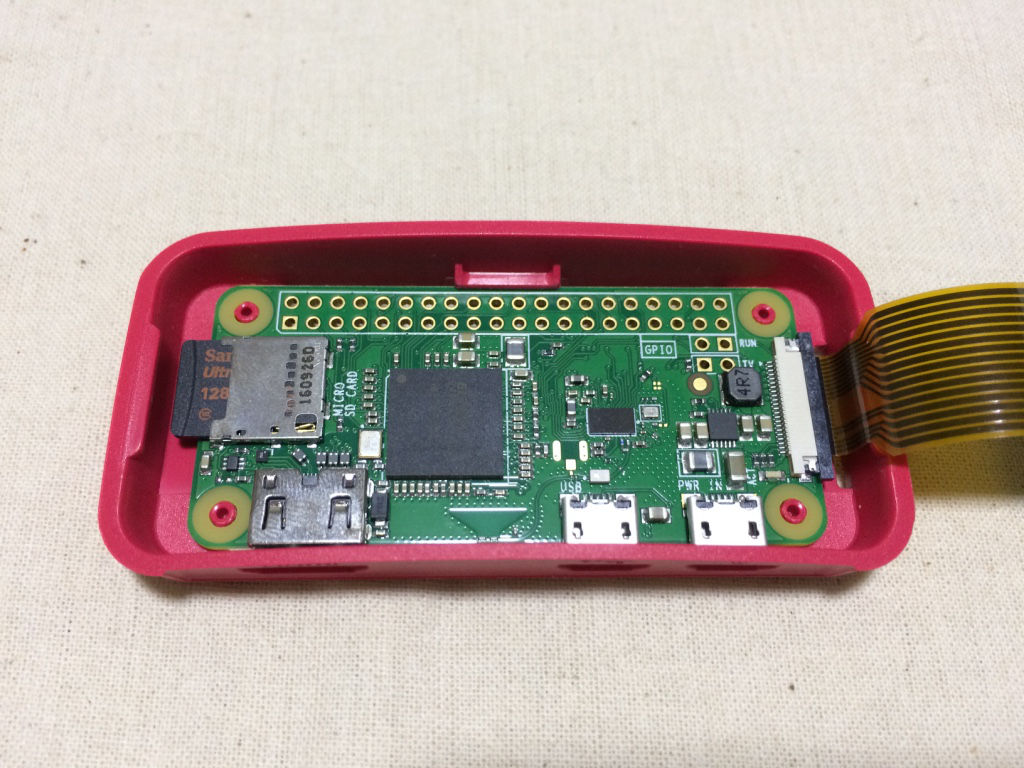
Slotting the Raspberry Pi Zero W board into the base of Raspberry Pi Zero Official Case
Once the camera module is connected to the Raspberry Pi Zero W board, we can then proceed to slot in the Raspberry Pi Zero W board into the base of the Raspberry Pi Zero Official case.
Since the base of the Raspberry Pi Zero Official Case does not have a slot for the microSD card to be inserted to the board, we should insert the microSD card into the card reader on the Raspberry Pi Zero W board before slotting the Raspberry Pi Zero W board into the base of the Raspberry Pi Zero Official case.
To slot the Raspberry Pi Zero W board into the base of the Raspberry Pi Zero Official Case, we tilt the board under the catch of the base:
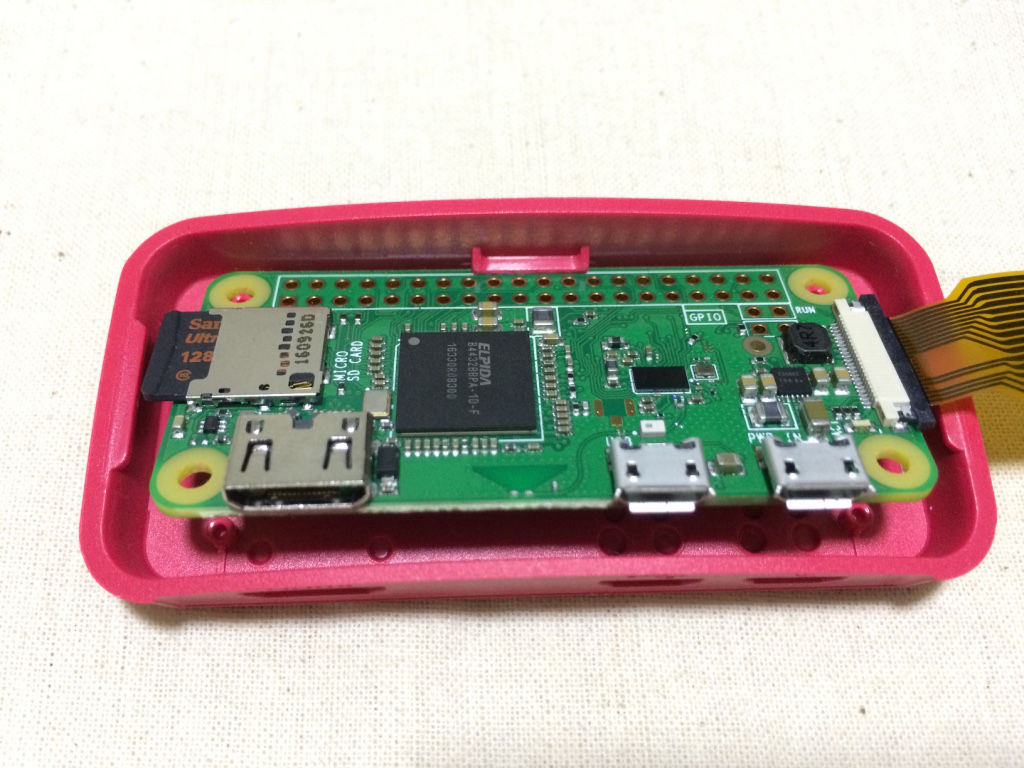
And then push down the other side into the base of the Raspberry Pi Zero Official case. A nicely fitted Raspberry Pi Zero W board will look like this:
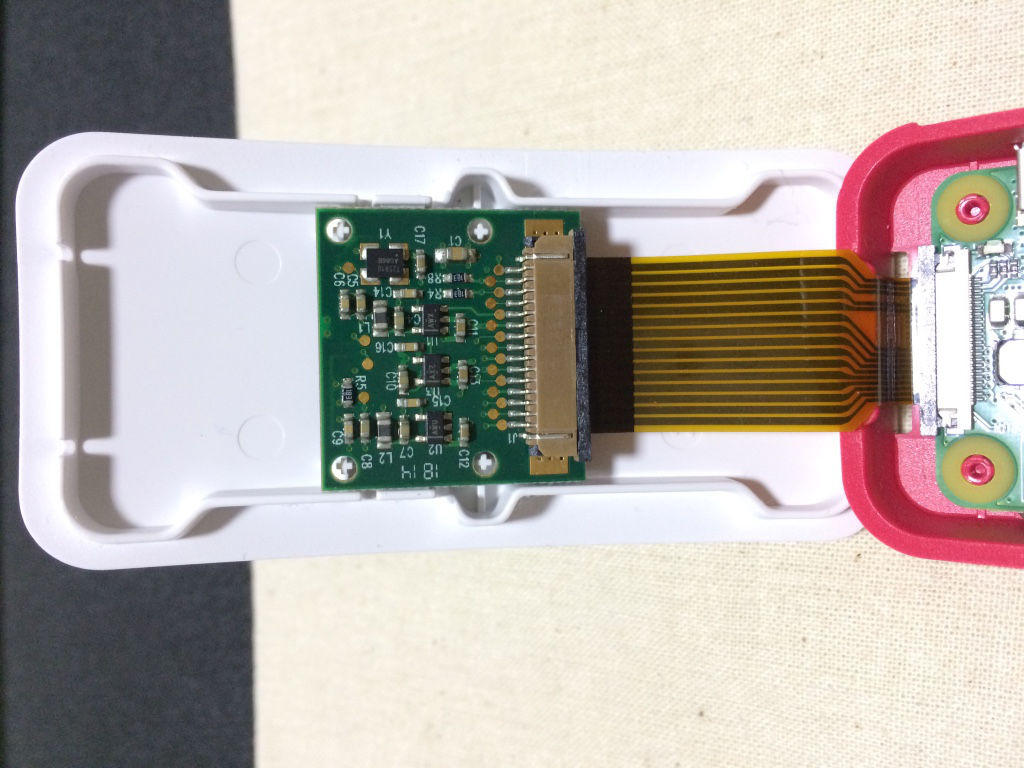
Attaching the Raspberry Pi Camera module onto the camera lid of Raspberry Pi Official Case
Once the Raspberry Pi Zero W board is nicely fitted into the base of the Raspberry Pi Zero Official Case, we can then proceed to attach the Raspberry Pi Camera module onto the camera lid of the Raspberry Pi Zero Official Case.
With the Raspberry Pi Zero Board on the right, we sit the camera lid to the left as follows:
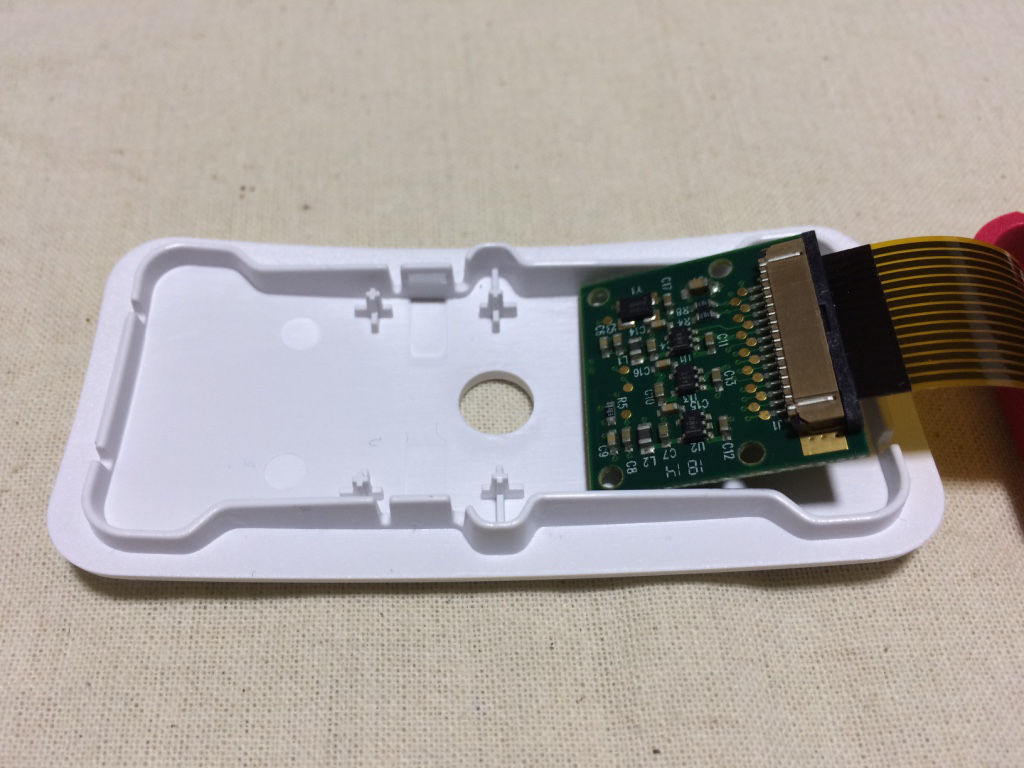
And then fit the Raspberry Pi Camera module firmly into the studs and camera hole of the camera lid:
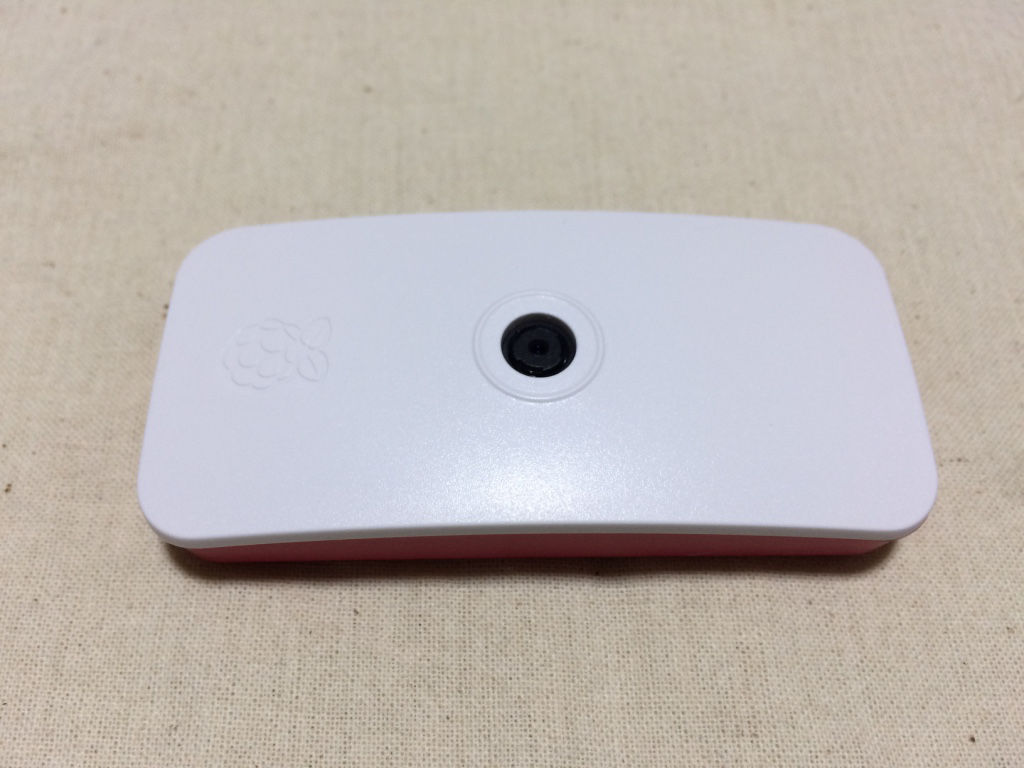
Covering the camera lid to the base of the Raspberry Pi Zero Official Case
Finally, with the Raspberry Pi Camera Module nicely fitted to the camera lid of the Raspberry Pi Zero Official Case, we can then cover the lid to achieve the following: