Setting up Go Git Service on a Ubuntu Server 15.10.3 image on my Raspberry Pi 3
My quest in searching for a suitable self hosted Git Service didn't stop at GitBucket. While GitBucket is easy to setup, running it on a Raspberry Pi 3 had not been ideal for me. If I had set it up on a more powerful computer / VM, I would have stuck with it.
To get a second opinion, I decided to give Go Git Service a try. This post documents my attempt in setting up Go Git Service on a Ubuntu 15.10.3 image on my Raspberry Pi 3. To make this post complete, the first eight steps are taken from previous posts.
Getting the hardware
The hardware that I used for this setup is as follows:
- A Raspberry Pi 3 motherboard
- A PiBlox LEGO® Compatible Case
- A SanDisk Ultra 32GB microSDHC UHS-I Card with Adapter
As my laptop came with a SD card reader, I did not have to get a SD card reader.
Getting the Ubuntu Server 15.10.3 image for my Raspberry Pi 3 onto the micro SD card
After I got the hardware that I needed, the next step was to get the Ubuntu Server 15.10.3 image for my Raspberry Pi 3. The awesome folks at Ubuntu Pi Flavour Maker had made a few variations of Ubuntu images available for me to download.
I downloaded a copy of the Ubuntu Server Standard 15.10.3 image onto my windows machine via torrent.
Once I got the .xz file, I used 7-zip to extract the .img file. I then used Win32 Disk Imager to write the .img file into the SanDisk microSD card via the SD card drive on my laptop.
Booting into Ubuntu Server 15.10.3 on my Raspberry Pi 3
Once Win32 Disk Imager completed writing the Ubuntu Server 15.10.3 image onto my SanDisk microSD card, I removed it from my SD card reader and inserted it to the SD card slot on the Raspberry Pi 3 motherboard. Note that unlike the Raspberry Pi 2, the microSD slot of the Raspberry Pi 3 motherboard is not a spring loaded one. This means that you just push to insert your microSD card and pull to remove your microSD card.
I then attached my trusty mouse, keyboard, monitor, a RJ45 network cable from my DLink router and my old samsung charger to my Raspberry Pi 3 motherboard. After turning on the power, the login screen appears. The default username is 'ubuntu' and the password is 'ubuntu'.
Adding a new user to access the server
I do not like a default username for my web server, even though it is not going to be used as the production server. Hence, I first added a new user via the command as follows:
sudo adduser techcoil
I then went through the following Q and As:
Adding user `techcoil' ...
Adding new group `techcoil' (1000) ...
Adding new user `techcoil' (1000) with group `techcoil' ...
Creating home directory `/home/techcoil' ...
Copying files from `/etc/skel' ...
Enter new UNIX password:
Retype new UNIX password:
passwd: password updated successfully
Changing the user information for techcoil
Enter the new value, or press ENTER for the default
	Full Name []: Techcoil
	Room Number []: #1234
	Work Phone []: 12345678
	Home Phone []: 12345678
	Other []: 12345678
After I had created my new user account, I proceeded to add it to the sudo group so that I was able to continue with installing the necessary software:
sudo adduser techcoil sudo
Deleting the default user
Once I had created my user, I proceeded to delete the default user.
I first restarted the server:
sudo reboot
After the server booted up again, I logged in with my new user.
Once I had logged into the server, I typed the following in the terminal to delete the default user:
sudo deluser --remove-home ubuntu
Resizing the file system of my Ubuntu Server 15.10.3 image to utilize the entire microSD card space on my Raspberry Pi 3
By default, the Ubuntu Server 15.10.3 image does not utilize the entire microSD card space on my Raspberry Pi 3.
Therefore, I proceeded on to resize the file system of my Ubuntu Server 15.10.3 image to utilize the entire microSD card space on my Raspberry Pi 3.
Adding swap space to my Ubuntu Server 15.10.3 image
1 GB of ram is not going to be enough to run Go Git Service alongside the other pieces that run the WordPress instance on my Raspberry Pi 3. As such, I also went on to add swap space to the Ubuntu Server 15.10.3 image so as to complement the 1GB of ram on my Raspberry Pi 3.
Installing the MySQL database for Go Git Service
Upon setting up the Ubuntu 15.10.3 image running on my Raspberry Pi, I proceeded to install the MySQL database server for my Go Git Service.
To do so, I typed the following in the terminal:
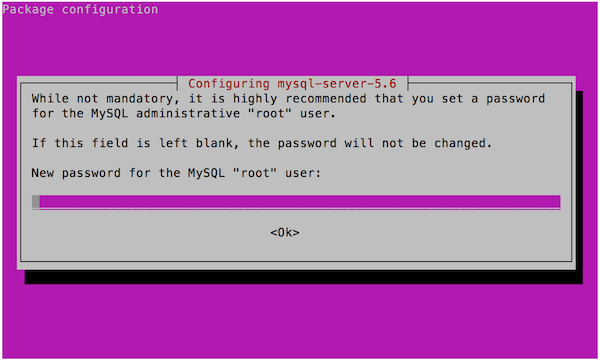
sudo apt-get install mysql-server mysql-client
This led to the screen to enter a password for the root user:
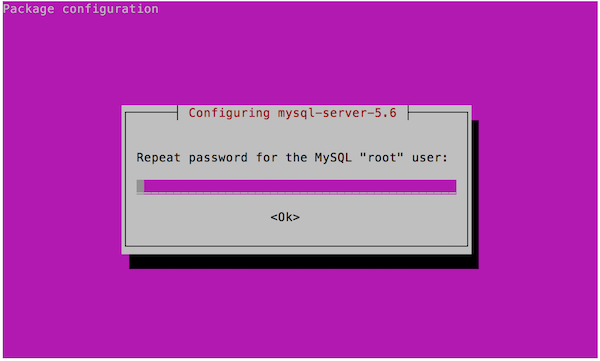
And the screen to repeat the password for the root user:
I verified my MySQL database installation by entering the command:
sudo systemctl status mysql
Which produced the following output:
● mysql.service - MySQL Community Server
   Loaded: loaded (/lib/systemd/system/mysql.service; enabled; vendor preset: enabled)
   Active: active (running) since Wed 2016-04-06 12:10:25 UTC; 15min ago
 Main PID: 4534 (mysqld_safe)
   CGroup: /system.slice/mysql.service
           ├─4534 /bin/sh /usr/bin/mysqld_safe
           └─4881 /usr/sbin/mysqld --basedir=/usr --datadir=/var/lib/mysql --...

Apr 06 12:10:23 ubuntu-standard systemd[1]: Starting MySQL Community Server...
Apr 06 12:10:24 ubuntu-standard mysqld_safe[4534]: 160406 12:10:24 mysqld_saf...
Apr 06 12:10:24 ubuntu-standard mysqld_safe[4534]: 160406 12:10:24 mysqld_saf...
Apr 06 12:10:24 ubuntu-standard mysqld_safe[4534]: 160406 12:10:24 mysqld_saf...
Apr 06 12:10:25 ubuntu-standard systemd[1]: Started MySQL Community Server.
Hint: Some lines were ellipsized, use -l to show in full.
With that, I got myself a MySQL database server and a root account for the database related tasks later on.
Installing Git
With the MySQL server running, the next item that I installed was Git. To do so, I ran the following command in terminal:
sudo apt-get install git
Downloading a copy of Go Git Service for Raspberry Pi 3
After I had installed Git, I proceeded to download a copy of Go Git Service onto my Raspberry Pi 3:
cd /opt
sudo wget https://dl.gogs.io/gogs_v0.9.141_raspi2.zip
sudo unzip gogs_v0.9.141_raspi2.zip
sudo rm gogs_v0.9.141_raspi2.zip
This would result in the binary source of Go Git Service 0.9.141 to be available in /opt/gogs.
Creating a database instance and a new MySQL user for Go Git Service
Inside /opt/gogs/scripts, there is a helper script to aid in the creation of the MySQL database instance for Go Git Service. Hence, I used that script to create the database instance for my Go Git Service:
mysql -u root -p < /opt/gogs/scripts/mysql.sql
This created an empty database instance named as gogs in my MySQL server.
With the database instance created, I then proceeded to create a new MySQL user with privileges to interact with the gogs database instance.
I first got into the mysql shell:
mysql -u root -p
Once inside the mysql shell, I ran the following commands:
mysql> CREATE USER 'gogsuser'@'localhost' IDENTIFIED BY 'password';
mysql> GRANT ALL ON gogs.* TO 'gogsuser'@'localhost';
These commands created a MySQL user with gogsuser as the username and password as the password. In addition, gogsuser has the rights to act on the gogs database instance.
Creating the system user that will run Go Git Service
Once the database related configurations had been completed, I went on to create a system user that will run Go Git Service:
sudo adduser --disabled-login --gecos 'Go Git Service' gogs
This would create a system user with username gogs and Go Git Service as its descriptive name. In addition, this user cannot be used to login to Ubuntu Server
Making gogs the owner of /opt/gogs
I then changed the owner of /opt/gogs and its contents to gogs:
sudo chown -R gogs:gogs gogs
This would ensure that gogs had the appropriate privileges to act on the items inside the /opt/gogs folder.
Configuring Go Git Service to be run by systemctl
To ensure that my Go Git Service is constantly up and running, I also configured my Go Git Service to run as a systemctl service.
To do so, I first got into the /opt/gogs/scripts/systemd folder:
cd /opt/gogs/scripts/systemd
Inside this folder, there is a systemd unit file, gogs.service.
I first made a backup of this file:
sudo cp gogs.service gogs.service.bak
I then opened up gogs.service with nano:
sudo nano gogs.service
And changed the contents to resemble the following:
[Unit]
Description=Gogs (Go Git Service)
After=syslog.target
After=network.target
After=mysql.service
#After=postgresql.service
#After=memcached.service
#After=redis.service

[Service]
# Modify these two values and uncomment them if you have
# repos with lots of files and get an HTTP error 500 because
# of that
###
#LimitMEMLOCK=infinity
#LimitNOFILE=65535
Type=simple
User=gogs
Group=gogs
WorkingDirectory=/home/gogs/systemdwd
ExecStart=/opt/gogs/gogs web
Restart=always
Environment=USER=gogs HOME=/home/gogs

[Install]
WantedBy=multi-user.target
After saving changes made to gogs.service, I created the /home/gogs/systemdwd folder to serve as the working directory for Go Git Service:
sudo -H -u gogs mkdir /home/gogs/systemdwd
After that, I enabled my Go Git Service so that it can be controlled by systemctl:
sudo systemctl enable /opt/gogs/scripts/systemd/gogs.service
This would cause symbolic links to be created in the /etc/systemd/system/multi-user.target.wants and /etc/systemd/system folders. These new symbolic links will link to /opt/gogs/scripts/systemd/gogs.service.
I then started my Go Git Service with the following command:
sudo systemctl start gogs.service
I then verified that Go Git Service runs successfully:
sudo systemctl status gogs.service
which the following output:
● gogs.service - Gogs (Go Git Service)
   Loaded: loaded (/opt/gogs/scripts/systemd/gogs.service; enabled; vendor preset: enabled)
   Active: active (running) since Sun 2016-07-24 13:39:59 SGT; 1s ago
 Main PID: 3930 (gogs)
   CGroup: /system.slice/gogs.service
           └─3930 /opt/gogs/gogs web

Jul 24 13:39:59 ubuntu-standard gogs[3930]: 2016/07/24 13:39:59 [I] Gogs: Go...8
Jul 24 13:39:59 ubuntu-standard gogs[3930]: 2016/07/24 13:39:59 [I] Log Mode...)
Jul 24 13:39:59 ubuntu-standard gogs[3930]: 2016/07/24 13:39:59 [I] Cache Se...d
Jul 24 13:39:59 ubuntu-standard gogs[3930]: 2016/07/24 13:39:59 [I] Session ...d
Jul 24 13:39:59 ubuntu-standard gogs[3930]: 2016/07/24 13:39:59 [I] Git Vers...0
Jul 24 13:39:59 ubuntu-standard gogs[3930]: 2016/07/24 13:39:59 [T] Doing: C...s
Jul 24 13:39:59 ubuntu-standard gogs[3930]: 2016/07/24 13:39:59 [I] SQLite3 ...d
Jul 24 13:39:59 ubuntu-standard gogs[3930]: 2016/07/24 13:39:59 [I] Run Mode...n
Jul 24 13:39:59 ubuntu-standard gogs[3930]: [mysql] 2016/07/24 13:39:59 stat...n
Jul 24 13:40:00 ubuntu-standard gogs[3930]: 2016/07/24 13:40:00 [I] Listen: ...0
Hint: Some lines were ellipsized, use -l to show in full.
Starting the installation process
Once the system related configurations are done, it was time to proceed on with the installation process.
To do so, I accessed my Go Git Service with my browser via http://192.168.0.200:3000, where 192.168.0.200 is the ip address of my Raspberry Pi 3. This resulted in a web page that prompted for initial configurations.
I supplied the following values as my initial configurations:
======== Database Settings ========
Database Type: MySQL
Host: 127.0.0.1:3306
User: gogsuser
Password: password
Database Name: gogs

======== Application General Settings ========
Application Name: Gogs: Go Git Service
Repository Root Path: /home/gogs/gogs-repositories
Run User: gogs
Domain: 192.168.0.200
SSH Port: 22
HTTP Port: 3000
Application URL: http://192.168.0.200:3000/
Log Path: /opt/gogs/log

========  Admin Account Settings ========
Username: admin
Password: password
Confirm password: password
Admin Email: gogsAdmin@techcoil.com
and clicked the Install Gogs button.
Once the installation steps were completed, I was shown the following screen in my browser:

With that, I got a relatively responsive self hosted Git Service running on my Raspberry Pi 3.
Buying the Raspberry Pi 3 hardware to host your own Go Git Service from Amazon
If you do not have the Raspberry Pi 3 hardware mentioned in this post yet, you may want to purchase them from Amazon. Simply click on the button below to add the Raspberry Pi 3 hardware to your cart. You may remove anything that you already have or replace some of the hardware with other hardware.