How to make your own USB powered LED lights
Since upstream USB connectors can supply 5V of DC power to downstream devices, we can use USB connectors to power LED lights.
While there are many USB powered lighting options available in the market, making your own gives you more flexibility in the form factor.
With this in mind, let's look at how we can make our own USB powered LED lights.
Parts for making the USB powered LED lights
Since we want more flexibility in the form factor of our own USB powered LED lights, we can choose a SMD2835 light strip as the lighting component.
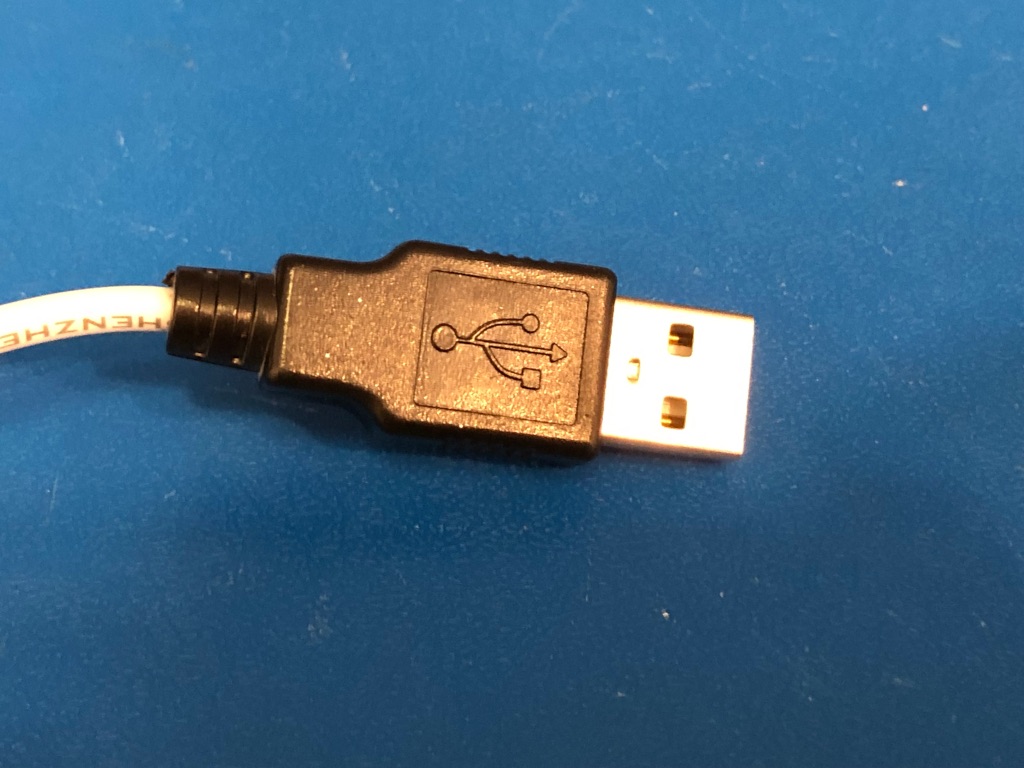
In addition to that, we can get a 2 conductor cable to link the LED light strip with a USB 2.0 type A pin plug.
Tools for making the USB powered LED lights
Apart from the parts for making the USB powered LED lights, here are some tools for building your lights:
Steps to building your USB powered LED lights
Once you have procured the parts of making your own lights, you can proceed with building your lights.
1. Cut a portion of LED light strip for your lights
First, cut a portion of LED light strip from the coil. You can choose to cut along the solder pads that separate the LED chips.
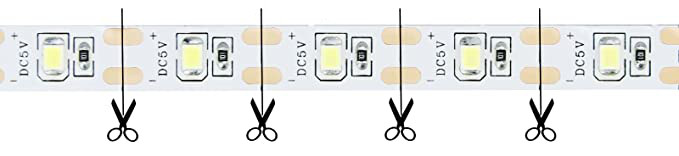
In order to have good spacing for soldering, make sure that you leave equal spacing between the severed strips.
2. Cut a good portion of 2 conductor cable to connect the LED light strip to power source
Next, cut out a good portion of 2 conductor cable to connect the LED light strip to power source.
Once you had cut out the needed cable, strip out the wires at both ends for soldering.
3. Solder cable to LED light strip
At this point in time, you are ready to solder the cable to the LED light strip.
In order to have an easier time soldering, you can tape them to the surface.
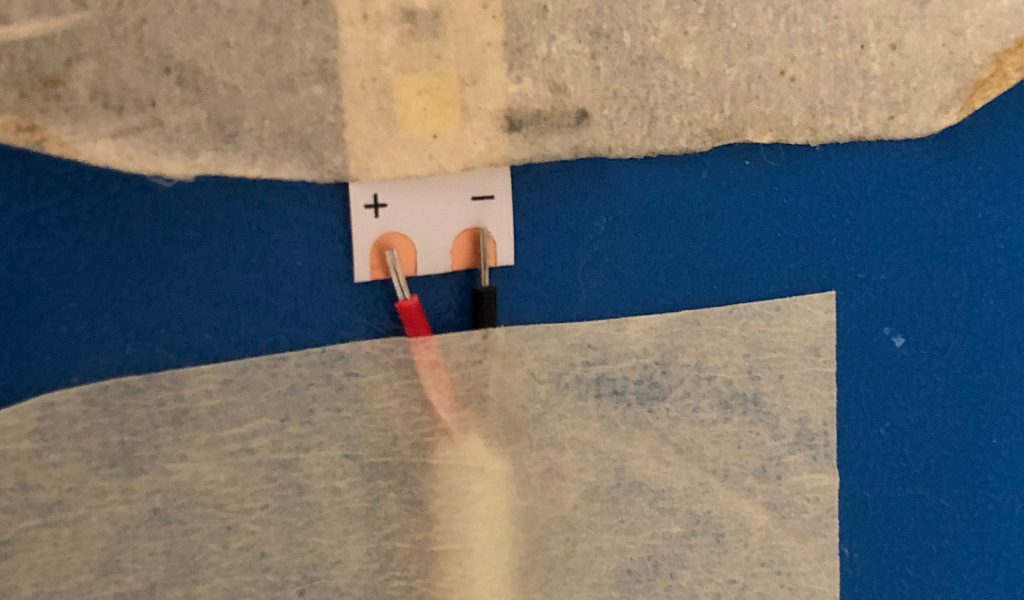
After that, apply sufficient soldering wire and solder the cables to the respective soldering pad on the LED strip.
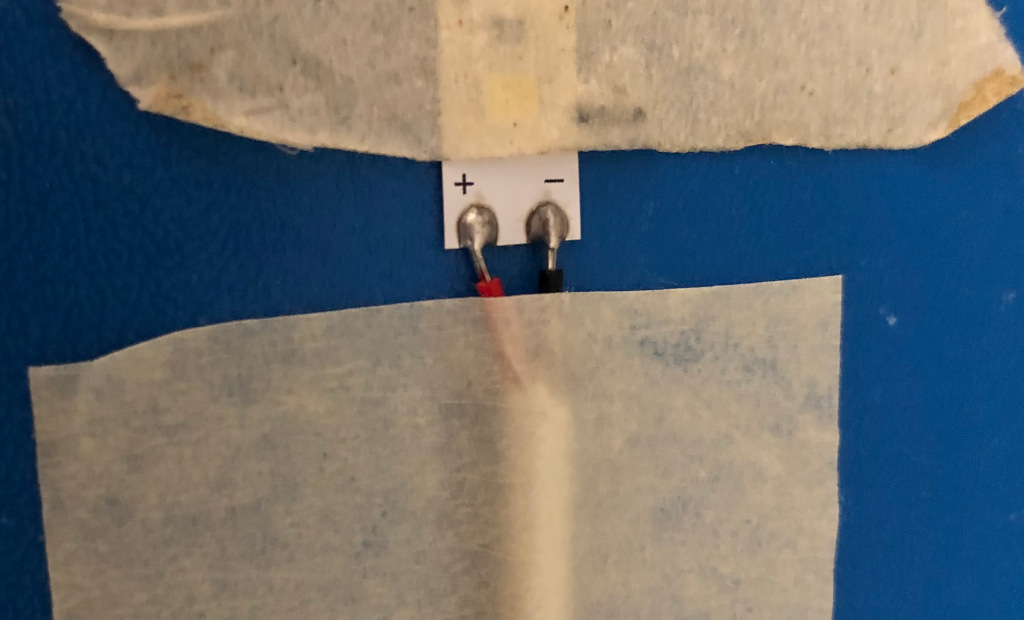
As shown above, we had soldered the red wire to solder pad labelled + and the black wire to solder pad labelled -.
4. Solder cable to USB 2.0 type A pin plug
At this point in time, we can solder the cable to our USB 2.0 type A pin plug.
Since we had connected the red wire to + and black wire to -, we can solder the cable without the use of a multimeter.
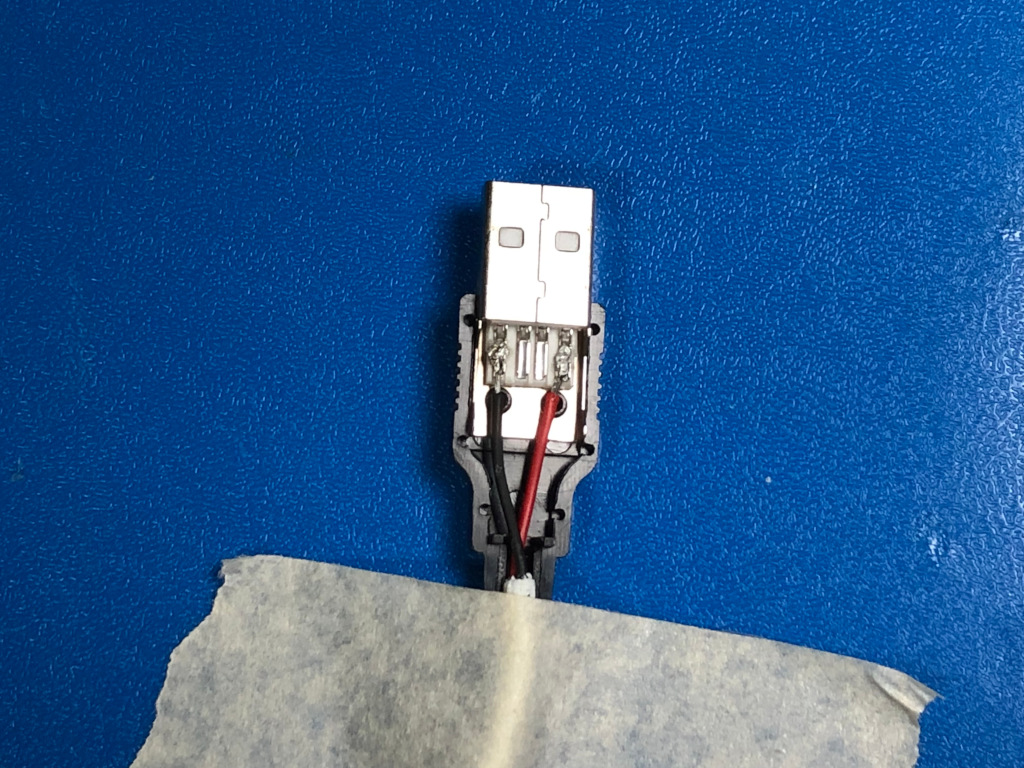
When you are done with the soldering, cover up the USB 2.0 type A pin plug with the other side of the plastic cover.
After that, you will be able to light up your LED lights by connecting it to a USB power adapter.