Enabling ESP8266 Development on Arduino IDE
Undeniably, the ESP8266 NodeMCU LUA Development Board is cost efficient for IOT solutions. Available at a low price point and built-in WiFi, we can easily get sensor readings and make them available on the Internet.
In order to run our program on ESP8266 NodeMCU LUA Development Board, we will need to write our program into the flash memory of the development board. Since it is easy to write code and flash programs with Arduino IDE, it is a good tool to use with the ESP8266 NodeMCU LUA Development Board.
In case you are looking for a reference to enable ESP8266 development on Arduino IDE, this post shows how you can do so.
Getting a copy of Arduino IDE that supports addons with the Arduino Boards Manager
First of all, you will need to ensure that your copy of Arduino IDE supports addons with the Arduino Boards Manager. When you have an Arduino IDE 1.6.4 and later, you will be ready to add the ESP8266 core to your Arduino IDE. If you do not have one, download the latest Arduino IDE and install it on your computer.
Installing ESP8266 core with Arduino Boards Manager
In order to start ESP8266 development on Arduino IDE, we will need to add the ESP8266 core created by Ivan Grokhotkov and the ESP8266 community.
After you had started your Arduino IDE, go to Arduino -> Preferences to open up the Preferences windows.
Next, enter http://arduino.esp8266.com/stable/package_esp8266com_index.json into the Additional Board Manager URLs textfield.

After that, press OK on the Additional Boards Manager URLs windows and OK on the Preferences windows to exit Preferences.
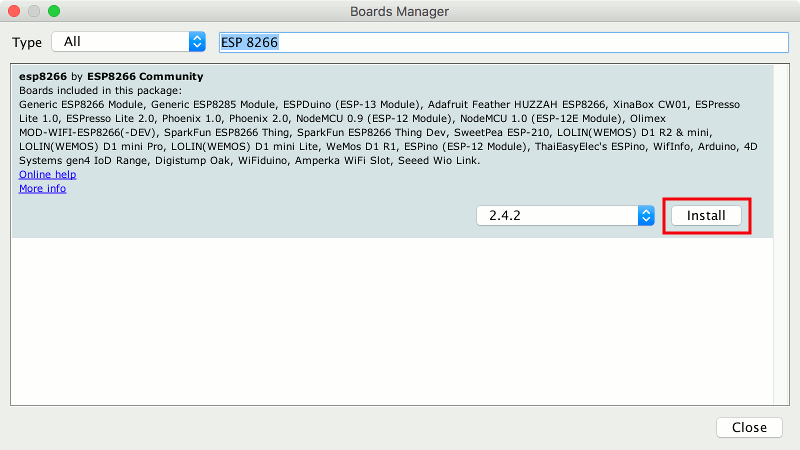
Once you had included the ESP8266 core URL, go to Tools -> Boards -> Boards Manager... to open up the Boards Manager window. When the Boards Manager window appears, find ESP 8266 and click Install:
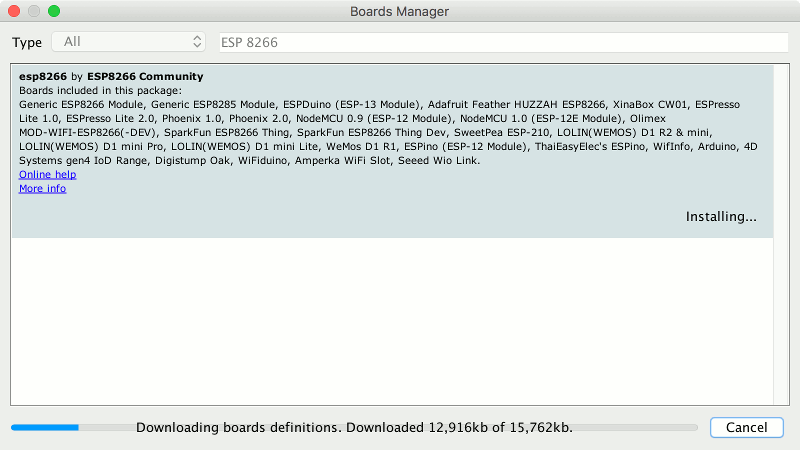
After you clicked install, a progress bar appears to show the installation process:
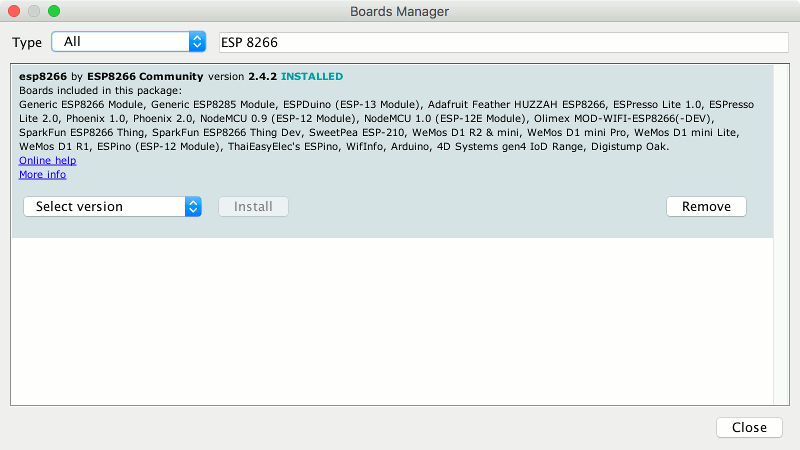
When the installation is completed, the Boards Manager will show the version of ESP 8266 that had been installed on your Arduino IDE:
Installing a CP210x USB to UART Bridge VCP Driver
In order to flash your program to your ESP8266 NodeMCU LUA Development Board, you will also need to have CP210x USB to UART Bridge VCP Driver installed on your computer. Therefore, go to Silicon's download page for CP210x USB to UART Bridge VCP Drivers to get a copy for your computer. Follow the instructions to install the respective driver for your computer.
Verifying that you can flash a program to your ESP8266 board with Arduino IDE
Once you had installed the CP210x USB to UART Bridge VCP Driver on your computer, you are ready to verify that you can flash a program to your ESP8266 board with your Arduino IDE.
Connecting your ESP8266 NodeMCU LUA Development Board to your computer
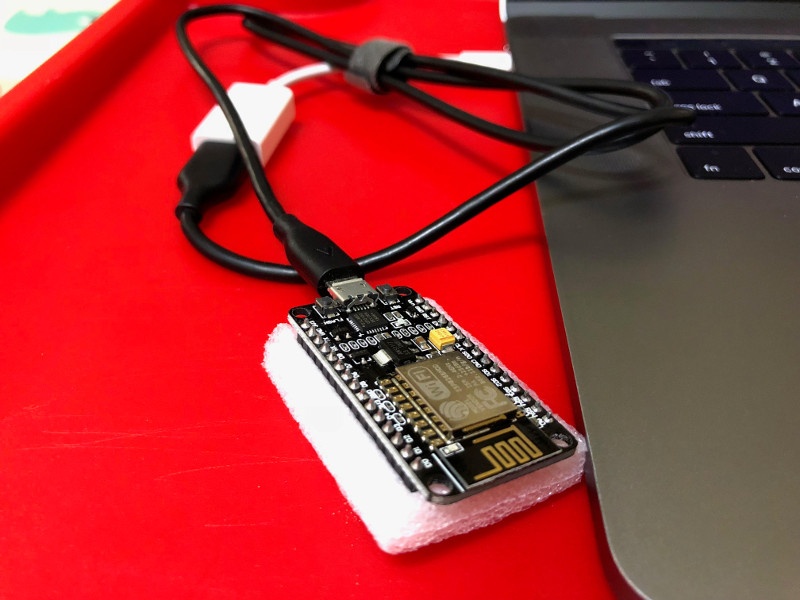
First, connect your ESP8266 NodeMCU LUA Development Board to your computer via a good microUSB cable:
Load the ESP8266 blink example onto your Arduino IDE
Next, start your Arduino IDE and go to File -> Examples -> ESP8266 -> Blink to open up the Blink example:
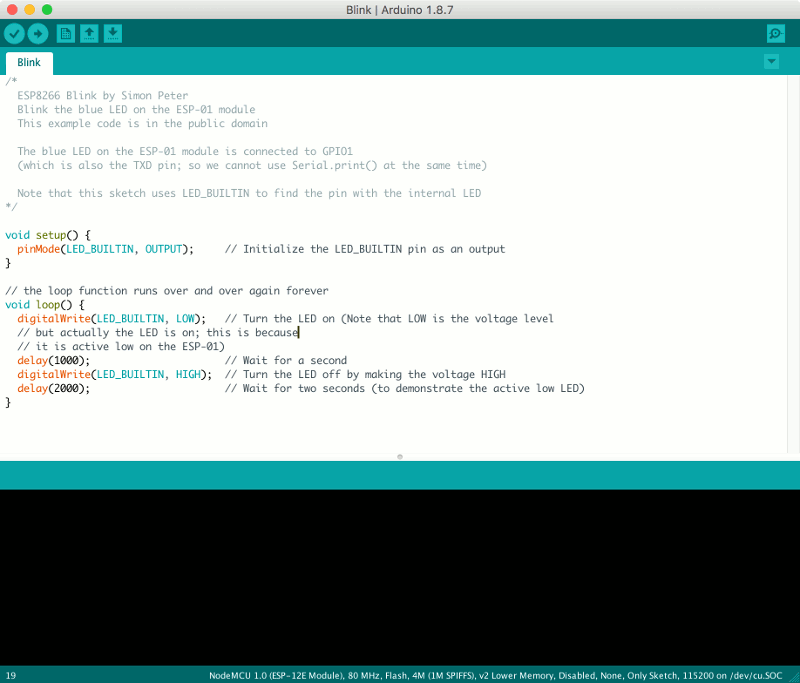
This example will toggle the ESP8266 NodeMCU LUA Development Board built-in LED on and off with some delay.
Configurations to flash the ESP 8266 Blink example to the development board
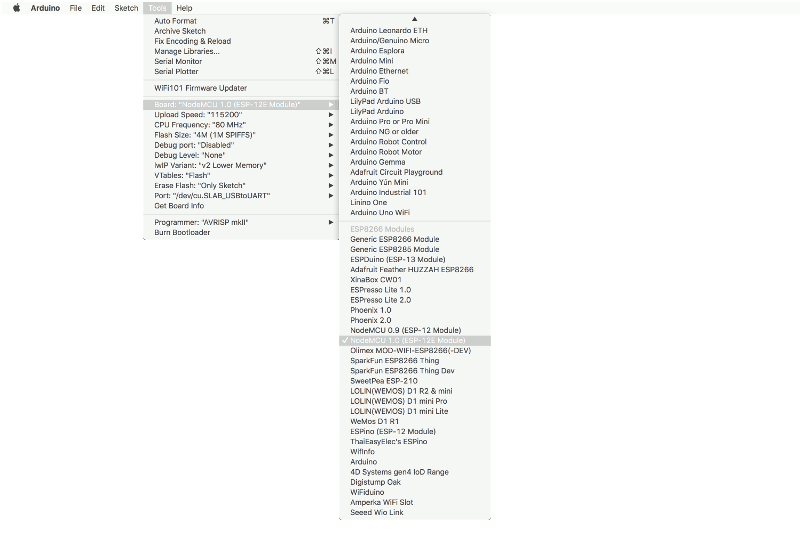
Once your Arduino IDE had been loaded in the editor, there are some settings that you had to configure.
First, select NodeMCU 1.0 (ESP-12E Module) as the development board:
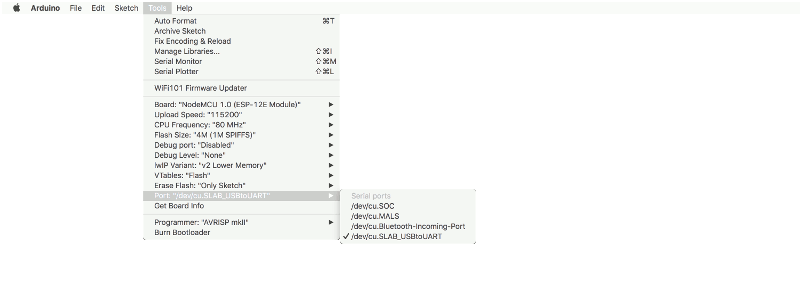
Next, select the port on your computer that you will use to flash your program to your board:
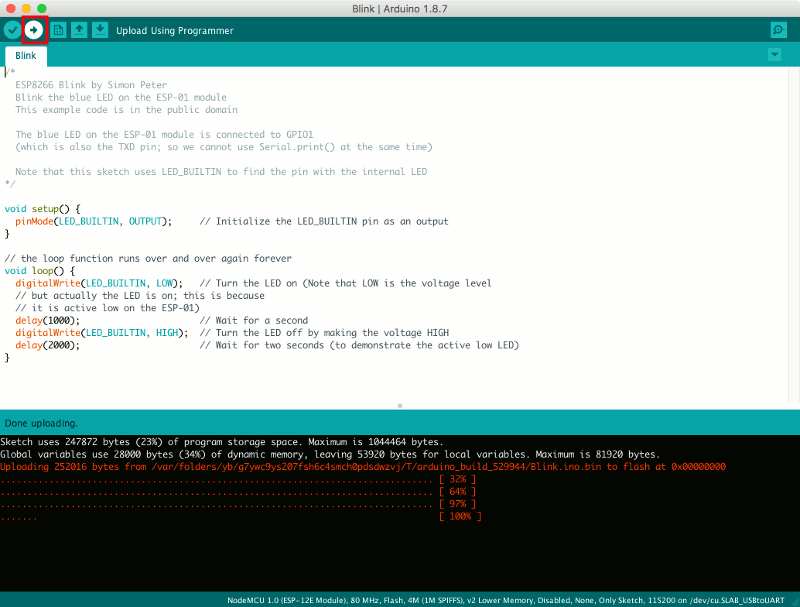
Flashing the ESP 8266 blink example to the development board
Finally, click the Upload button to flash the ESP 8266 blink example to the development board:
When your program had been successfully uploaded, the LED light on your ESP8266 NodeMCU LUA Development Board will blink.