Displaying post author information in your WordPress theme
Every blog post has an author behind it. As web masters, we have the authority to decide whether to display some information about the author.
Although I am the sole author of my blog, I feel that including some information about myself right after my posts can give my readers some form of assurance that they are reading something from a human.
I present such information in the form of a little box:

Storing relevant information with WordPress
Since I am the only writer for my blog, a straightforward approach to putting up information about myself could be hard coding them into single.php. However, this approach hurts scalability and maintainability. In the future, I could put up similar information at places other than single.php. Or I could invite others to post content in my blog in return for some visual space.
Storing authors' details with WordPress
Every author in a WordPress blog will use a user account to log into and write blog posts. With that, I use the edit profile page in the administration area of my blog to save some information about myself.
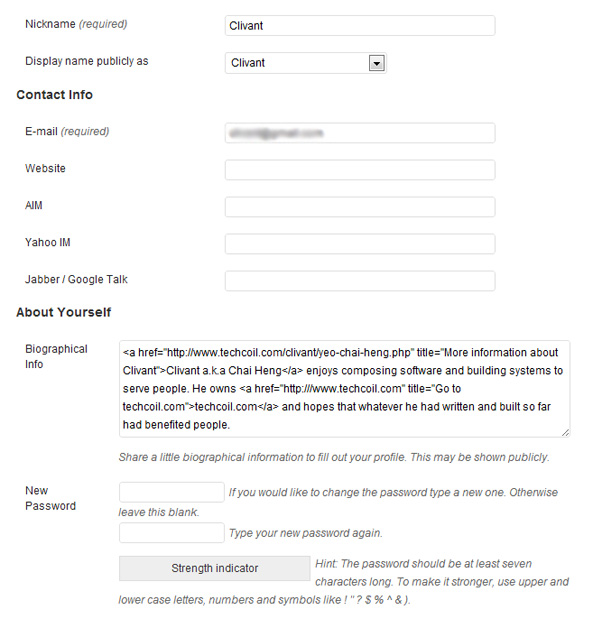
In this page, I filled up three pieces of information:
- A display name, which is different from my username.
- An email account which is registered with Gravatar so that I can display my Gravatar photo.
- A paragraph about myself with some HTML formatting.
Displaying author's details
After I had saved the relevant information which I wish to display, I went on to identify the functions that will retrieve these information from the WordPress engine.
Outputting display name
<?php the_author_meta('display_name');?>
I used the the_author_meta function with the string literal 'display_name' to write my display name to the browser.
Outputting the Gravatar photo
<?php echo get_avatar(get_the_author_meta('user_email')); ?>
I employed a two-step approach to outputting my Gravatar photo to the browser.
- I first get the email which I associate with my Gravatar account via the
get_the_author_metafunction, by passing it the string literal'user_email'. Note that unlike thethe_author_metafunction, theget_the_author_metareturns a string containing the requested information instead of directly writing it out to the browser. - I then get the
imgtag for my Gravatar photo by passing the return value ofget_the_author_metainto theget_avatarfunction. I then write the image tag to the browser via theechofunction.
Outputting the biographical info
<?php the_author_meta('user_description');?>
As with the outputting of the display name, I used the the_author_meta function with the string literal 'user_description' to write my biographical information to the browser.
Formatting the information with HTML markup
With an idea of what functions to call for the information, I craft the entire HTML markup that will form the box.
<div id="post-author">
    <?php echo get_avatar(get_the_author_meta('user_email')); ?>
    <h3>About <?php the_author_meta('display_name');?></h3>
    <p>
        <?php the_author_meta('user_description');?>
    </p>
</div>
With the HTML markup in place, I then style the information with the following CSS rules.
#post-author {
  border: 3px solid #B8D6FF;
  margin: 0 30px 0 17px;
  min-height: 116px;
}

#post-author h3 {
  color: #19447E;
  font-size: 16px;
  font-weight: bold;
  margin: 10px 10px;
}

#post-author img {
  border: 1px solid #B8D6FF;
  display: block;
  float: left;
  margin: 10px;
}

#post-author p {
  font-size: 14px;
  text-align: left;
  margin-right: 10px;
}
Some posts which may interest you
- Make your PHP webpage loads faster by aggregating external CSS scripts
- PHP codes to tell browsers to open the download dialog box for users to download a file
- How to send HTTP post requests and HTTP get requests using jQuery
- Code segments for rendering html 4.0 pages
- How to ensure that your Javascript is able to write unicode characters from external Javascript files to your HTML contents