How to setup Jupyter Notebook on Ubuntu 16.04 of your Nvidia Jetson TX2 developer kit
When you want to quickly test out your machine learning algorithm, you can create Python 3 notebooks via Jupyter Notebook.
Therefore, Jupyter Notebook is one of the things that you may want to setup after getting started with your Nvidia Jetson TX2 developer kit.
With this in mind, this post shows how to setup Jupyter Notebook on Ubuntu 16.04 of your Nvidia Jetson TX2 developer kit.
Installing python3-venv and python3-dev on Ubuntu 16.04
After you had logged into Ubuntu 16.04 with the nvidia user, start an instance of the terminal program. After a terminal program instance had started, install python3-venv and python3-dev with the following command:
sudo apt-get install python3-venv python3-dev -y
Creating a virtual environment for your Jupyter Notebook on Ubuntu 16.04 of your Nvidia Jetson TX2 developer kit
After you had installed python3-venv, you will be able to run the venv module with the python3 binary. With this in mind, you can then create a virtual environment for running your Jupyter Notebook on Ubuntu 16.04 of your Nvidia Jetson TX2 developer kit. In order to do so, run the following commands in the terminal window:
mkdir ~/jupyter/
python3 -m venv ~/jupyter/jupyter-env
Upgrading your pip version of your virtual environment
Once you had created the virtual environment, activate the virtual environment within the terminal window:
source ~/jupyter/jupyter-env/bin/activate
After your virtual environment had been activated, run the following command to upgrade the pip version of your virtual environment:
pip install --upgrade pip
Installing Jupyter Notebook into the virtual environment
Once you had upgraded the pip version of your virtual environment, you can proceed with installing Jupyter Notebook and its dependencies into the virtual environment.
Setting up zeromq in Ubuntu 16.04
When you install Jupyter Notebook right away, you may encounter the following error message:
    Using bundled libzmq
    already have bundled/zeromq
    attempting ./configure to generate platform.hpp
    Warning: failed to configure libzmq:
    b'/bin/sh: 1: ./configure: not found\n'
    staging platform.hpp from: /tmp/pip-install-7b2xfn81/pyzmq/buildutils/include_linux
    ************************************************
    checking for timer_create
    creating build/temp.linux-aarch64-3.5/tmp
    aarch64-linux-gnu-gcc -pthread -DNDEBUG -g -fwrapv -O2 -Wall -Wstrict-prototypes -g -fstack-protector-strong -Wformat -Werror=format-security -Wdate-time -D_FORTIFY_SOURCE=2 -fPIC -c /tmp/timer_create__sd0z0x.c -o build/temp.linux-aarch64-3.5/tmp/timer_create__sd0z0x.o
    /tmp/timer_create__sd0z0x.c:1:1: warning: return type defaults to ‘int’ [-Wimplicit-int]
     main (int argc, char **argv) {
     ^
    /tmp/timer_create__sd0z0x.c: In function ‘main’:
    /tmp/timer_create__sd0z0x.c:2:5: warning: implicit declaration of function ‘timer_create’ [-Wimplicit-function-declaration]
         timer_create();
         ^
    aarch64-linux-gnu-gcc -pthread build/temp.linux-aarch64-3.5/tmp/timer_create__sd0z0x.o -o build/temp.linux-aarch64-3.5/a.out
    build/temp.linux-aarch64-3.5/tmp/timer_create__sd0z0x.o: In function `main':
    /tmp/timer_create__sd0z0x.c:2: undefined reference to `timer_create'
    collect2: error: ld returned 1 exit status
    no timer_create, linking librt
    ************************************************
    building 'zmq.libzmq' extension
    creating build/temp.linux-aarch64-3.5/buildutils
    creating build/temp.linux-aarch64-3.5/bundled
    creating build/temp.linux-aarch64-3.5/bundled/zeromq
    creating build/temp.linux-aarch64-3.5/bundled/zeromq/src
    aarch64-linux-gnu-gcc -pthread -DNDEBUG -g -fwrapv -O2 -Wall -Wstrict-prototypes -g -fstack-protector-strong -Wformat -Werror=format-security -Wdate-time -D_FORTIFY_SOURCE=2 -fPIC -DZMQ_HAVE_CURVE=1 -DZMQ_USE_TWEETNACL=1 -DZMQ_USE_EPOLL=1 -Ibundled/zeromq/include -Ibundled -I/home/nvidia/jupyter/jupyter-env/include -I/usr/include/python3.5m -c buildutils/initlibzmq.c -o build/temp.linux-aarch64-3.5/buildutils/initlibzmq.o
    aarch64-linux-gnu-gcc -pthread -DNDEBUG -g -fwrapv -O2 -Wall -Wstrict-prototypes -g -fstack-protector-strong -Wformat -Werror=format-security -Wdate-time -D_FORTIFY_SOURCE=2 -fPIC -DZMQ_HAVE_CURVE=1 -DZMQ_USE_TWEETNACL=1 -DZMQ_USE_EPOLL=1 -Ibundled/zeromq/include -Ibundled -I/home/nvidia/jupyter/jupyter-env/include -I/usr/include/python3.5m -c bundled/zeromq/src/tipc_address.cpp -o build/temp.linux-aarch64-3.5/bundled/zeromq/src/tipc_address.o
    cc1plus: warning: command line option ‘-Wstrict-prototypes’ is valid for C/ObjC but not for C++
    aarch64-linux-gnu-gcc -pthread -DNDEBUG -g -fwrapv -O2 -Wall -Wstrict-prototypes -g -fstack-protector-strong -Wformat -Werror=format-security -Wdate-time -D_FORTIFY_SOURCE=2 -fPIC -DZMQ_HAVE_CURVE=1 -DZMQ_USE_TWEETNACL=1 -DZMQ_USE_EPOLL=1 -Ibundled/zeromq/include -Ibundled -I/home/nvidia/jupyter/jupyter-env/include -I/usr/include/python3.5m -c bundled/zeromq/src/socket_poller.cpp -o build/temp.linux-aarch64-3.5/bundled/zeromq/src/socket_poller.o
    cc1plus: warning: command line option ‘-Wstrict-prototypes’ is valid for C/ObjC but not for C++
    In file included from bundled/zeromq/src/ypipe.hpp:33:0,
                     from bundled/zeromq/src/mailbox.hpp:39,
                     from bundled/zeromq/src/ctx.hpp:38,
                     from bundled/zeromq/src/epoll.hpp:40,
                     from bundled/zeromq/src/poller.hpp:42,
                     from bundled/zeromq/src/socket_poller.hpp:33,
                     from bundled/zeromq/src/socket_poller.cpp:31:
    bundled/zeromq/src/atomic_ptr.hpp: In member function ‘int zmq::atomic_value_t::load() const’:
    bundled/zeromq/src/atomic_ptr.hpp:269:46: error: binding ‘const zmq::mutex_t’ to reference of type ‘zmq::mutex_t&’ discards qualifiers
                                                  sync
                                                  ^
    bundled/zeromq/src/atomic_ptr.hpp:116:14: note:   initializing argument 4 of ‘void* zmq::atomic_cas(void* volatile*, void*, void*, zmq::mutex_t&)’
     inline void *atomic_cas (void *volatile *ptr_,
                  ^
    error: command 'aarch64-linux-gnu-gcc' failed with exit status 1

    ----------------------------------------
Command "/home/nvidia/jupyter/jupyter-env/bin/python3 -u -c "import setuptools, tokenize;__file__='/tmp/pip-install-7b2xfn81/pyzmq/setup.py';f=getattr(tokenize, 'open', open)(__file__);code=f.read().replace('\r\n', '\n');f.close();exec(compile(code, __file__, 'exec'))" install --record /tmp/pip-record-g8qe7o43/install-record.txt --single-version-externally-managed --compile --install-headers /home/nvidia/jupyter/jupyter-env/include/site/python3.5/pyzmq" failed with error code 1 in /tmp/pip-install-7b2xfn81/pyzmq/
Therefore, run the following commands to setup zeromq on Ubuntu 16.04 before installing Jupyter again:
# Download zeromq
# Ref http://zeromq.org/intro:get-the-software
wget https://github.com/zeromq/libzmq/releases/download/v4.2.2/zeromq-4.2.2.tar.gz

# Unpack tarball package
tar xvzf zeromq-4.2.2.tar.gz

# Install dependency
sudo apt-get update && \
sudo apt-get install -y libtool pkg-config build-essential autoconf automake uuid-dev

# Create make file
cd zeromq-4.2.2
./configure

# Build and install(root permission only)
sudo make install

# Install zeromq driver on linux
sudo ldconfig
After that, run the following command to install a copy of Jupyter Notebook into the virtual environment:
pip install jupyter
When the installation had completed, you will then be able to run Jupyter notebook with the following command:
jupyter notebook
Running Jupyter Notebook as a server daemon
At this point in time, each time you restart your Nvidia Jetson TX2 developer kit, you will need to activate your virtual environment and start your Jupyter Notebook. In order to make Jupyter Notebook run whenever you start your Nvidia Jetson TX2 developer kit, you need to run it as a server daemon.
Installing Supervisor on your Ubuntu 16.04 of your Nvidia Jetson TX2 developer kit
Supervisor is a convenient tool for running an application as a server daemon. Therefore, you can use it to keep an instance of Jupyter Notebook running as a server daemon on your Ubuntu 16.04.
In order to use Supervisor on Ubuntu 16.04, you will need to run the following command to install it:
sudo apt-get install supervisor -y
After the installation had completed, you can verify your installation with the following command:
systemctl status supervisor.service
When Supervisor is installed successfully, you should see output similar to the following:
● supervisor.service - Supervisor process control system for UNIX
   Loaded: loaded (/lib/systemd/system/supervisor.service; enabled; vendor preset: enabled)
   Active: active (running) since Sun 2018-11-18 09:39:02 UTC; 13min ago
     Docs: http://supervisord.org
 Main PID: 15567 (supervisord)
   CGroup: /system.slice/supervisor.service
           └─15567 /usr/bin/python /usr/bin/supervisord -n -c /etc/supervisor/supervisord.conf

Nov 18 09:39:02 tegra-ubuntu systemd[1]: Started Supervisor process control system for UNIX.
Nov 18 09:39:03 tegra-ubuntu supervisord[15567]: 2018-11-18 09:39:03,264 CRIT Supervisor running as root (no user in
Nov 18 09:39:03 tegra-ubuntu supervisord[15567]: 2018-11-18 09:39:03,264 WARN No file matches via include "/etc/super
Nov 18 09:39:03 tegra-ubuntu supervisord[15567]: 2018-11-18 09:39:03,290 INFO RPC interface 'supervisor' initialized
Nov 18 09:39:03 tegra-ubuntu supervisord[15567]: 2018-11-18 09:39:03,290 CRIT Server 'unix_http_server' running witho
Nov 18 09:39:03 tegra-ubuntu supervisord[15567]: 2018-11-18 09:39:03,290 INFO supervisord started with pid 15567
Creating a directory to keep your Jupyter Notebook documents
Once you had installed Supervisor, you can proceed with creating a directory to keep your Jupyter Notebook documents. For example, you can run the following command to create the contents directory inside the ~/jupyter directory:
mkdir ~/jupyter/contents
Creating a shell script to run Jupyter Notebook within the virtual environment
Next, proceed to create a shell script to run Jupyter Notebook. In order to do so, run the following command to create a shell script at ~/jupyter/run-jupyter-notebook.sh:
vi ~/jupyter/run-jupyter-notebook.sh
When the editor loads, create the following content:
#!/bin/bash
source /home/nvidia/jupyter/jupyter-env/bin/activate
jupyter notebook --ip 0.0.0.0 --port 9999 --no-browser
deactivate
After you had done so, press Esc followed by :wq to save the file. Once you had saved the file, make the file executable by running the following command:
chmod +x ~/jupyter/run-jupyter-notebook.sh
Creating the Supervisor configuration file to run Jupyter Notebook
In order to get Supervisor to run Jupyter Notebook, you will need to create a Supervisor configuration file. Run the following command to create a configuration file at /etc/supervisor/conf.d/jupyter-notebook.conf:
sudo vi /etc/supervisor/conf.d/jupyter-notebook.conf
Once the editor appears, create the following content:
[program:jupyter-notebook]
directory=/home/nvidia/jupyter/contents
command=/bin/bash -E -c ../run-jupyter-notebook.sh
autostart=true
autorestart=true
stopsignal=INT
stopasgroup=true
killasgroup=true
user=nvidia
After you had done so, press Esc followed by :wq to save the file.
Once you had saved /etc/supervisor/conf.d/jupyter-notebook.conf, run the following command to restart Supervisor:
sudo systemctl restart supervisor.service
When Supervisor had restarted successfully, it will run your Jupyter Notebook for you.
Accessing Jupyter Notebook for the first time
When you access Jupyter Notebook for the first time, you need to provide a token that Jupyter Notebook had generated.
In order to get the token, get into supervisorctl with the following command:
sudo supervisorctl
And inside supervisorctl, print the log generated by Jupyter Notebook by running the following command:
tail jupyter-notebook stdout
When the command runs, output similar to the following will appear:
[I 10:36:27.067 NotebookApp] Writing notebook server cookie secret to /home/nvidia/.local/share/jupyter/runtime/notebook_cookie_secret
[I 10:36:27.679 NotebookApp] Serving notebooks from local directory: /home/nvidia/jupyter
[I 10:36:27.681 NotebookApp] The Jupyter Notebook is running at:
[I 10:36:27.682 NotebookApp] http://(tegra-ubuntu or 127.0.0.1):9999/?token=cf8b7b5c3bece2cb2fd05dfc129befd81bc4ee6bbc39a988
[I 10:36:27.682 NotebookApp] Use Control-C to stop this server and shut down all kernels (twice to skip confirmation).
[C 10:36:27.688 NotebookApp]

    Copy/paste this URL into your browser when you connect for the first time,
    to login with a token:
        http://(tegra-ubuntu or 127.0.0.1):9999/?token=cf8b7b5c3bece2cb2fd05dfc129befd81bc4ee6bbc39a988
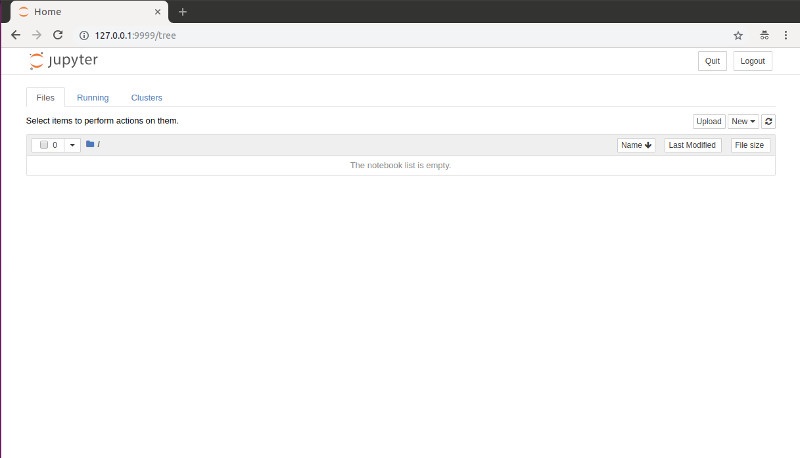
Once you see the output, follow the instructions of the last paragraph to access your Jupyter Notebook for the first time. For example, we can access the Jupyter Notebook in this post via http://127.0.0.1:9999/?token=cf8b7b5c3bece2cb2fd05dfc129befd81bc4ee6bbc39a988: