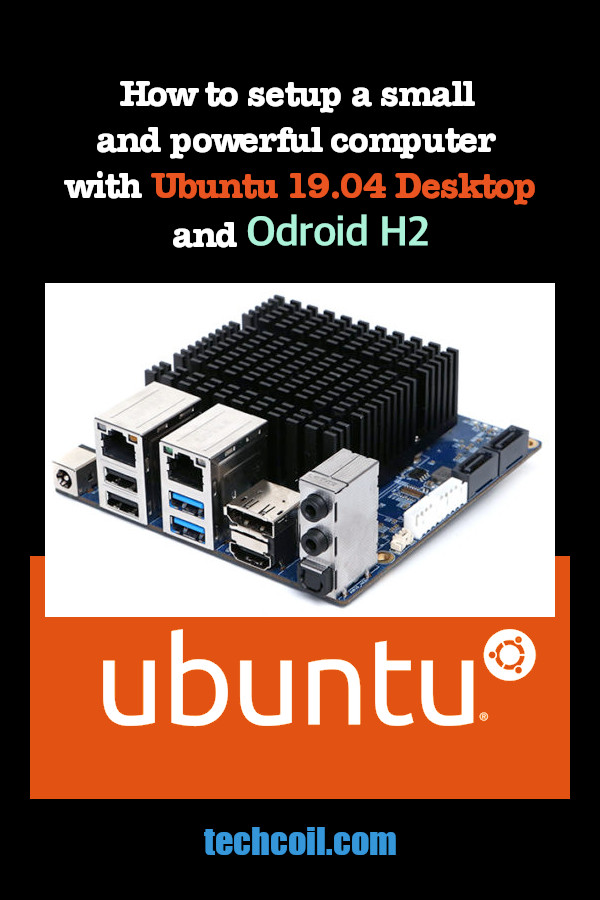
How to setup a small and powerful computer with Ubuntu 19.04 Desktop and Odroid H2
After implementing some easy and effective ways to make money with my website, I was able to earn some budget for a developer's machine.
So what is a single board computer that is small and powerful?
After doing some research, I set my eyes on the Odroid H2.
Once I had received all the hardware components, I proceeded with setting up Ubuntu 19.04 Desktop on my Odroid H2.
In case you need a reference, this is how you can setup Ubuntu 19.04 Desktop on an Odroid H2.
Recommended hardware
When I was looking for parts to buy for my Odroid H2 build, I looked for information at several places. In order to make it more convenient for you, I had included a list of items that you can buy for your Odroid H2 build:
- Odroid H2 board
- 15V/4A power supply UK plug or
15V/4A power supply US plug or
15V/4A power supply EU plug or
15V/4A power supply Asia/Korea plug or
15V/4A power supply Australia plug - Odroid H2 Case Type 1 or
Odroid H2 Case Type 2 or
Odroid H2 Case Type 3 or
Odroid H2 Case Type 4 - LED Power Button (Optional, good to have if you have fat fingers)
- Crucial P1 1TB 3D NAND NVMe PCIe M.2 SSD - CT1000P1SSD8
- Crucial 32GB Kit (16GBx2) DDR4 2400 MT/s (PC4-19200) DR x8 SODIMM 260-Pin Memory - CT2K16G4SFD824A
- If you need WIFI, get one of Odroid WIFI modules. I was able to get WIFI with my old ASUS USB-N10 NANO too.
Create a bootable USB flash drive for installing Ubuntu 19.04
One of the easiest way to install Ubuntu on Odroid H2 is to create a Ubuntu bootable USB flash drive.
In order to do so, first go to Ubuntu 19.04 (Disco Dingo) download page and download 64-bit PC (AMD64) desktop image.
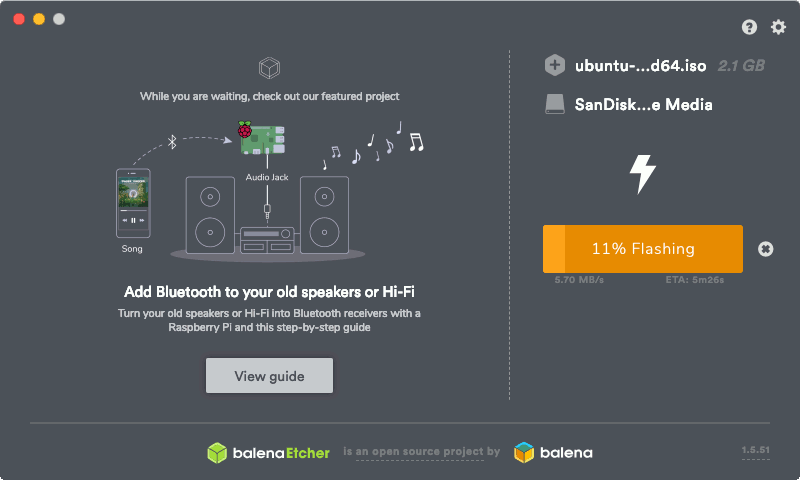
After you had downloaded the image to your machine, you can use an image flashing tool like balenaEtcher to flash the iso image onto a USB flash drive:
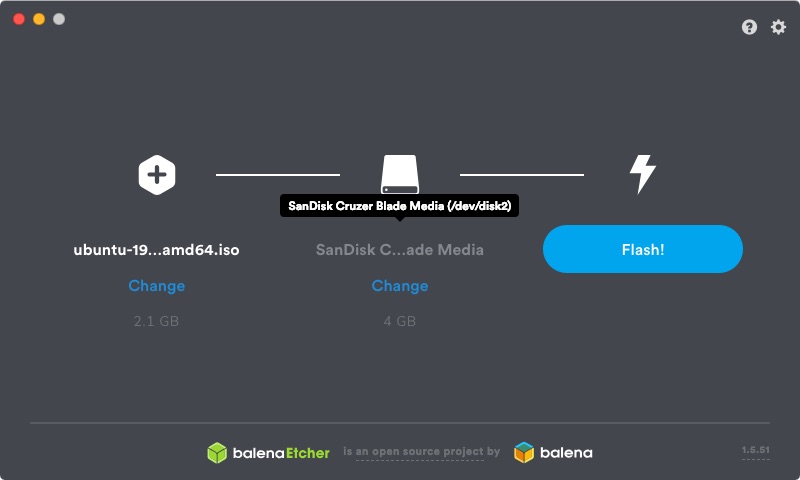
When you had selected the image and drive to flash the Ubuntu image, click on Flash!.
Assembling the NVMe PCIe M.2 SSD and RAM modules to Odroid H2
Once you had successfully created your Ubuntu 19.04 bootable flash drive, you can proceed to assemble the NVMe PCIe M.2 SSD and RAM modules to Odroid H2.
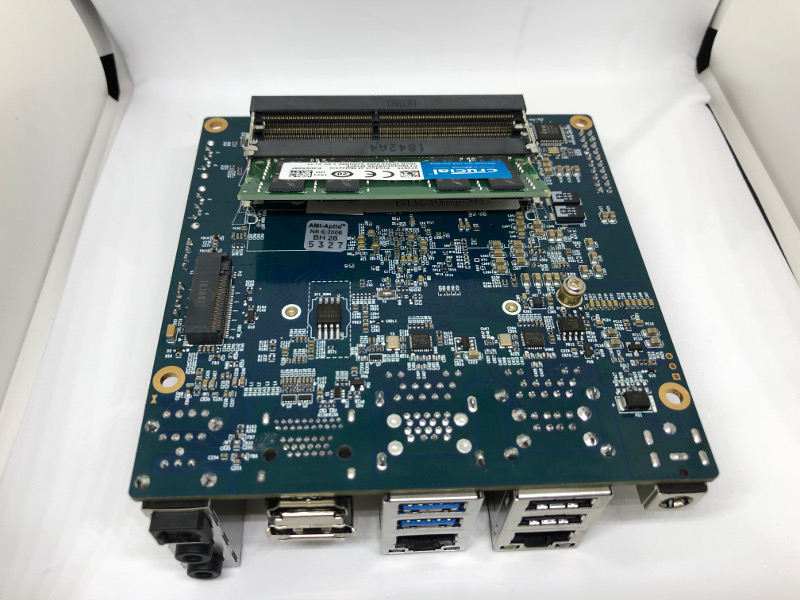
First, flip the Odroid H2 board with the PCIe and RAM slots facing you:
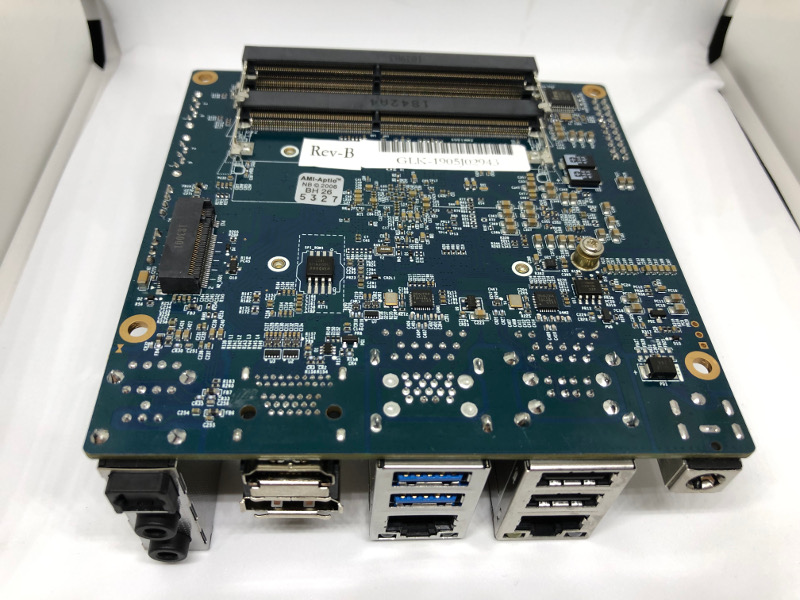
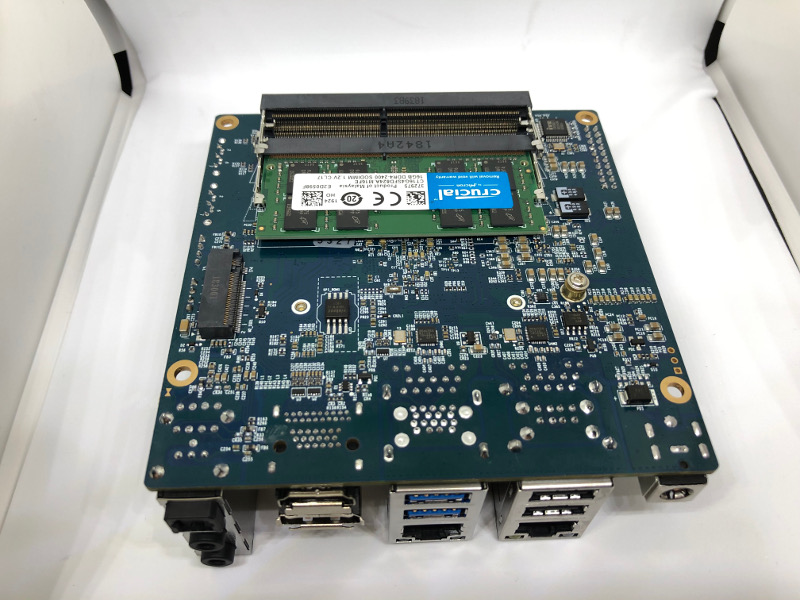
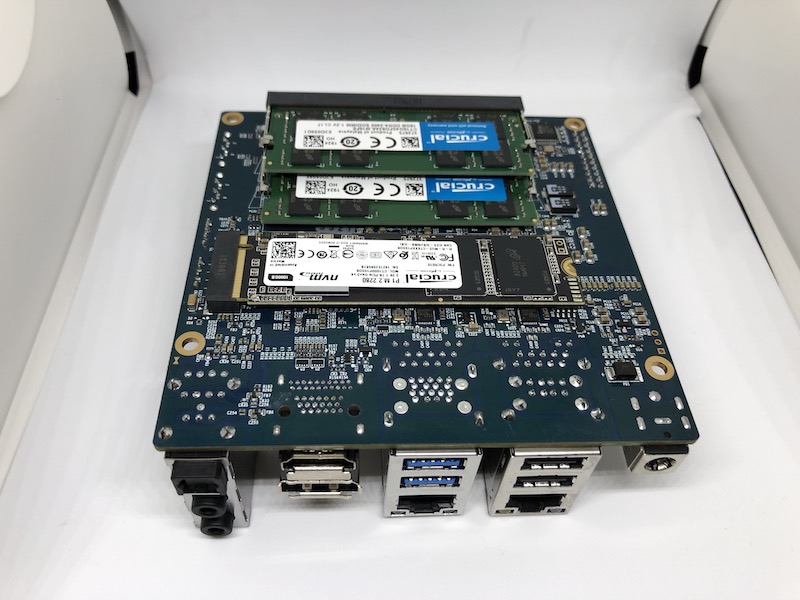
Next, slot the rams onto the Odroid H2 board:
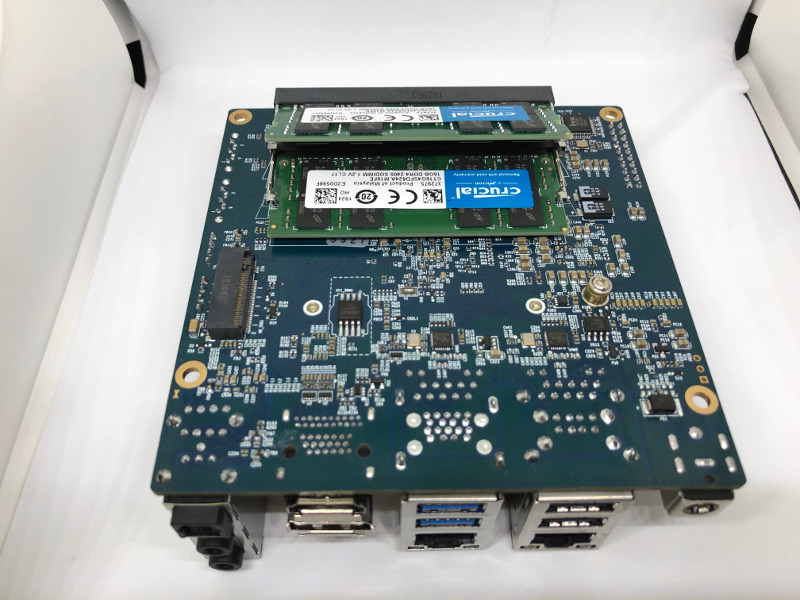
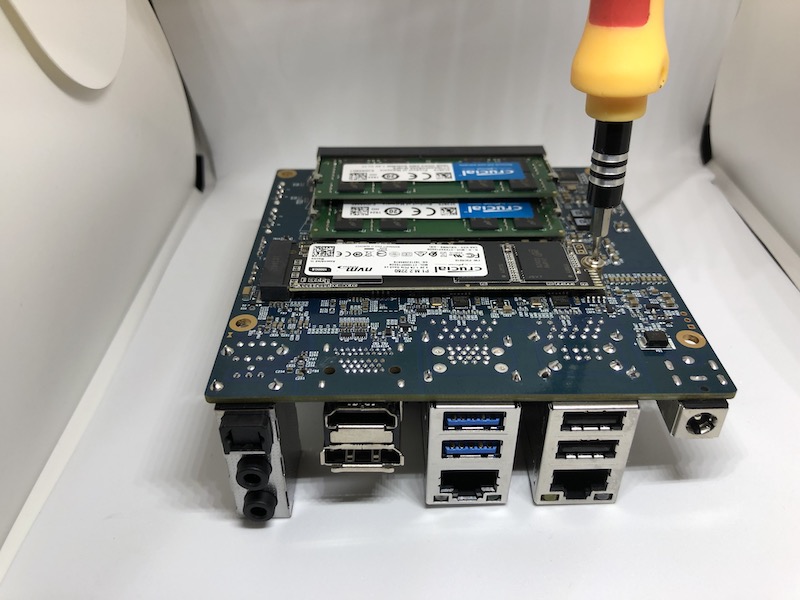
After you had slotted the two RAM modules, remove the screw for securing the SSD drive:

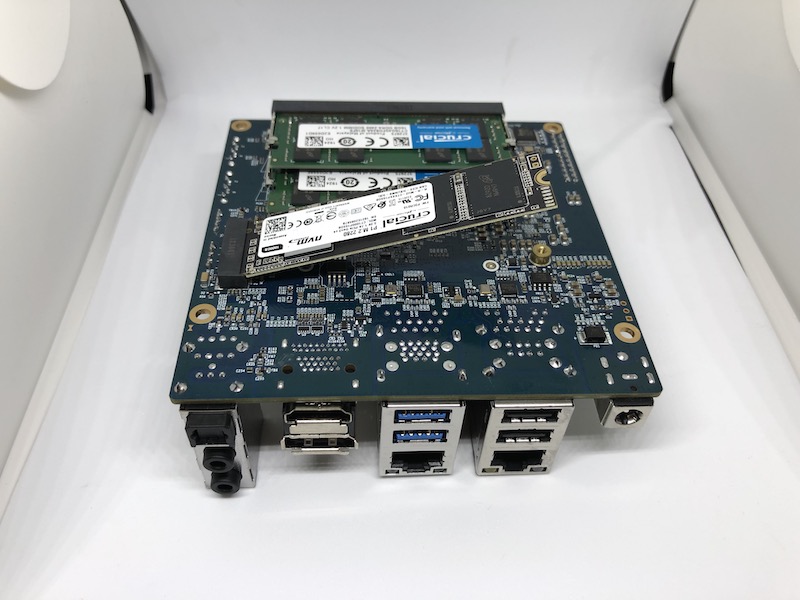
Once you have removed the screw, slot the SSD drive in and secure it with the screw:
After you had assembled the NVMe PCIe M.2 SSD and RAM modules to Odroid H2, you are ready to install Ubuntu 19.04 desktop.
In order to do so, connect your Odroid H2 to a mouse, keyboard, monitor screen, power adapter and the USB bootable drive that you had created earlier:
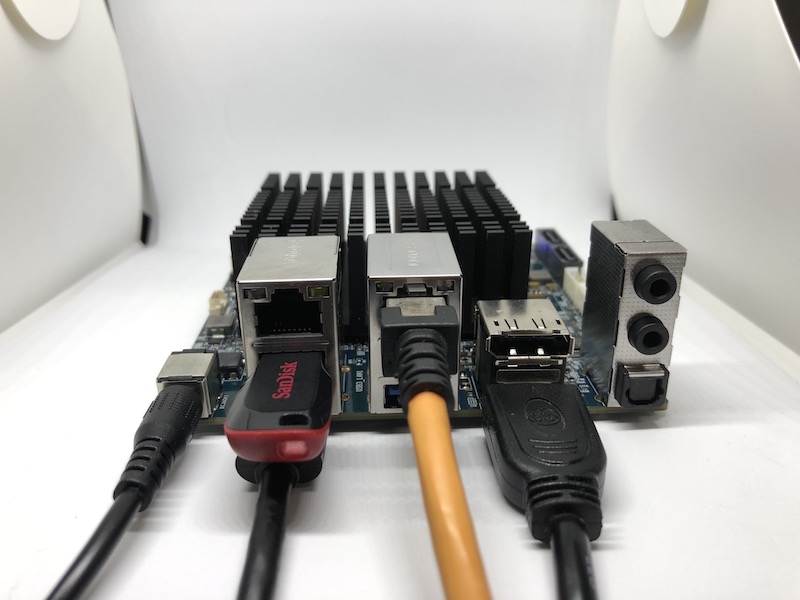
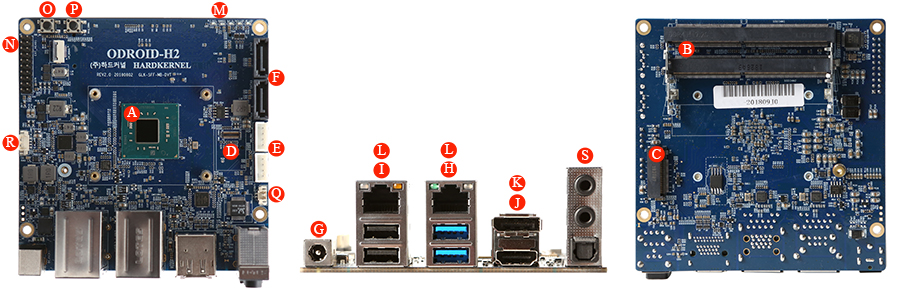
Once you had provided electricity your power adapter, press the power button (labeled O in the image below) to switch on Odroid H2.
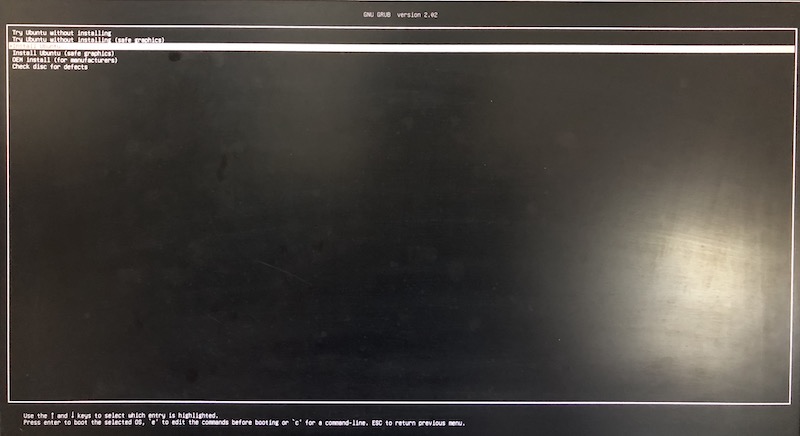
When your Odroid H2 boots for the first time, it will load the Grub loader with a few options. Select Install Ubuntu and press ENTER on your keyboard.
After you have done so, Odroid will load the Ubuntu 19.04 installation wizard. Follow the installation wizard to install Ubuntu 19.04 onto your Odroid H2.
Assembling the case to your Odroid H2 board
Once you had installed Ubuntu 19.04 onto your Odroid H2 board, you can assemble the case with the board.
Depending on which case that you had bought, you can follow one of the following videos to assemble the case with the board:
Assembling Odroid H2 with Case Type 1
Assembling Odroid H2 with Case Type 2
Assembling Odroid H2 with Case Type 3
Assembling Odroid H2 with Case Type 4